
Arduino IDE is designed to run well on Windows, macOS, and Linux. However, in contrast to Raspberry Pi, which is a fully-fledged computer, Arduino runs as a single-board microcontroller. Therefore, a real time operating system (RTOS) is preferred in actual Arduino projects since it has a smaller footprint, better control over the tiny peripherals, and no buffering delays.
The following is our list of industry recommended operating systems for Arduino’s embedded environment, along with detailed installation instructions.
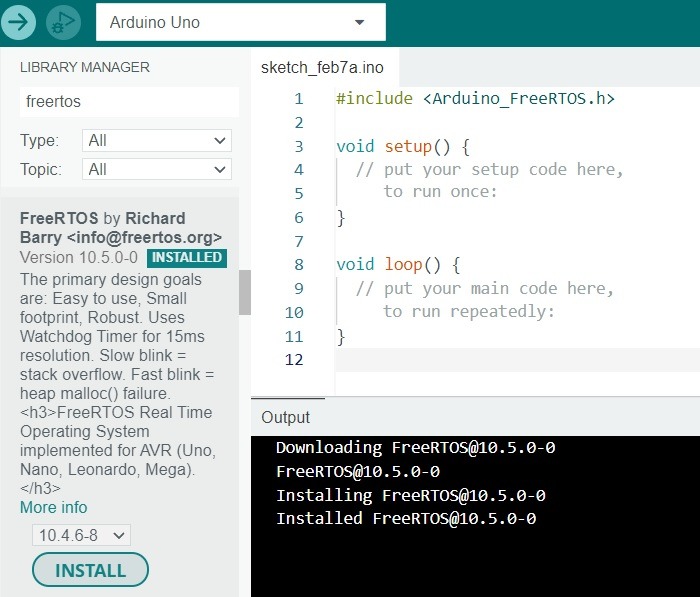
1. FreeRTOS
FreeRTOS is a market leading RTOS for Arduino and other microcontrollers. According to the official site, the operating system is downloaded once every 170 seconds. It is available as an MIT open-source license.
There are two ways to make this operating system work with Arduino.
- You can download the source code and example projects from the official FreeRTOS GitHub.
- You can add a specific Arduino library optimized for use with an Arduino kernel to existing Arduino IDE. For this you can download a library that supports Arduino’s Uno, Mega, and Leonardo boards (example below).
The advantages of FreeRTOS include over the air (OTA) updates, an exhaustive collection of IoT libraries, managing data sharing and hardware resources across multiple tasks, a trusted kernel recognized by many embedded companies, and more predictable memory use.
There are many examples of RTOS installations for Arduino available online. The FreeRTOS site has its own active forum where you can find relevant support for installation guidelines. No matter how complex your project is, you can never go wrong with this versatile operating system.
2. Simba
If you want extensive support for all kinds of Arduino boards on a dedicated embedded platform, Simba offers a brilliant option. Not only does it support Arduino Uno and Mega, but also Zero, Due, Nano32, Pro Micro, and more. You can install Simba to Arduino IDE using the following steps.
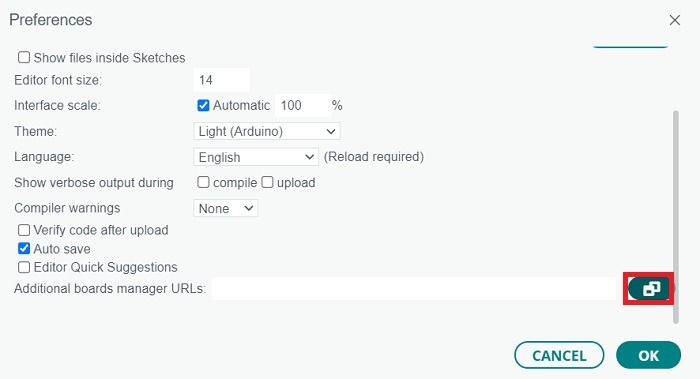
- Open “File -> Preferences” and scroll down under the “Settings” tab.
- Click a button next to Additional boards manager URLs. This will open a new pop-up window.
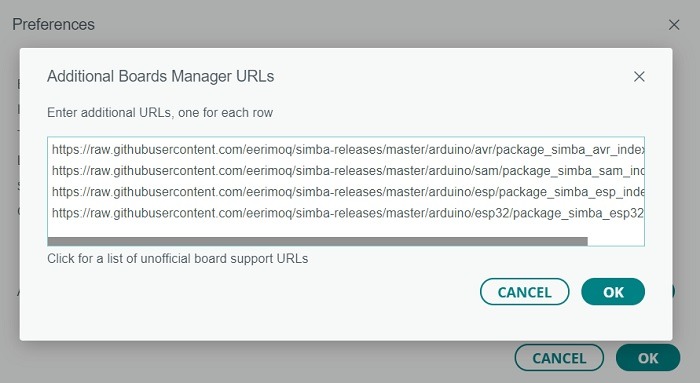
- Inside given space, enter the updated list of URLs mentioned on this link.
- Click OK to close the windows and run the download commands.
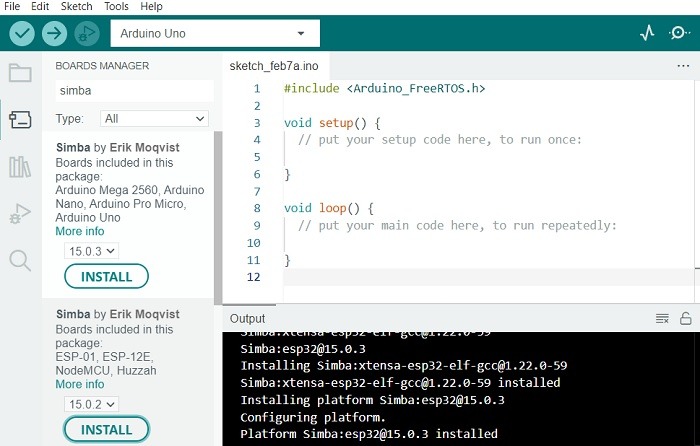
- The Simba packages will start downloading in the Output window of Arduino IDE.
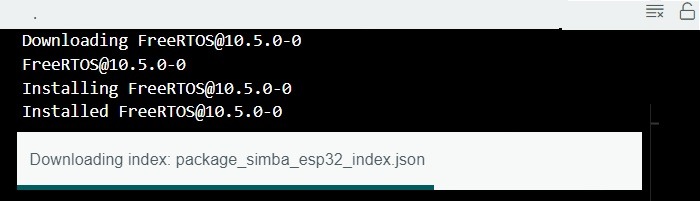
- You can find Simba packages in “Boards Manager.”
- Install the latest versions of any of these packages and they will be available with Arduino IDE after installation.
Among the advantages of Simba are a simple shell design, fast debugging, and a fairly extensive standard library that is comprised of a vast range of functions from USB to Math, sensors, and global navigation satellite systems.
You can also run it from PlatformIO, which is based on Microsoft Visual Studio code. Finally, the Simba build can be installed on Linux.
3. Trampoline
In embedded industry parlance, a trampoline refers to short snippets of code which execute other lines of code. This has inspired a no-frills static RTOS for small embedded systems called Trampoline. It is available as a GitHub project and runs on Arduino Uno and Mega boards.
- Download the ZIP file in GitHub Code section.
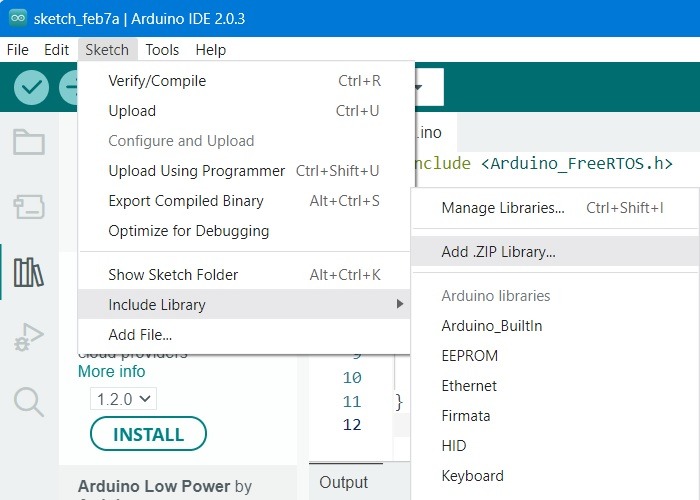
- Add the downloaded ZIP file using “Add ZIP library” option under “Include library.
- The operating system will install on Arduino IDE provided your Arduino board has Atmel ATMega328p or Atmel ATMega2560 processors.
The main advantages of Trampoline include real time predictability, support for very low RAM (32 kB), ROM (128 kB), and CPU (16 bit). What this means is that Trampoline has been designed for tiny cyber physical systems such as miniature drones and digital controllers such as brakes.
Apart from Arduino Uno and Mega, Trampoline also supports Raspberry Pi 2 Model B, Teensy 31, Zedboard and STMicroelectronics boards.
4. DuinOS
Based on FreeDOS, an open source operating system, DuinOS is an RTOS designed exclusively for Arduino boards. It currently supports FreeRTOS-based embedded projects which are available as a GitHub repository.
To install DuinOS, follow the simple steps shown here which just requires the renaming and copy-pasting of a few folders. Note: the following instructions are for Windows. The folder locations will somewhat differ for Mac and Linux.
- Close all instances of Arduino IDE.
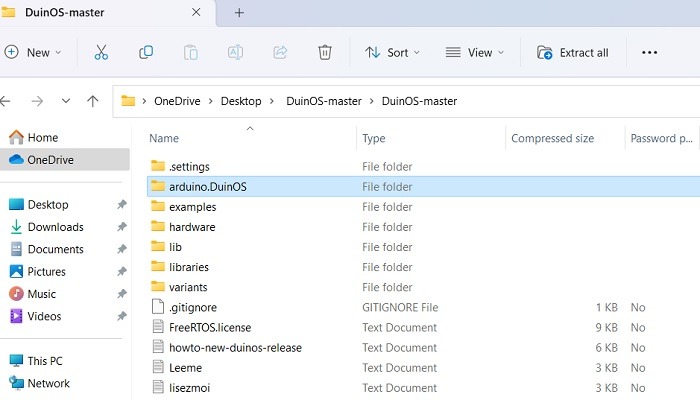
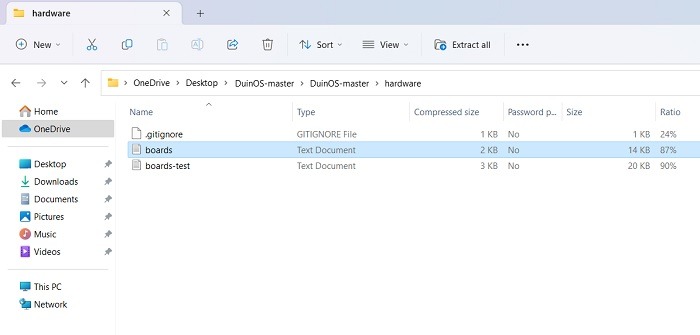
- Copy a folder named “arduino.DuinOS” which is available in the ZIP file downloaded from the GitHub repository.
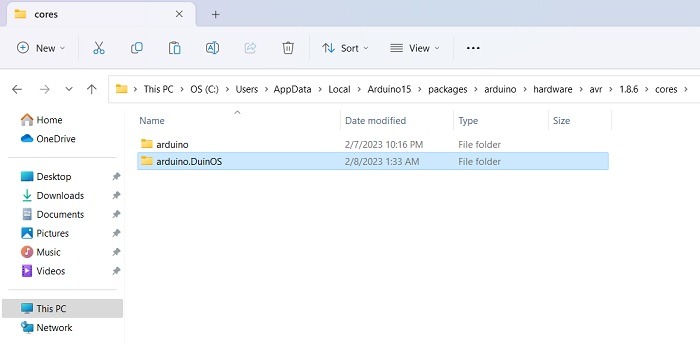
- Paste the “arduino.DuinOS” folder in the \hardware\cores folder which can be accessed from AppData of Arduino. The exact path may vary depending on your system.
- Rename the default “boards” text file under hardware to something else such as “boards2.”
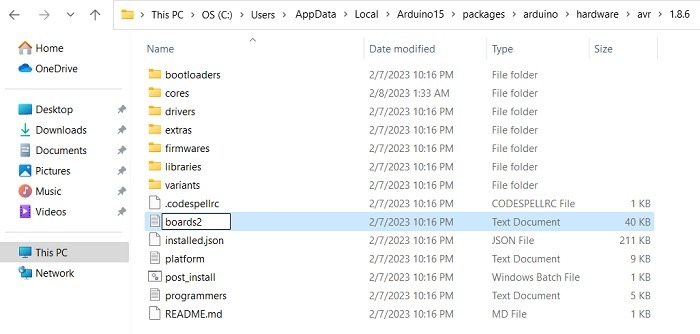
- The downloaded DuinOS has its own “boards.txt” file which you need to copy-paste into the \hardware folder of installed Arduino as shown above.
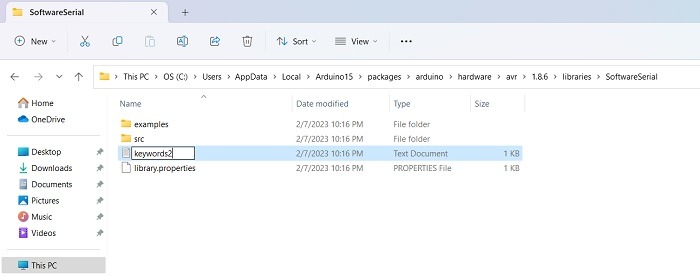
- Rename a text file in your installed Arduino folders named “Keywords” into something else such as “Keywords2.”
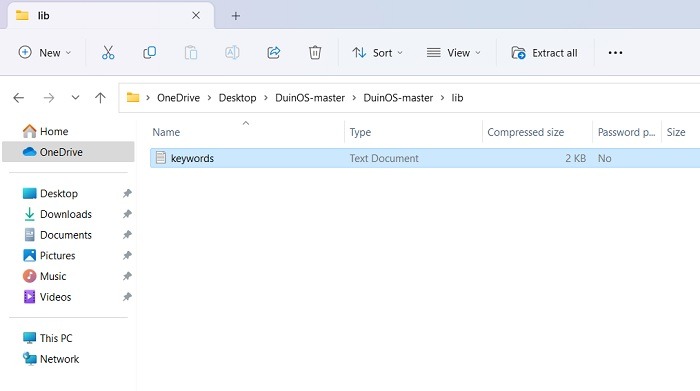
- The downloaded DuinOS folder has its own “keywords” text file which will have to be copy-pasted to the installed Arduino /lib folders above.
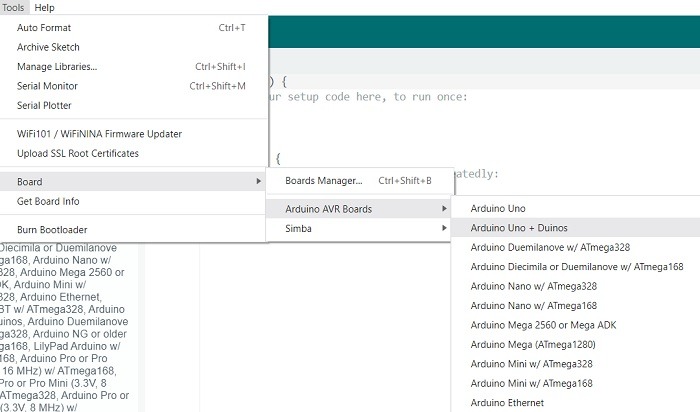
- Reopen Arduino IDE. The DuinOS should be visible under “Tools > Board” for Arduino AVR boards, as “DuinOS” or “Arduino DueMilanove.”
The advantages of DuinOS include basic multitasking and multi-threading, low RAM and CPU requirements and efficient signaling.
5. MicroOS
MicroOS is an uncomplicated operating system that has been designed for embedded projects and has low CPU requirements and the ability to run multiple tasks at a fixed rate. It can also be downloaded from GitHub.
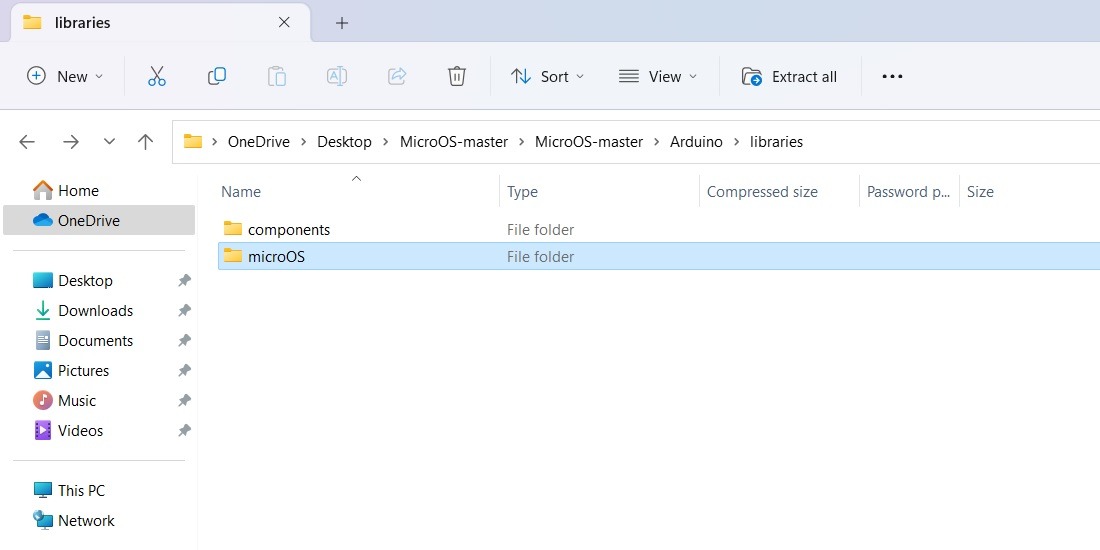
- Installing MicroOS is far easier than some of the other options. The downloaded Zip file will have a MicroOS folder under Arduino libraries.
- Copy-paste this folder into the original Arduino libraries folder and restart the system.
MicroOS is an efficient program which allows reusable blocks of the code to be used for different components of a system design.
Other Notable Mentions
There are a few other RTOS which work properly with Arduino IDE. For example, HeliOS is a highly sophisticated yet free operating system that controls every aspect of a system while managing kernel-level resources. It is currently available as an Arduino library manager.
If you are serious about using Arduino as your main development platform, you will need to step out of the official operating system guidelines.
Arduino projects allow you to build sophisticated IoT gadgets with an extensive support for advanced designs. Using the right operating system can make all the difference on your project costs, efficiency, and time constraints. We have some guidelines on how to prevent your Arduino from breaking by mistake.
Image credit: Manseok Kim from Pixabay.


