
SSH is an awesome protocol for any network. It’s secure, easy, and cheap. Any Raspberry Pi SSH network can be made to include almost any I/O peripheral. In fact, you’d be amazed at how you can control most things wirelessly with an OpenHABian server running SSH.
To get you started, I’ll show you everything you need to know about SSH.
What Is SSH?
SSH stands for secure shell. It’s a protocol for communication between computers.
SSH always has a server and a client. For the most part, you’ll be running a headless Raspberry Pi SSH server. Your laptop, phone, or desktop can be the client, connecting to your Raspberry Pi to control it through the network.
What makes SSH great is that it’s encrypted. Bad guys can’t just make out what you’re saying (or send you fake commands) because it’s got a way to keep things private and secure.
Managing Raspberry Pi SSH with SSH Clients
There are a couple of programs you can use to manage Raspberry Pi SSH networks. These are called SSH clients.
For Windows and Linux, your best go-to would be PuTTY. This program lets you save your configurations and launch multiple instances of SSH clients.
As for Android, you can use JuiceSSH which does the same thing but also save your login credentials for you.
Enabling Raspberry Pi SSH
By default, SSH is enabled in a fresh install of the Raspberry Pi OS. But in case it’s disabled for some reason, here’s how to enable it:
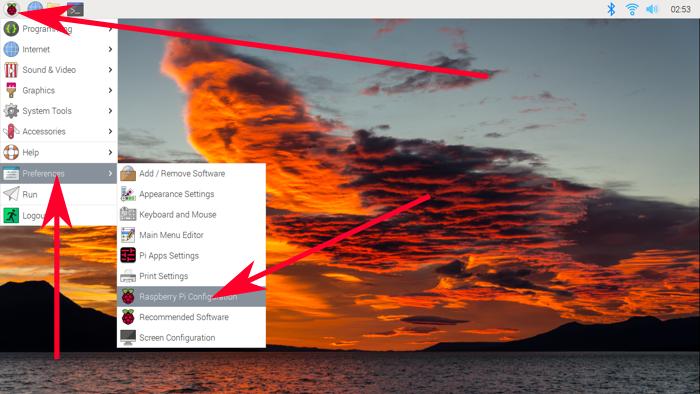
- Click on the Raspberry Pi icon, and go to “Preferences –> Raspberry Pi Configuration.”
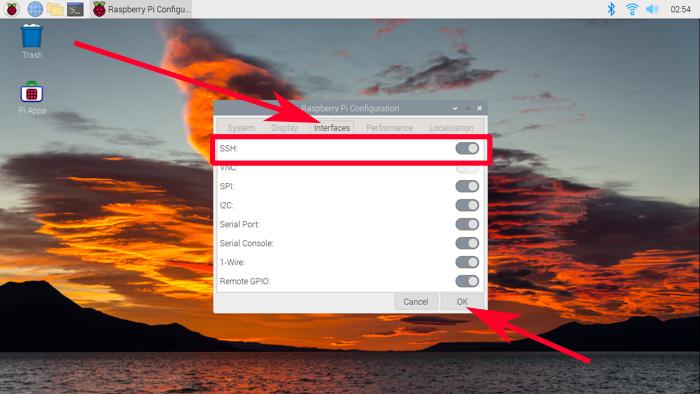
- Next, under the Interfaces tab, look for the SSH toggle. Make sure the circle is on the right side before pressing OK.
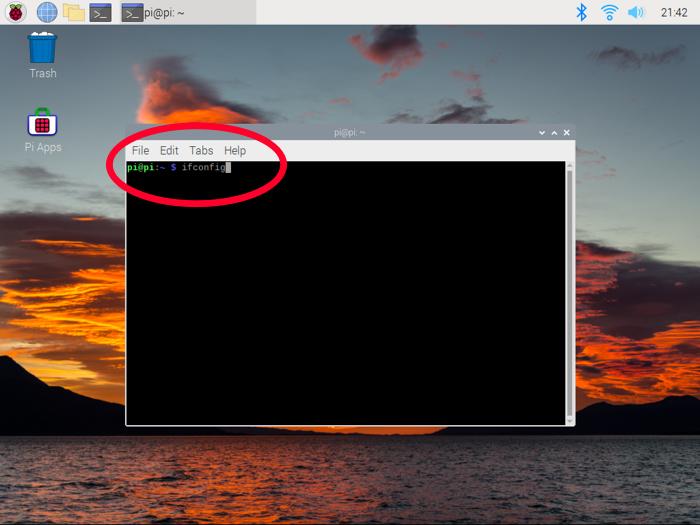
- To find your Raspberry Pi’s IP address, you’ll need to open the terminal.
- Type
ifconfigin the terminal.
- Your Raspberry Pi’s IP address should be within the part that says
wlan0:. The IP address is that thing that saysinet. If not, try the other IP addresses you might find. This can look different if you’re using Ethernet, for example.
Using PuTTY to Control Raspberry Pi through SSH
- To work with PuTTY, you’ll first have to download and install the PuTTY client program on your computer first.

Note: Make sure the download link comes from Chiark Gree. Any other site claiming to be PuTTY (if there were any) is most likely a dangerous trojan site and must be avoided.
- Power up your Raspberry Pi and connect it to a network.
- Now on your PC, connect it to the same network as that of the Raspberry Pi.
- Open PuTTY. Type the Raspberry Pi’s IP address on the hostname. If this doesn’t work later on, try typing “raspberrypi” for a more general address.
- Click on Open. Congrats, you’re on SSH!
Using JuiceSSH to Control Raspberry Pi through SSH
- Download JuiceSSH from the Play Store.
- Tap on Quick Connect.
- A screen will pop up. Either type the Raspberry Pi’s IP address or type in “raspberrypi” to make things easier to type. If you want to make it easier to connect next time, make sure to fill the “Save connection for future use” check box before pressing enter.
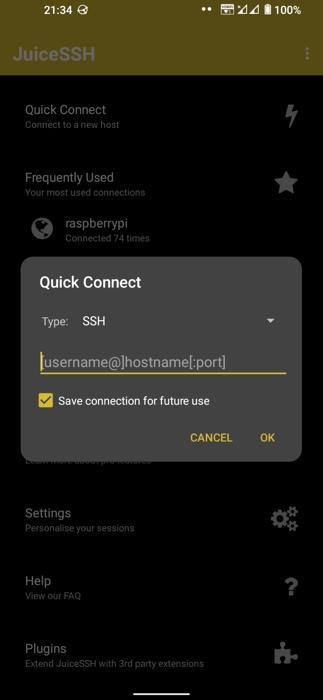
- Once you press OK, you’ll be logged in to your Raspberry Pi through SSH. Congrats!
Raspberry Pi SSH Username and Password
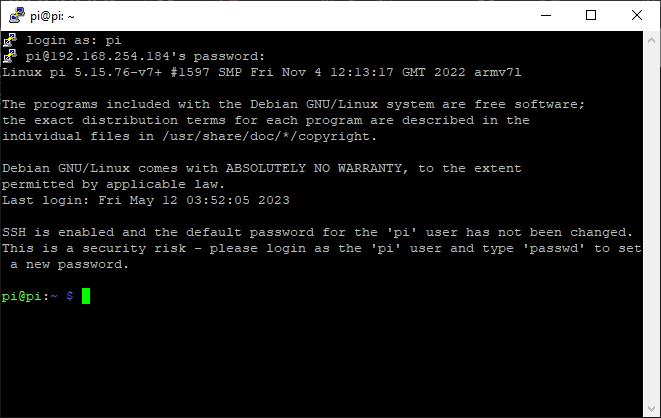
Okay so here’s one thing where you might end up having a problem with. The first time you log into your network, you’ll usually be asked with a username or password.

For most Raspberry Pi OS installs from before April 2022, you can use “pi” for username and “raspberry” for password. That used to be the default. And that’s no longer how things work due to security reasons.
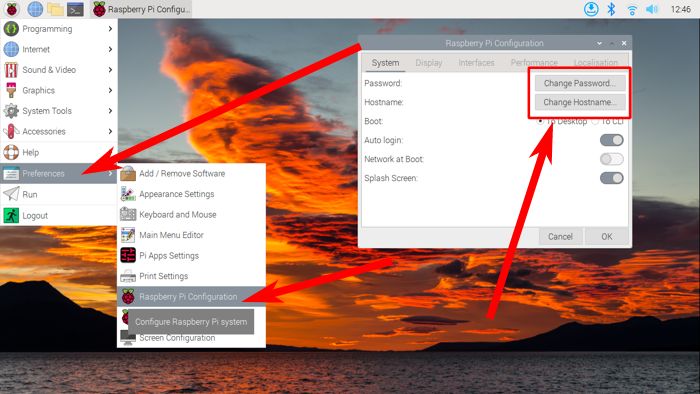
The first time you install the Raspberry Pi OS on your Raspberry Pi, you’ll be asked for a username and password. But if you don’t remember it anymore, you can always set up a new one.
Just go to “Pi Logo –> Preferences –> Raspberry Pi Configuration.” You’ll see the settings for “Password” and “Hostname” under the “System” tab. That’s where you change things up.
Now if you forgot the username and password before turning your Raspberry Pi on, well, it looks like you’ll have to pull the plug on it. Don’t worry, it won’t break. Just make sure the yellow LED isn’t blinking before you turn off the power.
Frequently Asked Questions
What's the difference between SSH and Telnet?
SSH and Telnet may both be similar, but there’s one starking difference between the two: SSH is secure while Telnet isn’t. Telnet is broadcast over an open network using port 23 by default. On the other hand SSH is an encrypted protocol using port 22 by default.
What's the difference between SSH and MQTT?
SSH and MQTT are both networking protocols. However, SSH uses a master-slave architecture. The “master” provides inputs for another computer or “slave” to work with. In contrast, MQTT is more of a send-it-once-broadcast-to-everyone kind of architecture. Client computers can send a message to an MQTT broker which forwards it to all the other clients in the same network.
Why can't I connect to port 22?
The most common reason why you can’t connect to port 22 (SSH) is because your firewall blocks it. Check your firewall settings if your computer’s communications with the rest of your system doesn’t work.
Get the best of IoT Tech Trends delivered right to your inbox!


