
As an open-source electronics platform, Arduino circuit boards are very popular for IoT projects. While the standard way to use them is to hook up Arduino USB ports to a computer, you can also do it using Bluetooth controllers and Android apps.
In case your computer is not available for powering up Arduino boards, an Android phone is the best available option.
Essential Components
You will need the following components to prepare this setup:
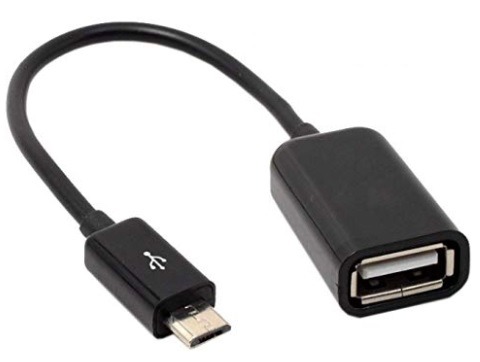
1. OTG Cable: a standard OTG cable with USB 2.0 for older Android phones. For the latest smartphones which have Type-C ports, you will need an OTG cable with Type-C ports.
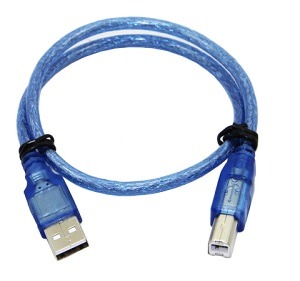
2. Data transmission cable: a data transmission cable with Type A USB 2.0 Male to Type B USB 2.0 Male for further connections.
3. Arduino Uno board: you may use any other Arduino boards.
4. LED: this will be used for testing the connection. You can also use a servomotor or whatever else you need to test.
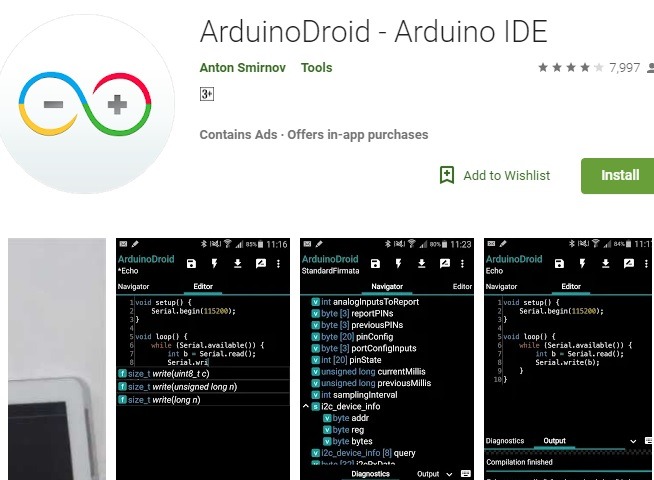
5. Arduino Android app: while there are quite a few decent apps, it is relatively easy to work with ArduinoDroid. It is a heavy app (210 MB), so you need a decent amount of space in your phone memory. Moreover, the app cannot be written to an SD card.
6. Miscellaneous: you will also need a breadboard and some connector cables to connect with it. A few resistors are necessary to divide the voltage.
How to Assemble
The Arduino-Android assembly setup is very simple and does not require too many steps.
- Connect the USB Type-A male plug to the female USB of the OTG cable which further goes to the smartphone.
- Connect the USB Type-B plug to the Arduino board.
- Use the connector cables to join the LED on the breadboard to the Arduino Uno board. The precise position of the connectors on Arduino Uno is determined by the code provided by the app. (See the next section for that.)
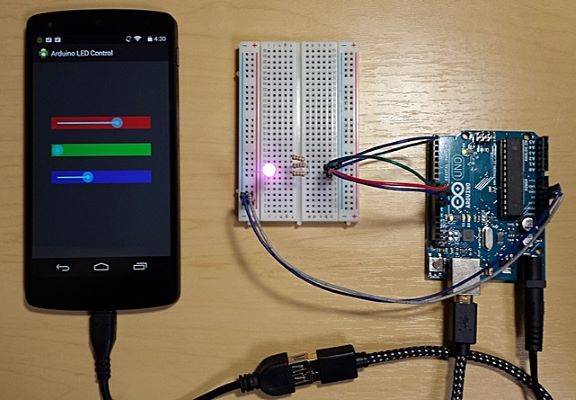
An approximate assembly should look like the one in the above picture.
Using the ArduinoDroid App
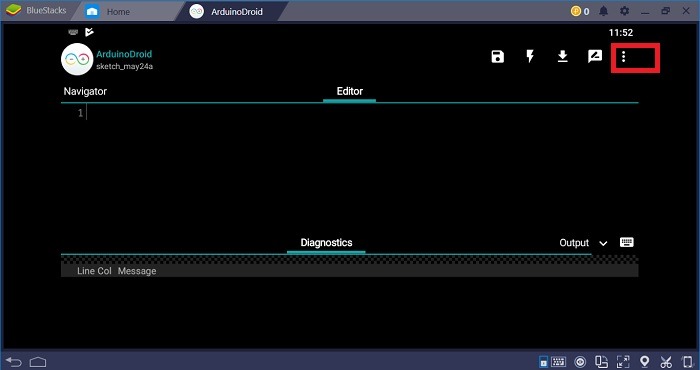
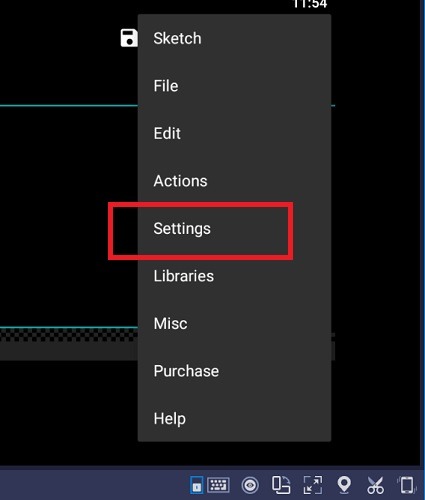
After downloading and installing the app on your phone, go to the home screen and click the three-dot menu icon.
Next, go to “Settings,” followed by “Board Type” and “Arduino.”
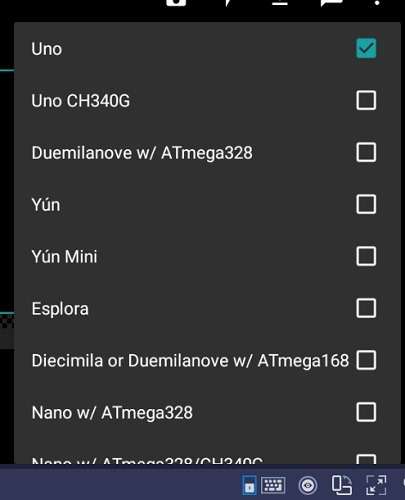
In the next step you must choose “Uno” as the board type. Depending on the type of Arduino board you’re using, you can choose from many other options.
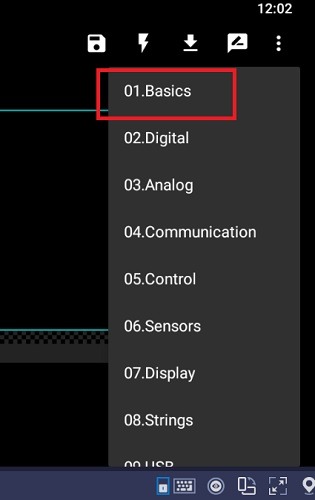
Again, go to the three-dot menu and select “Sketch” followed by “Examples.” There are a great number of examples. For LED lights, you just have to go to “Basics” followed by “Blink.”
Automatically, the code for LED blinking is visible on the Editor screen.
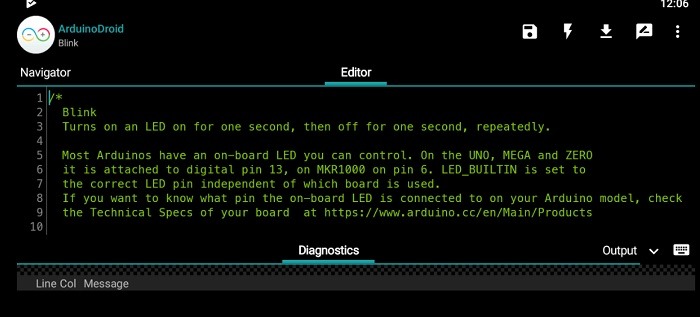
The code says that the Uno board should be attached to digital pin 13. Go back to the previous section, “How to assemble,” to insert the LED connector cable to digital pin 13 on the Arduino Uno.
Another connector will go from the Arduino Uno ground pin to the LED on the breadboard, as will the resistors.
In the below image, you can see a “flash” sign, which is the compiler. Just click it and the LED blinking program starts compiling and loading to the Arduino Uno board.

Once done successfully, you can control the LED light directly from your Android phone. You can look for many other project examples in the libraries of ArduinoDroid, which include servomotors, temperature and pressure sensors and such.
Conclusion
Learning how to manage and control your Arduino projects from your Android phone is easy and requires just a little attention. Of course, you can find further guidance on this topic at the Arduino official forum and this site as well.
Shoot any questions or thoughts on this topic to us in the comments section below, and we will be happy to respond.
Image Credit: GitHub


