
By adding attractive display capabilities to your Arduino project, you can make your smart device readable and far more useful.
In this tutorial, we will explore how to connect a liquid crystal display (LCD) screen with an Arduino Uno board.
How LCD Displays Work
Before we begin, it is very important to know how LCD works. Flat panel LCDs can be of various types, so depending on your project needs, you will have to go with the right screen.
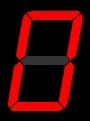
The most basic version uses “seven-segment displays” commonly seen in calculators, digital alarms and gas station pump displays. These simply consist of vanes which can be lit in various combinations to produce a numerical reading.
On the other hand, there are “thin-film transistor (TFT) LCDs” used in television sets, laptops, smartphones and complex electronic devices. They utilize pixel algorithms to provide fast response times, wide viewing angles, high contrast and accurate color schemes.
“Dot-matrix LCD” lies somewhere in the middle of the basic and the most advanced LCD technologies. They are useful in displaying alphabets, numbers and upper and lower cases of letters.
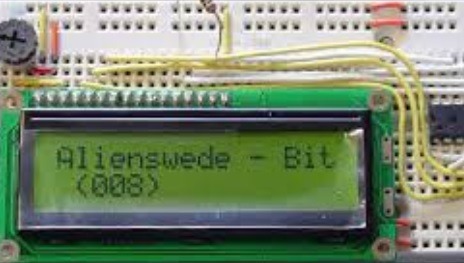
One of the most common dot matrix LCD displays is the 2×16 module which refers to two rows and sixteen columns of LCD display pins. This is what we will be using in our connections with the Arduino board.
Setting Up the Project
The following hardware is needed to interface an LCD screen with Arduino.
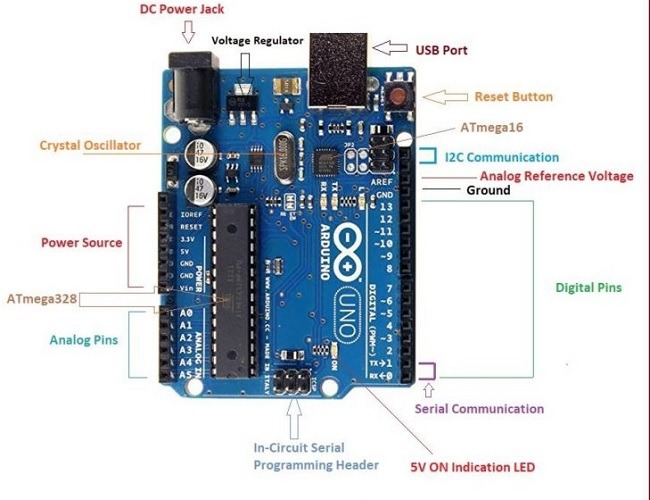
- Arduino Uno board
- 2×16 dot-matrix LCD screen (as above)
- Connecting wires
- Breadboard
- 10K Potentiometer to change the contrast of the LCD
- Soldering display pins with the breadboard
The Arduino website offers a detailed example of an assembly. It is compatible with the built-in library example available for Arduino IDE.
While the circuit may look complex at first glance, here is a simple step-by-step explanation of the various stages.
First, all sixteen pins of the LCD should be connected to the bottom positive rail of the breadboard.
The first and last pins of LCD are then connected to the negative rail on the top. Arduino’s GND and 5 V pins on the power-source side are connected to the positive rail contrasting with the LCD connections.
Further, the 10k ohm potentiometer should connect on the breadboard for GND and +5V configurations.
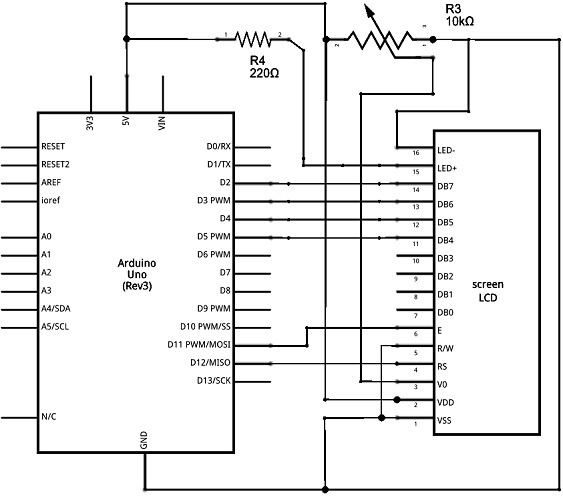
The LCD has various pins such as register select (RS) pins, read/write (R/W) pins, enable pins, and 8 data pins. Each has a specific function in regards to the project.
You don’t have to understand them in much detail as their roles are clearly explained in the built-in example which we will use. The only thing required is to get the connections right as per the below schematic.
Working Code
First, make sure that Arduino IDE is installed on your system. We have detailed tutorials for setting up the IDE on Windows, Mac and Linux.
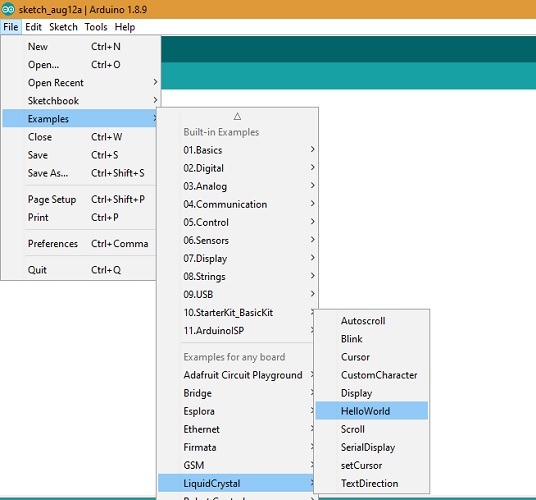
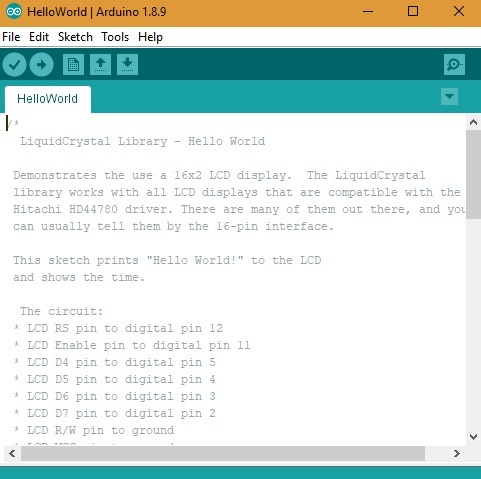
Open the IDE and go to “File -> Examples -> LiquidCrystal -> HelloWorld” to obtain the code for this project.
As explained earlier, the example library itself has all the data you need in creating your connections.
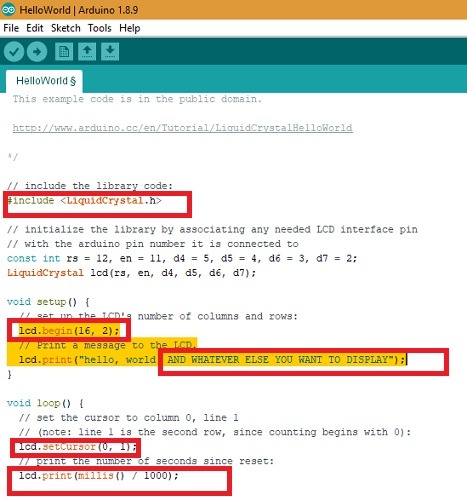
The code commands are rather simple if you understand the basics of Arduino IDE. They have been covered in our handy cheatsheet. Additionally, you need a begin() which helps initialize the interfacing with the LCD screen.
You can modify the display text as per your needs. To edit the cursor position to somewhere else in the LCD screen, use lcd.setcursor(x,y). The display time in milliseconds can also be adjusted as shown below.
Click the “Verify” and “Upload” buttons, and the sketch will be uploaded to the Arduino Uno board.
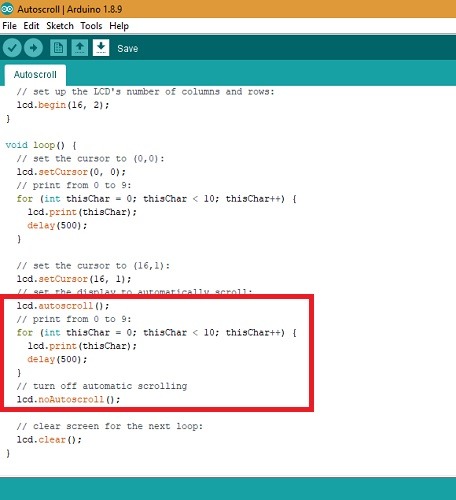
You can tinker a lot more with the LCD display. The physical circuitry will not change, but you can make the display scroll left and right using scroll() or by automatically shifting from right to left and vice versa using autoscroll(). There is another option for an underscore-style cursor using cursor().
Conclusion
LCD screens are one of the most useful applications of Arduino smart device projects. As shown in this tutorial, it is possible to interface an LCD screen using a standard example from Arduino library.
Have you tried incorporating LCD screens in your Arduino or Raspberry Pi projects? Please let us know your experience in the comments section.


