
Arduino development boards are very popular in IoT hobbyist projects. To work with them successfully, you must become familiar with Arduino IDE which is a custom software that can help you build any smart device on your own.
This IDE, along with an inexpensive Arduino starter kit, is all that you need to get started. There are literally hundreds of interesting project examples at Arduino Hub which share the entire code to be run on Arduino IDE.
We already published the procedure to install Arduino IDE in Ubuntu. Here, we’re going to learn to install Arduino development software on a Windows 10 laptop and experiment a bit with the Uno board.
Installation Steps
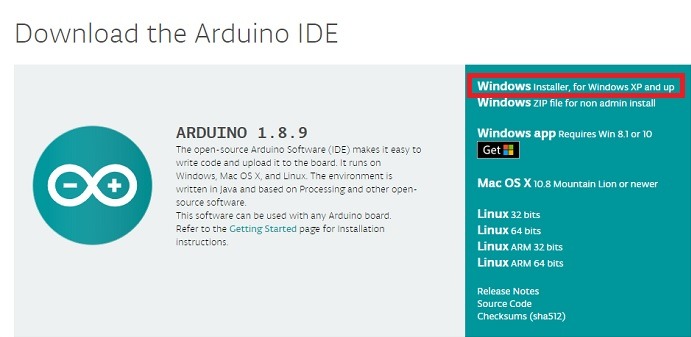
First, visit the official website to download the Windows installer for Arduino. You can alternatively use the zip file if you do not have admin rights to your PC.
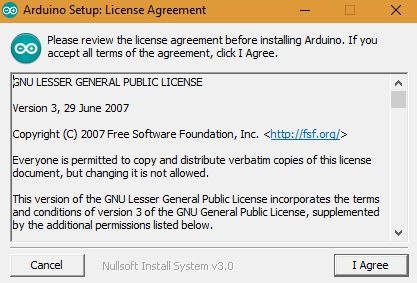
Soon after the download, you will have to set up a license agreement with Arduino, a member of the Free Software Foundation.
Check the installation options which apply to you. If you don’t need a start menu shortcut or desktop shortcut, it is fine. But you definitely need to install the USB driver and associate .ino files with the IDE.

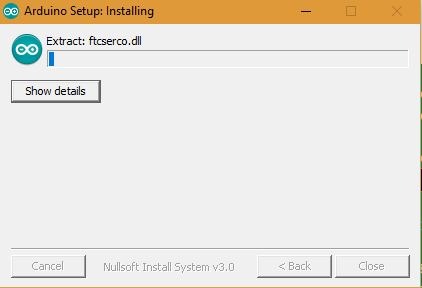
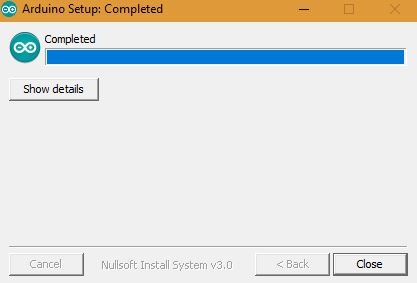
Wait for a few minutes while Arduino sets up the software for you.
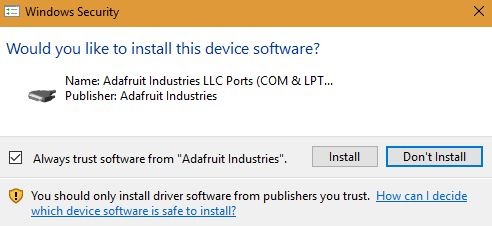
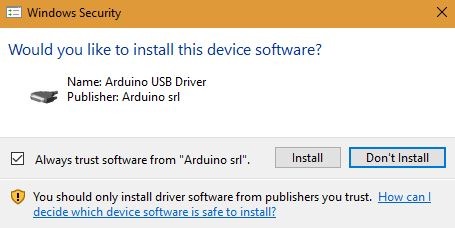
Accept the option to install the device software from Adafruit Industries.
Also, accept the installation of the USB driver.
After your setup is complete, you can start working on Arduino IDE immediately.
The Arduino IDE app can be easily located in the search bar if you did not save a desktop icon.
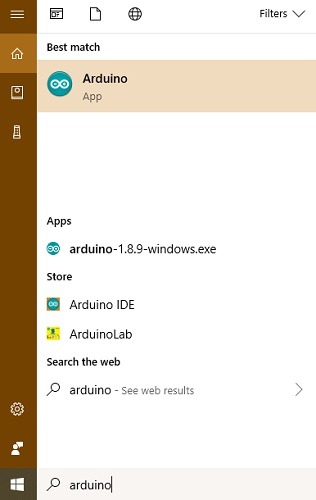
The software doesn’t take very long to initialize; you’re ready to go.

Working with Arduino IDE
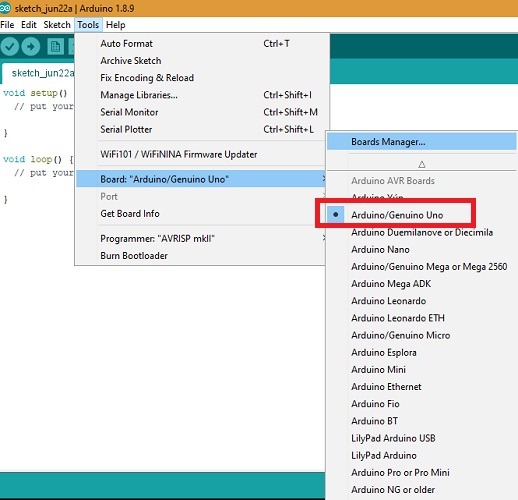
To begin your work, you will first have to set up the Arduino board. Here we will select Uno, which is the most common board. Go to “Tools -> Board -> Arduino/Genuino Uno.”
We earlier published that Arduino boards are extensible with specialized boards called “shields,” which improve upon Arduino’s capabilities. Not all boards readily find support on the Arduino IDE, which means you need to configure them separately.
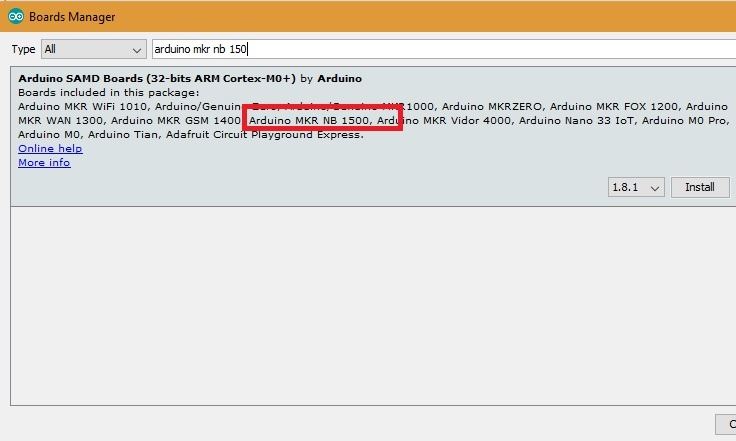
For example, there is a specialized shield, MKR NB 1500, which we mentioned for Narrowband IoT. If you bought yourself one, you can connect it to Arduino IDE by searching for the required specifications at “Tools -> Board -> Board Manager.” Simply install the shield program and, it is good to go.
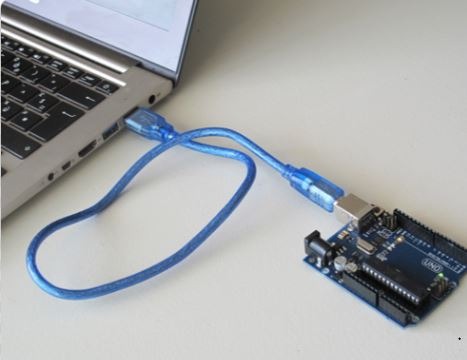
To connect your Arduino IDE to your Arduino board via Windows 10, simply hook up a Type-A data transmission cable (available with Arduino starter kits). The USB end goes to the laptop and the male end goes to the Arduino USB port.
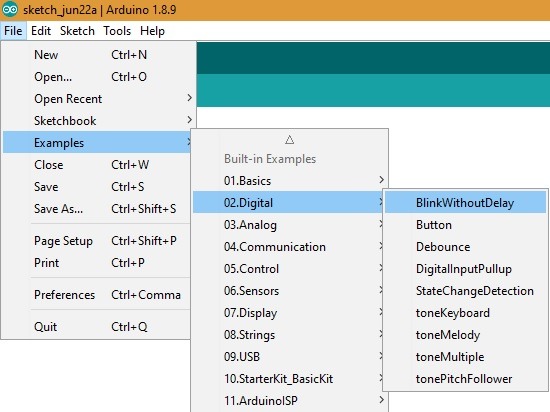
You are now ready to start tinkering with Arduino codes for any project. Let us take an easy example of Arduino Uno’s on-board LED blinking without delay. Go to “File -> Examples -> Digital -> BlinkWithoutDelay.”
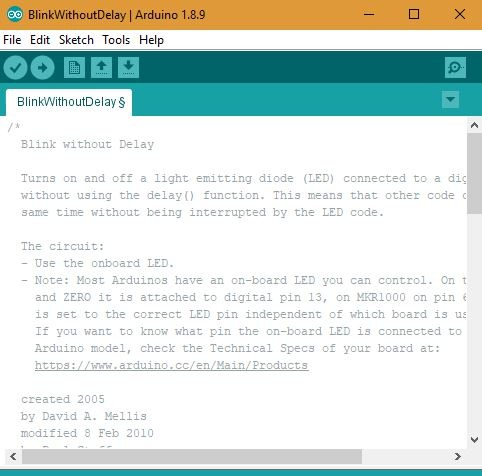
As you can see from the code, the on-board LED is attached to digital pin number 13 on the Arduino Uno board.
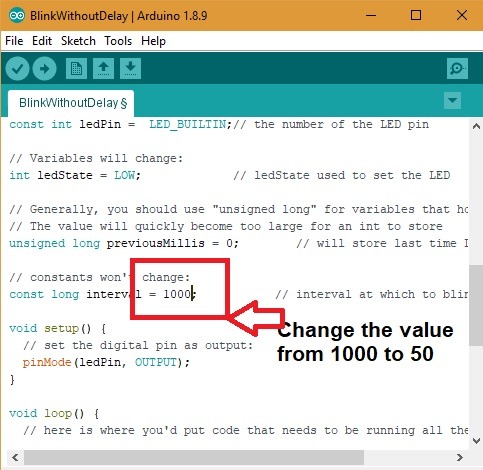
Make a minor edit in changing the value of the LED timer from 1000 to 50 milliseconds. Thus, it will blink very fast.
Click the OK button as shown to verify the code.
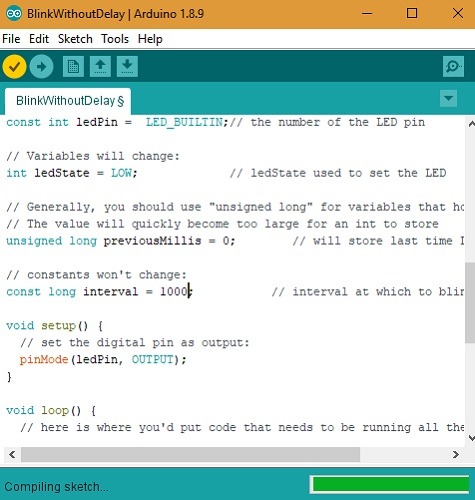
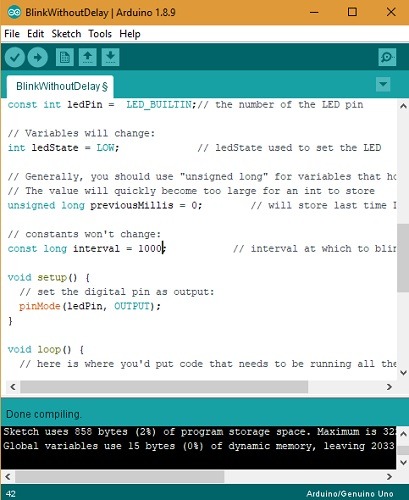
If there are no errors, it will display a “done compiling” status.
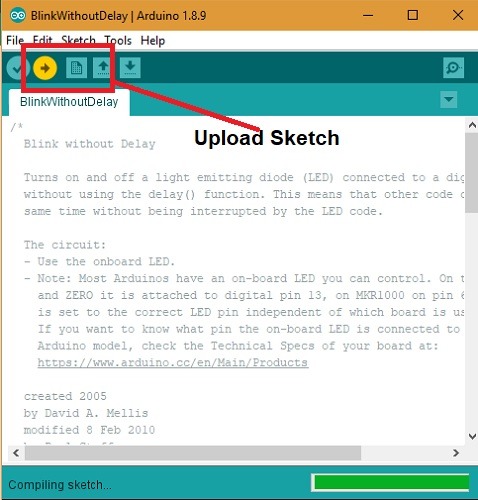
Once your connections are ready, you only need to click the next button after OK to upload the sketch to your Arduino board.
In Summary
Arduino IDE is one of the easiest software to learn on Windows 10 with minimal coding activity. To tinker with other similar programs on Arduino IDE, you can find examples for servo-motors, fans, dimmers and sensors. You can also control the Arduino board with your computer’s keyboard or mouse by using “Examples -> USB -> KeyboardandMouseControl.”
Are you interested in experimenting with Arduino IoT projects? Please share your thoughts and experience in the comments below.
Get the best of IoT Tech Trends delivered right to your inbox!


