
Not all of your home devices are smart, and you might not want to replace them either. This is where a Wi-Fi enabled smart plug comes in handy as you just need to plug it in and connect to a mobile app. You can further connect the smart plug to voice-based Alexa on Echo devices and set up a timer and power schedule as shown in this guide below.
What is a Smart Plug?
A smart plug is any plug that can connect to your local Wi-Fi network and Alexa/Google Assistant on their respective smart speakers. A smart plug is the ultimate home automation device as it can convert dumb gadgets into smart ones (as far as the on/off settings are concerned).
Smart plugs available in the market often have features like scheduling, timers, family sharing, and other remote access controls. If you’re able to set a routine with them in Alexa, you’ll never have to manually switch on/off any of your connected devices again. Just do an initial scheduled set up and let everything run in autopilot mode.
Set Up the Smart Plug App on Your Phone
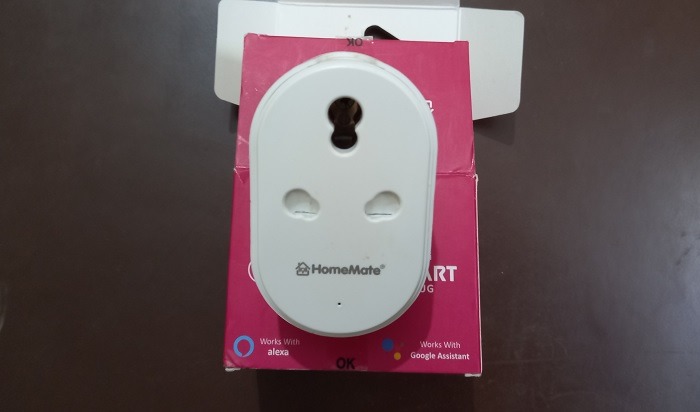
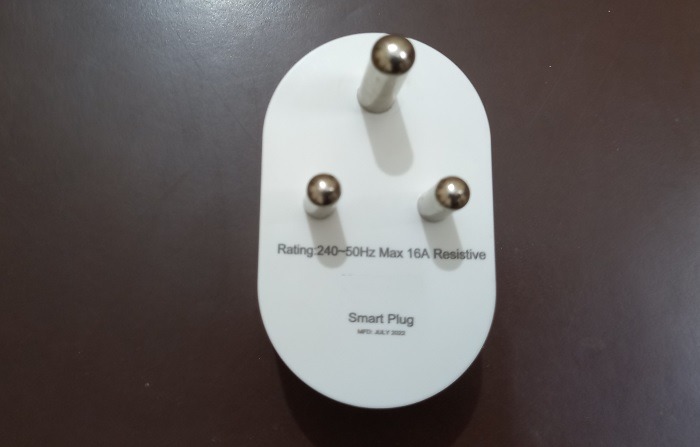
Before setting up a smart plug app on your phone, learn the plug’s hardware specifications which are available in the instruction manual. Always check the rated voltage (110-240 V) and maximum power capacity. For the following plug, the maximum rated capacity is 3500W.
These plugs are generally rated for a high ampere rating (16A etc.) as they’re designed for heavy duty appliances such as water pumps, geysers, air-conditioning, microwave ovens, vacuum cleaners, and indoor heating devices.
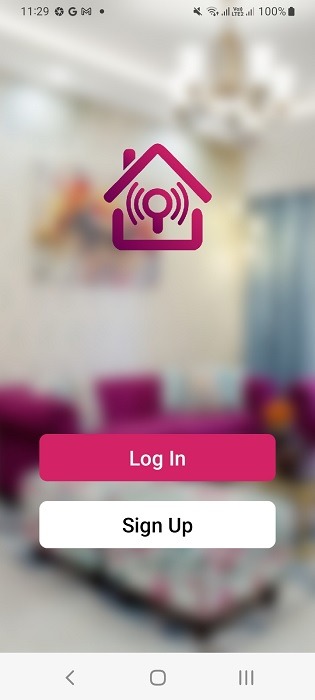
- Download and install the smart plug app on your phone. It should be mentioned in the device instructions and packaging.
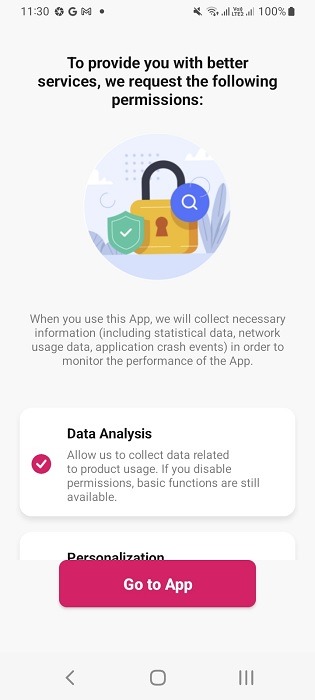
- After logging in, you will need to provide some permissions to the app to collect your data for analysis.
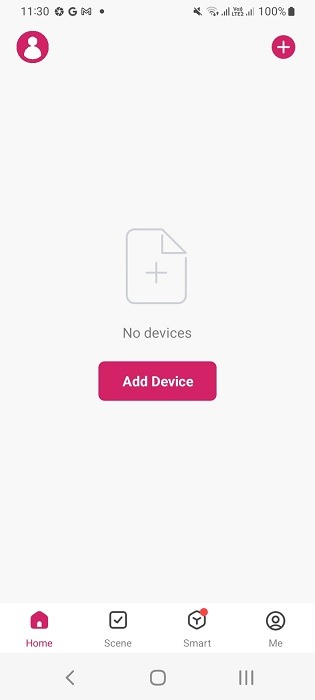
- Every smart home app has an add device menu where you can add all supported devices. Click the “+” sign to proceed.
- Connect the smart plug to a wall outlet or another power socket.
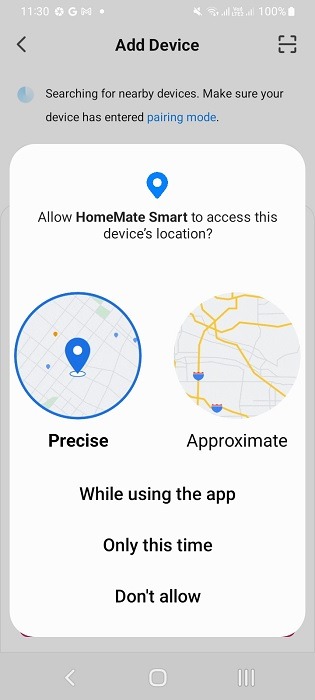
- While adding the Wi-Fi enabled plug, you will have to give your precise location via Google Maps.
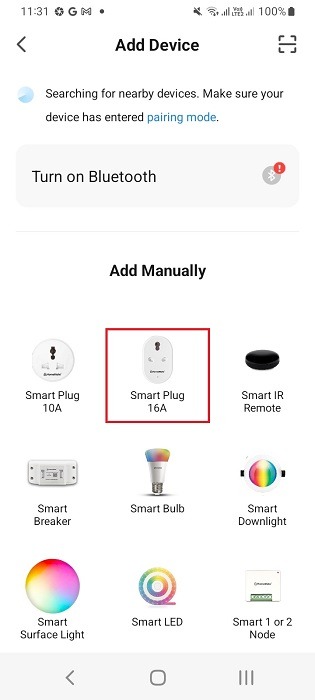
- The smart home app may have several different devices. Select your smart plug from the list. Make sure you select the correct amperage for your plug (16A, 10A etc.)
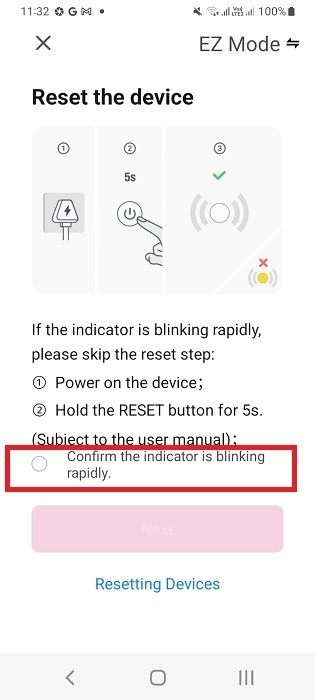
- Setting up smart plug may require a device reset for which you’ll find a button. Just hold the device reset button for a few seconds. You should notice an indicator that keeps blinking for a few seconds. For your device specific information, refer its configuration guide.
- Select the Wi-Fi network for your plug, and ensure it is set at the device rating of 2.4 GHz or 5 GHz.
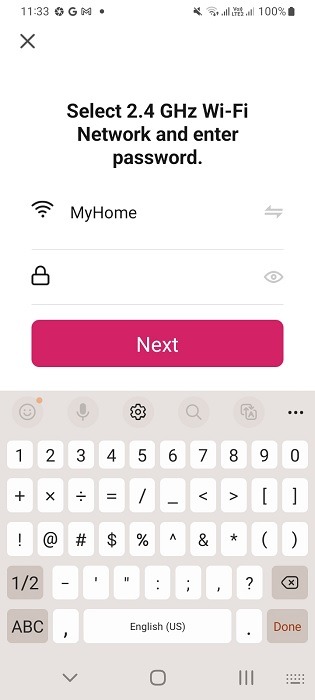
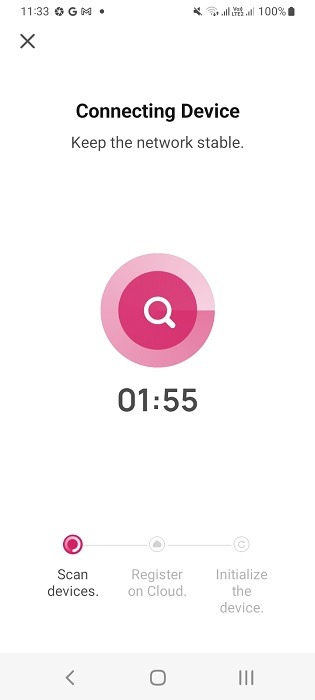
- Wait a couple of minutes for the smart plug device to connect online as the app scans for the plug and registers it to the cloud.
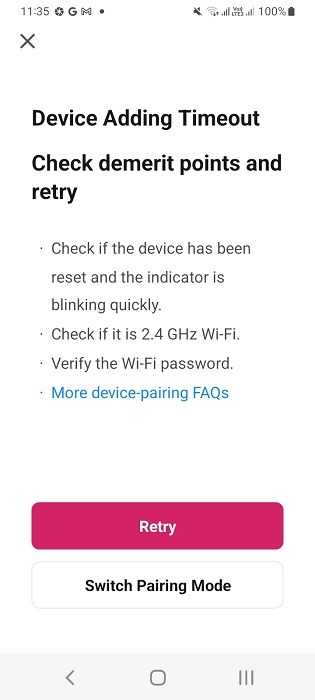
- If you’re getting a device timeout error, you will need to retry the above steps. Ensure that you power on the plug using its reset button only, and the Wi-Fi password is accurate.
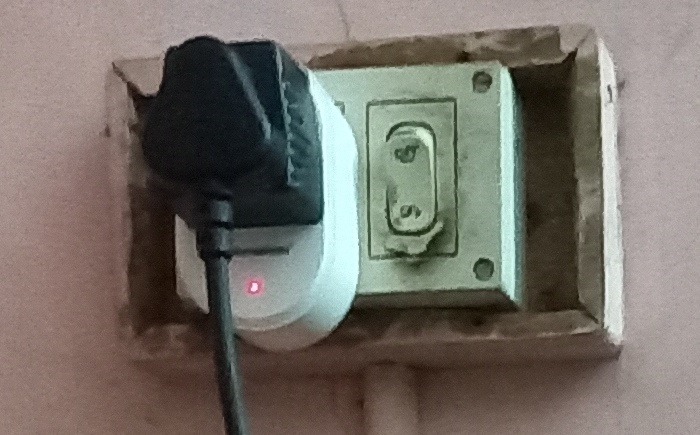
- If your plug is not connecting properly to your wall socket, or if the Internet is not receiving, use a step-down auxiliary three-pin plug. The one shown here is rated at 15A. I also had to chip the wiring a bit.
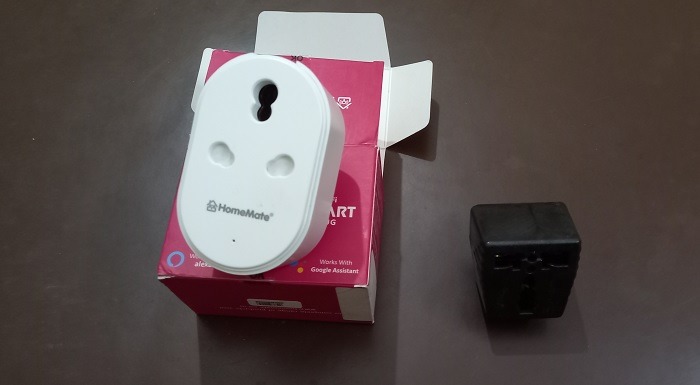
- After the auxiliary plug is connected to the smart plug, you may find the lights blinking in no time.
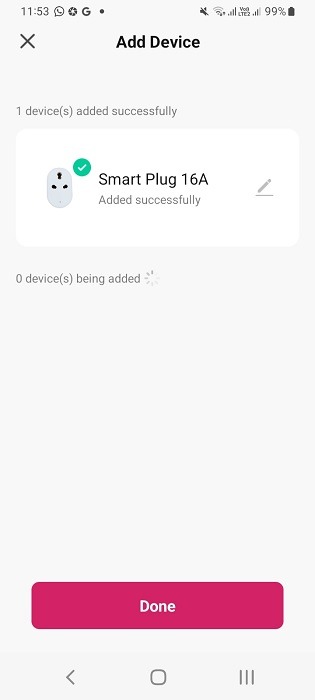
- Once you are able to connect the smart plug to Wi-Fi, you will see a “smart plug added successfully” message on the app.
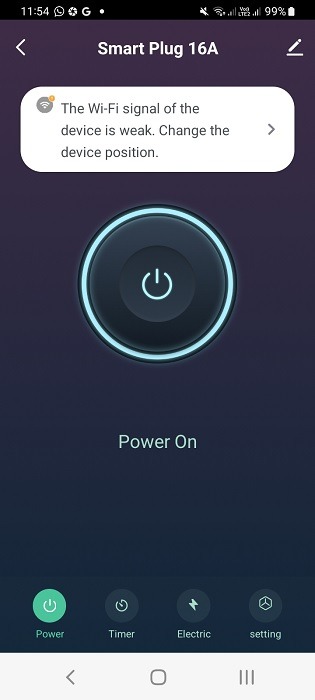
- You can now power on and off the smart plug device from the manufacturer app. To get more out of this, we will connect the smart plug to Alexa.
Connect Smart Plug to Your Alexa Account
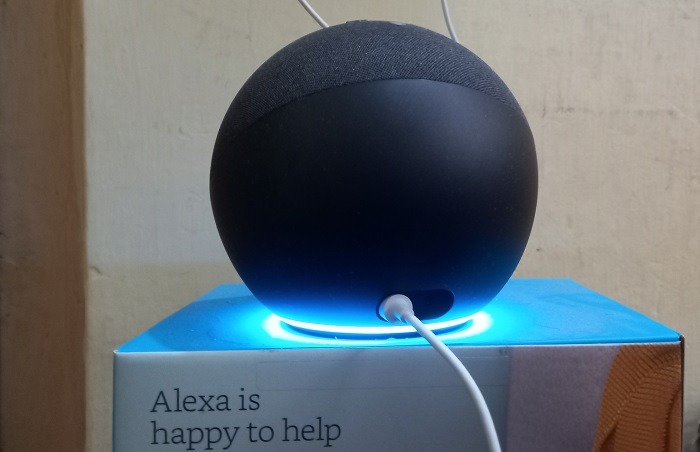
First you need to turn on your Alexa Echo speaker and put it in listening mode. Wait for the blue lights to fade out completely. After that, we will connect the smart plug to an Alexa account.
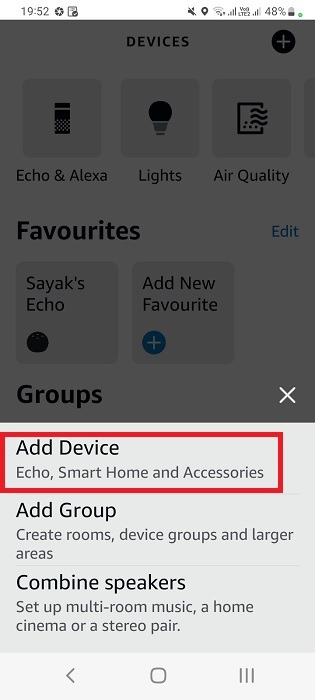
- On your iOS or Android Alexa app, go to the home screen and click the “+” sig on top. This will allow you to add new devices to your Alexa app.
- Select “Add device – Echo, Smart home and accessories.”
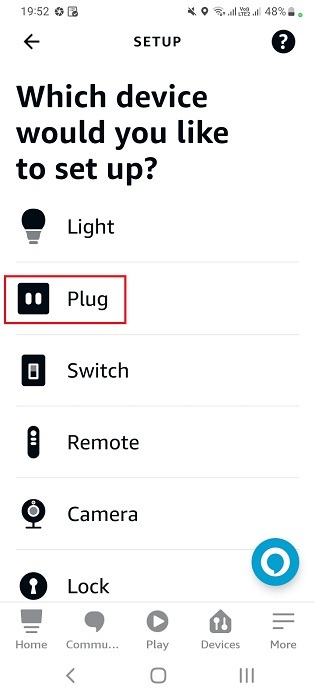
- Select “plug” as the category of the device you’d want to set up in your Alexa.
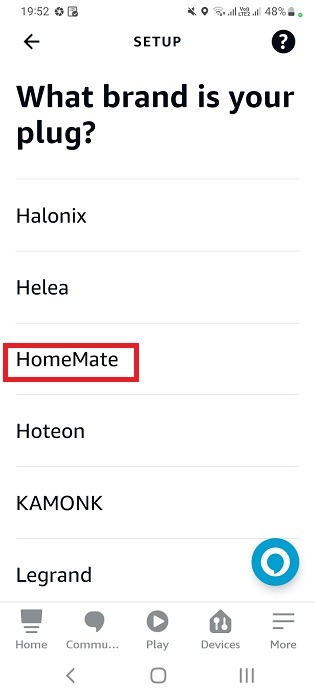
- Scroll down to search for your smart plug brand and click to go further inside the menu. If your plug is not available in the list, you can add the smart home app using Alexa skills, as shown in this unrelated guide for an air purifier that connects to Amazon Alexa using third-party skills.
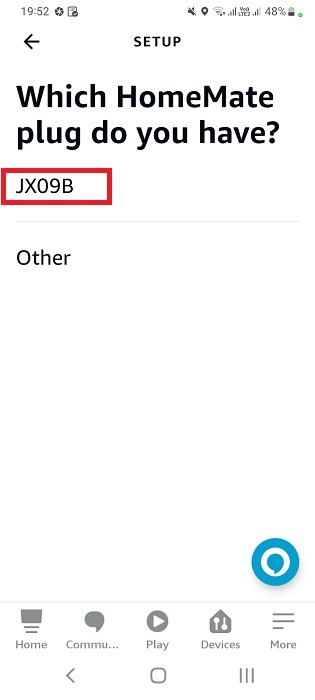
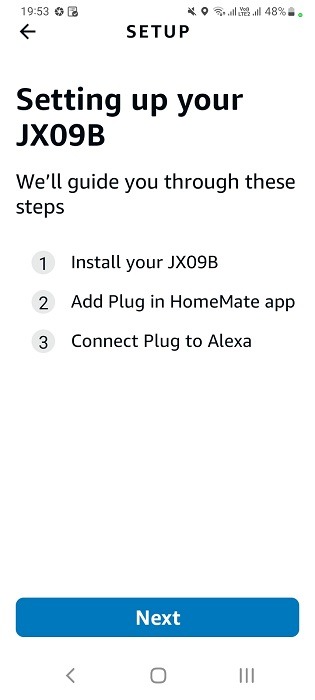
- Select your plug type. If you’re not sure, refer the manufacturer’s guide. In this case, it is a JX09B type plug that comes with a shutter.
- Alexa itself will guide you on how to set up your specific plug type. Follow its on-screen instructions.
- You should ultimately reach the third-party skill which needs to be enabled for use in Alexa. Click on the big blue button to proceed.
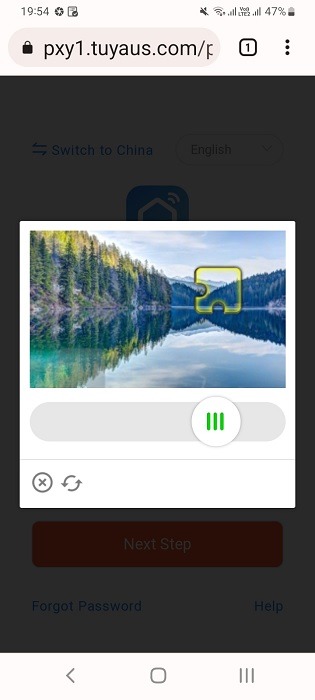
- You might need to solve an authentication query.
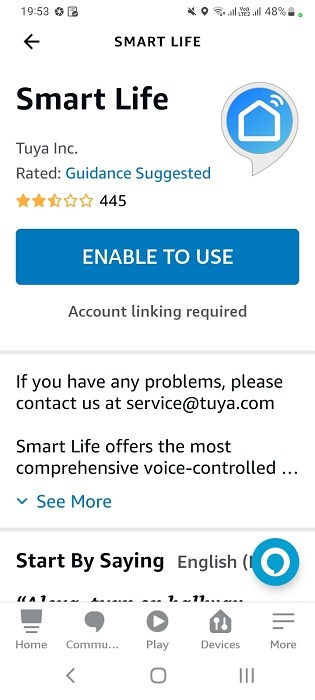
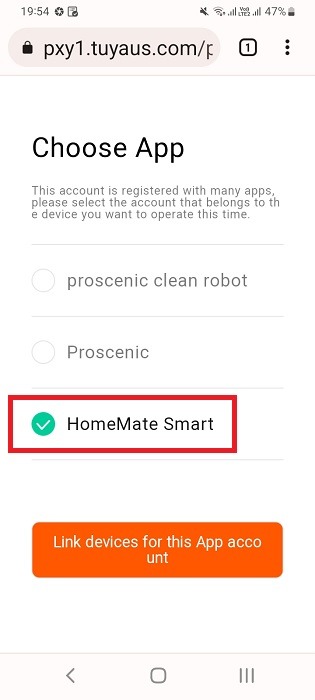
- Many smart home device makers use intermediate connecting apps such as Tuya Smart. In that case, you will need to choose your smart home app from a drop-down menu.
- Authorize Alexa to receive your public profile for the connecting app so that it can control the smart plug.
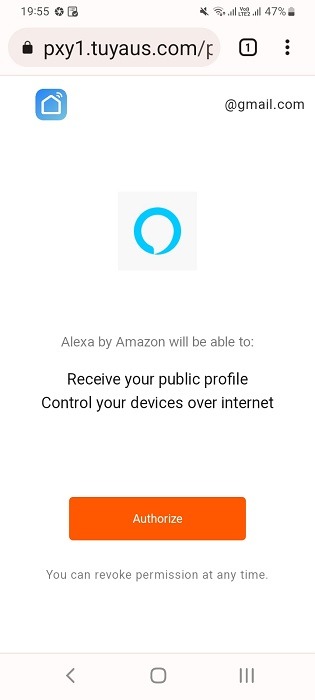
- You should see a message that the smart plug app has been successfully linked to Alexa.

- Wait up to a minute for Alexa to connect to other devices on the network.
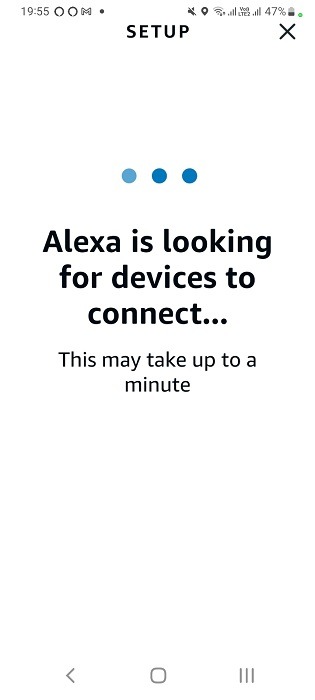
- Alexa will announce that it has found 1 smart plug (with brand name) and connected to it.

- Alexa may ask you where the smart plug is located? Choose a room such as the kitchen or living room.
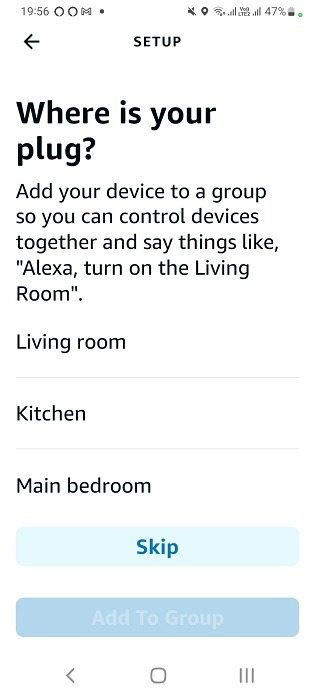
- After a few seconds, you will receive a confirmation that the smart plug is added to the room of your choice.
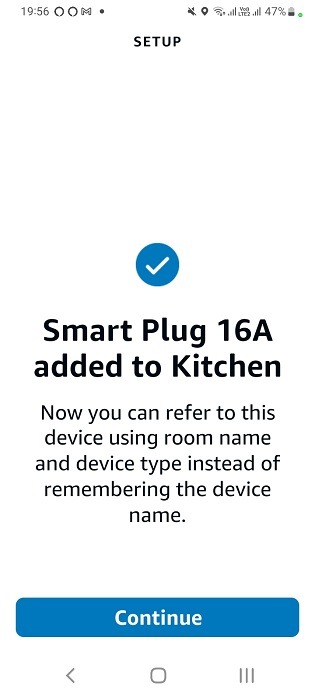
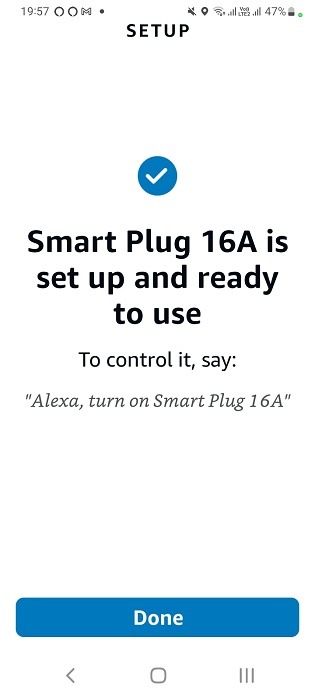
- You should also receive a message that the smart plug is set up and ready to use. You can now use voice instructions in Alexa to turn on/off the smart plug: “Alexa, turn on smart plug 16A.” You can rename the smart plug to just “plug” or something simpler in the device settings.
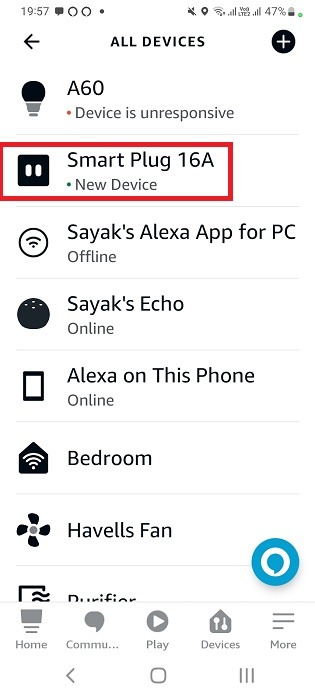
- Your smart plug will now be available in “Add devices.”
Set a Timer on a Smart Plug
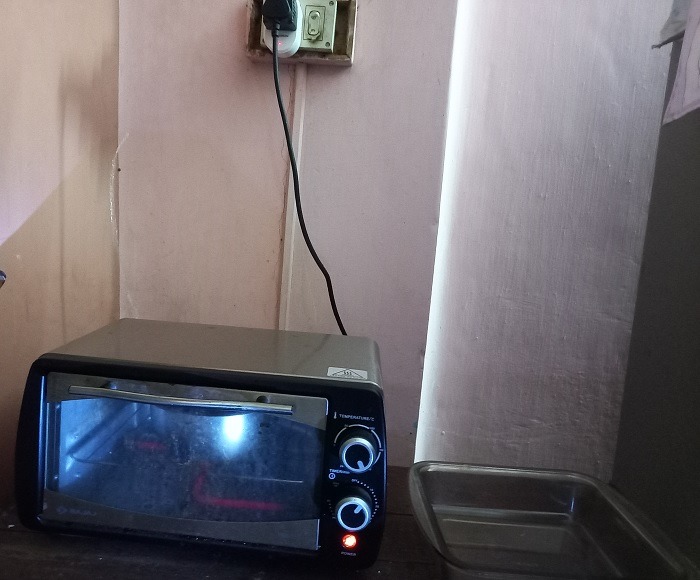
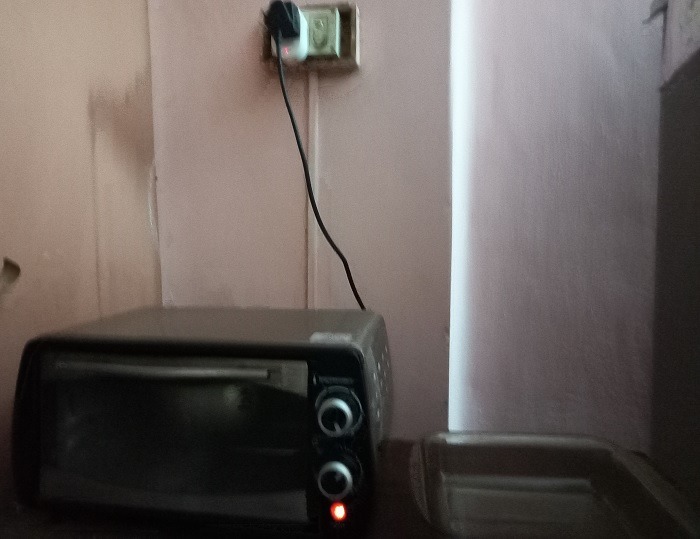
A good thing about smart plugs is that it can help you set timers on your target device which doesn’t have to be smart. With a 16A smart plug, you can set the timer for an oven, immersion rod, water pump, or any other heavy-duty appliance. In the following example, we will set a timer on a dumb microwave oven.
- First connect the smart plug to the microwave oven or any other dumb gadget. Make sure the plug lights are blinking on.
- If your target device uses “knobs” like in this example below, adjust them to a desired temperature setting.

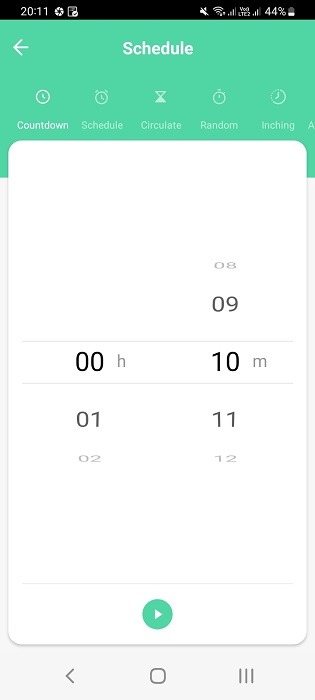
- Go to the smart plug app. You may find a countdown or timer option.
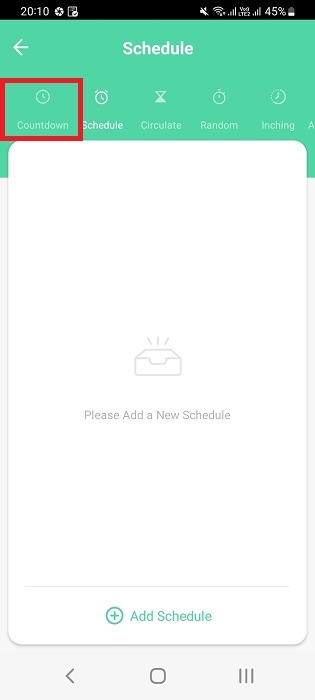
- Set the timer or countdown for desired number of minutes.
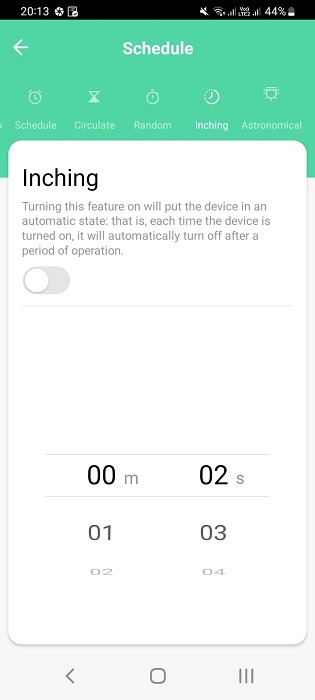
- Your smart plug app may also have a feature called “inching.” Turning it on means the device will be automatically set in a particular on/off state.
Once the number of minutes is visible, you can simply turn on or off the timer from your phone app, and the dumb gadget will be powered on, and get to work. So, if you wanted to preheat the oven without touching anything, the app timer will do everything for you.
Set a Power Schedule on a Smart Plug
A smart plug also helps set you what is called a power schedule. This is one of the best features as it can also integrate with Alexa (but not Google Assistant.)
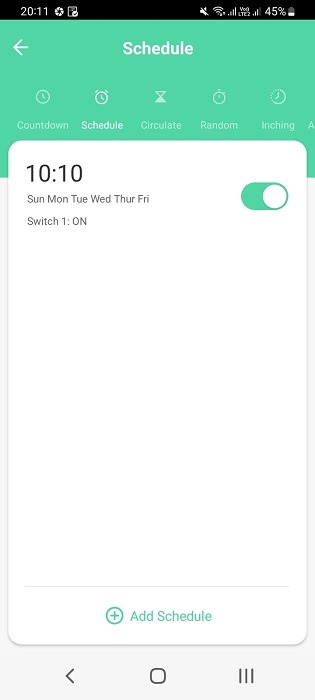
- You can set a weekly or day-by-day schedule for the smart plug on its manufacturer app as shown here.
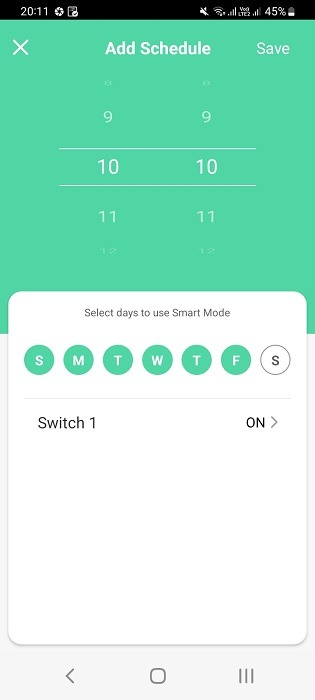
- Once the schedule is set, you can turn on or off the end use device from your app itself. Every day at the same time.
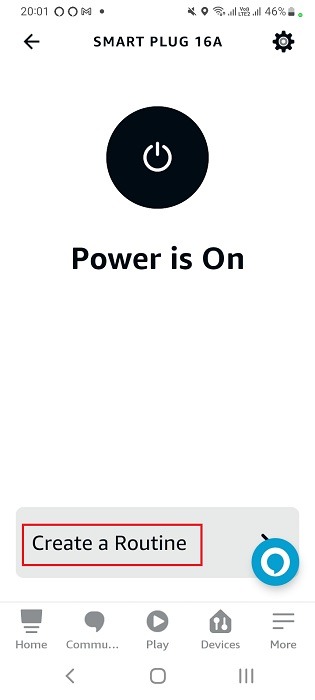
- You get many more advanced scheduling options with Alexa though. First visit the smart plug’s device settings page.
- Click “create a routine.”
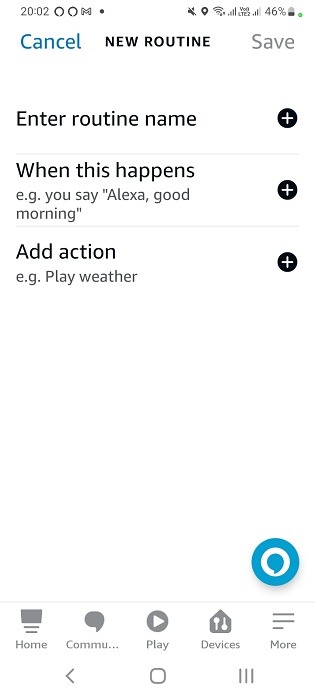
- Click “enter routine name” to give a new name to the scheduling activity.
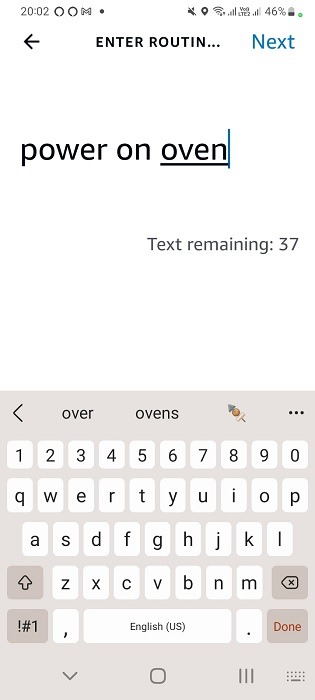
- Give the routine an easy to remember name. In this example, we’re calling it “power on oven.”
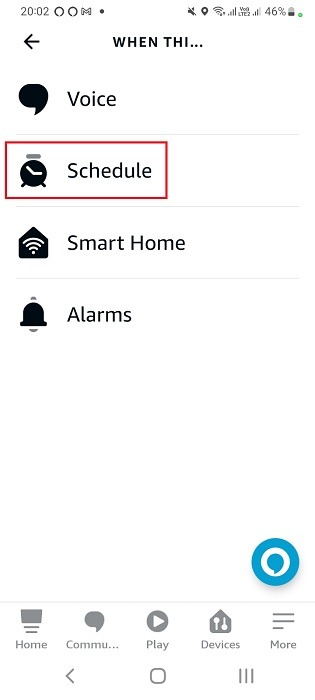
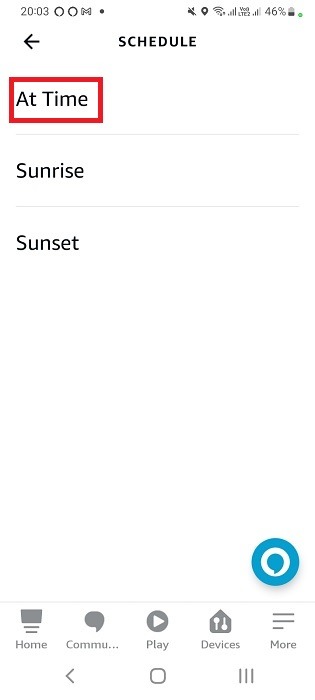
- From the “when this happens” menu, select “Schedule.”
- Alexa lets you schedule things for sunrise, sunset and at a specific time.
- If you’re choosing sunrise or sunset, you can choose a time offset before or after the event. This is just a few extra minutes.
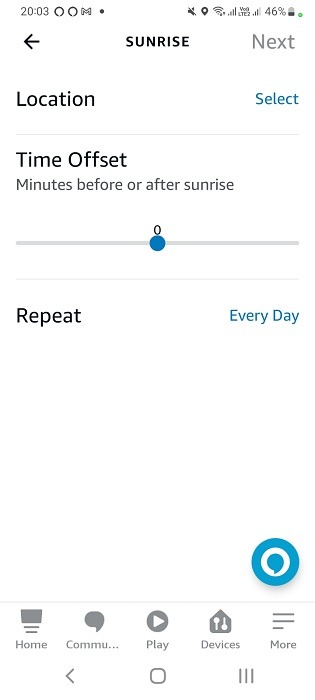
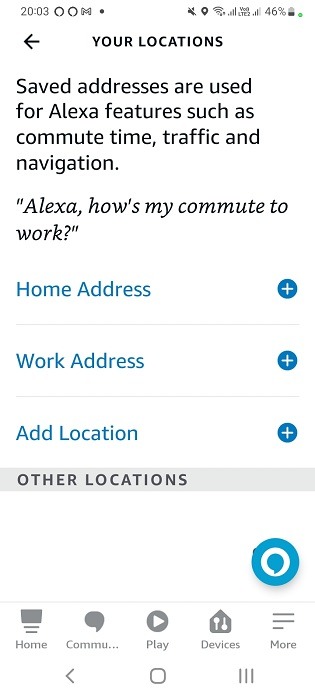
- If you haven’t saved your location address to Alexa so far, it’s time to do it now.
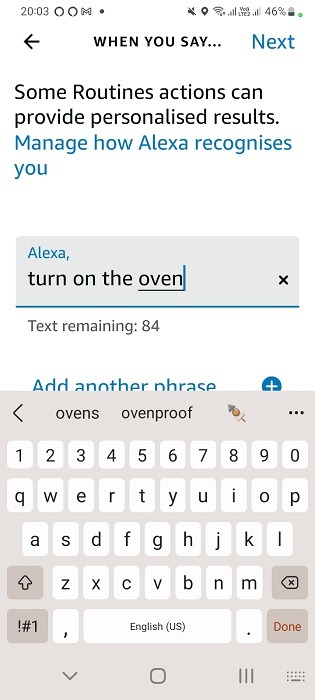
- You can also choose “voice” in the “When you say” menu. Write down what you want to say to activate instructions. In this example, I have put the voice instructions down to “Alexa, turn on the oven.”
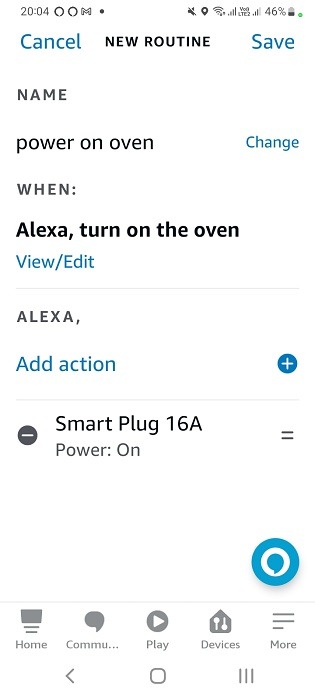
- Finally, you need to add an action to your voice command.
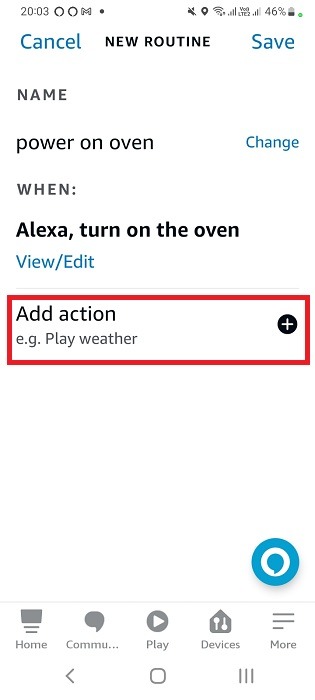
- The only actions available here are “power on” and “power off” which is good if I want to preheat the oven at a scheduled time of my choosing.
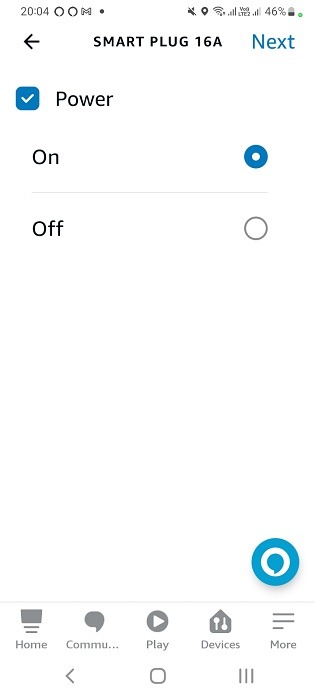
- You should see the smart plug power on option available on the Alexa app.
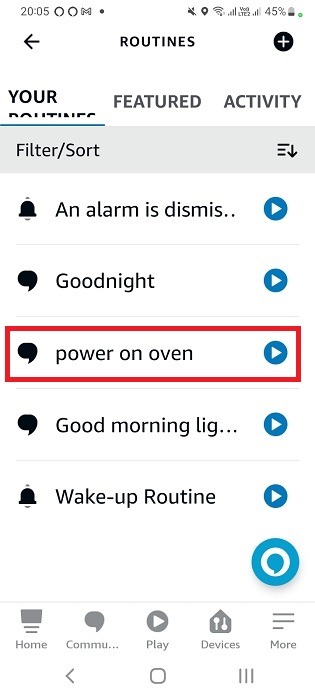
- You should be able to see the routine you created in the list of routines.
Once a voice routine is set in Alexa for the smart plug, you can turn on/off the target device using your voice. Thus, we have converted a dumb device to a smart one.
Frequently Asked Questions
Can I set a smart plug schedule without Internet?
Some smart plugs may allow you to set a schedule to the end device even when there is no Internet available. If your power goes down, then you can’t do anything. If you want to reduce your dependence on Internet, consider using a Zigbee connection to connect your smart plug.
Can you leave a smart plug on at all times?
Yes., you can leave a smart plug on all the time especially for devices that require constant power connections, such as refrigerators. As long as you don’t experience power failure, your device should work perfectly. If there are Wi-Fi issues, you just need to restart the router and it will start working again.
Can Google Home schedule with smart plugs?
Google Home’s Assistant generally doesn’t have advanced scheduling and timer facilities. They’re only available with Alexa. However, Google’s Nest devices and Google Assistant app can definitely connect to the smart plug to turn it on and off.
Get the best of IoT Tech Trends delivered right to your inbox!


