
An accelerometer measures the rate of change of velocity of any device. In smartphones and tablets, it calculates the device’s orientation (x, y, z) relative to its rest position. Additionally, it is useful in stabilizing the flight of drones relative to the ground.
There are many different types of accelerometers, so the code you will use will vary depending on your project need. However, the following is a simple example of how an accelerometer connects with an Arduino board.
Components
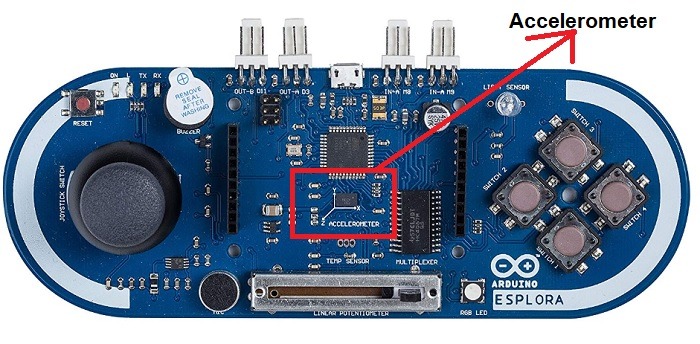
We will use an Arduino Esplora board which contains many on-board sensors and actuators that are useful for other Arduino projects. It is available for less than $30.
If you look closely, Esplora has an accelerometer, a microphone, joystick push buttons, temperature and light sensors, and a piezo-buzzer. For this project, the on-board accelerometer we will use is a 3-axis MPU 6050 which is easily available online.
Apart form the Arduino board, you will need to install the Arduino IDE on your computer. Earlier, we covered the procedures to install the IDE on Windows, Mac or Ubuntu, and you need them to work on your computer without any errors.
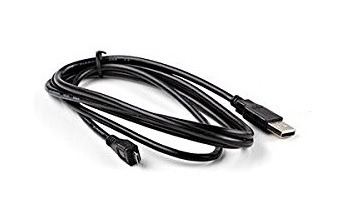
You will also need standard USB cables for connecting Arduino Explora with a laptop/computer.
Assembly
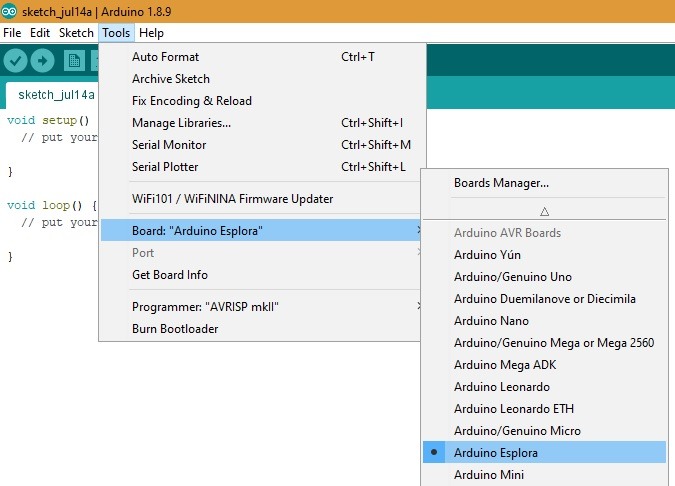
First, select the Arduino Esplora board on your Arduino IDE. Go to “Tools -> Board -> Arduino Esplora.”
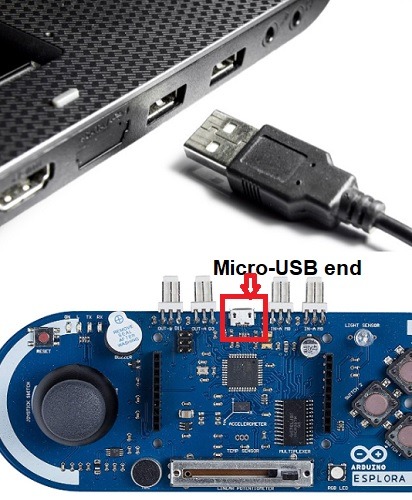
In the next step, connect the Esplora to your computer using the USB cable. One end of the USB cable goes to the laptop, and the other one goes to the micro USB slot provided in Esplora.
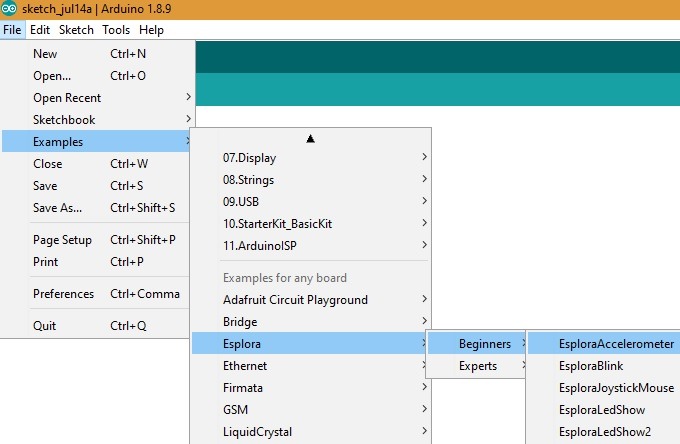
Once the connection is ready, go to “File -> Examples -> Examples for any board -> Esplora -> Beginners -> EsploraAccelerometer.”
In the visible code, you can see the set-up as below. To understand its logic, refer to the cheat sheet. There is a basic setup command which initially includes the Esplora code.
There are x, y, z enter values which you can change as you move the Arduino Esplora around a table. The same values are printed as the output.
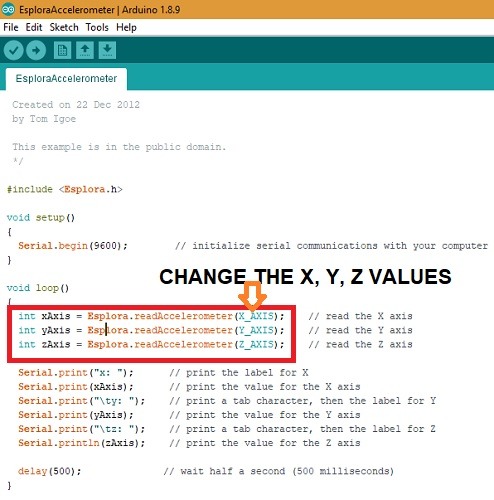
Press the upload button (–>) and the code is now ready to use. You should notice a change in values on Arduino IDE whenever you move the Esplora. Further, there is a delay of 50 milliseconds which you can change.
The accelerometer is now connected to your Arduino project. The readings of y and z will vary based on how much you change x or vice versa.
x = 3,  y = 41, z = 108
x = 26, y = -45, z = 88
Accelerometer Example with Another Arduino Board
If you are using an Arduino Uno or Genuino board, use a readily available example from one of the online Arduino tutorials. It uses any ADXL3xxx accelerometer. The schematic will now change with Arduino’s analog input pins (0, 1, 2, 3, 4 and 5) connecting to different parts of the ADXL3xxx accelerometer.
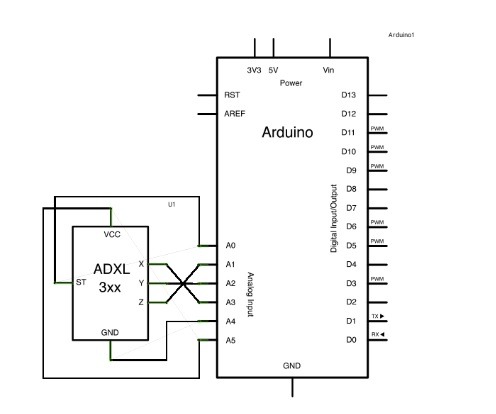
As you can see, the accelerometer pins “Gnd” and “Vcc” as the sources of power connect to the Arduino analog pins 4 and 5. Moreover, you can set them further as digital pins 18 and 19 to have a minimum potential for the accelerometer to work.
const int groundpin = 18;
const int powerpin = 19;
Summary
In this tutorial we saw how to connect an accelerometer to an Arduino project. For this, we used one of Arduino IDE’s readily available examples with an on-board accelerator.
No matter which Arduino board you use, you have to define x, y and z axis values for its pins. You can find plenty of other examples for other accelerometer types at Arduino forums.


