
Be it a part of a security system or to help automate your smart appliances, a smart motion detector is an indispensable piece of IoT hardware you’ll definitely want to have. More so with its simplicity – you can create your own using a motion sensor module and a Raspberry Pi.
Unlike a smart camera, these things don’t record video. Visitors’ faces will always be kept private. And, if needed, you can even use it to detect mice at night!
Here’s a short guide on what you have to do to make your own.
What You’ll Need
- An HC-SR501 PIR motion sensor module
- Jumper wires
- Any Raspberry Pi board
Quick note: If you’re buying PIR motion sensors online, make sure to order more than one in case you get a faulty one – especially if you’re ordering from cheap suppliers. Also, pick a decent courier because these things break pretty easily.
Connect Motion Sensor Module to a Raspberry Pi
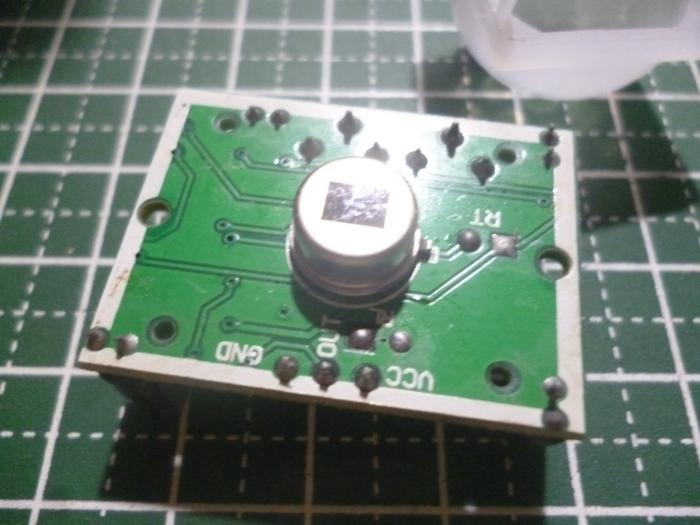
- Check the pinouts. Depending on where and whom you got that motion detector from, the VCC and GND pins might be reversed. If you can’t find the pinout markings underneath the module, then they might be right at the top below the Fresnel lens. You can take it off to see the markings and put it back on later.
Tip: You can push the leg of the of the Fresnel lens from underneath to push one side of it up, and use a fingernail to lift the rest. If you can’t reach the leg, you can use something small and solid like the bottom of a tiny screwdriver.
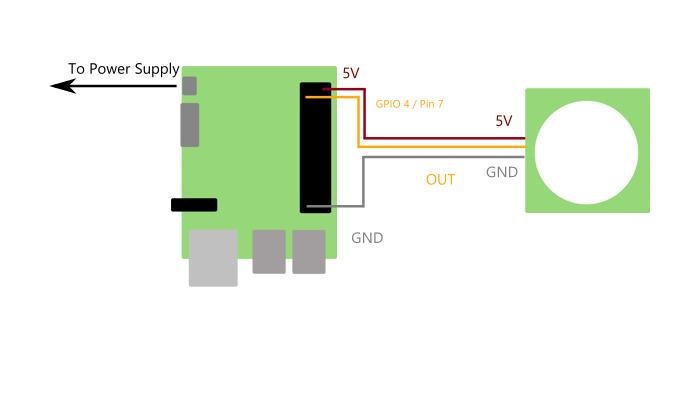
- Wire the PIR motion detector module to the Raspberry Pi. Connect Vcc to 5V, GND to GND, and OUT to GPIO 4.
- Now on Thonny, copy and paste the following code:
from gpiozero import MotionSensor

motion_sensor_pin = 4 # Set pin 4 as motion sensor pin.

status_motion_sensor = 0 # 0 means it's not detecting motion. 1 means it is.

while True:
	MotionSensor(motion_sensor_pin).wait_for_motion()
	print("Detected Motion!")
	status_motion_sensor = 1
	MotionSensor(motion_sensor_pin).wait_for_no_motion()
	status_motion_sensor = 0
In case you’ve noticed, we didn’t set the board-related settings using GPIO here. While you can still do for the other pins when you plan to add more functionality to the Raspberry Pi, the MotionSensor function from the gpiozero module sets all the nitty-gritty bits so you won’t have to when running a motion sensor.
Tip: To make it easier to do something like automatically running a DC motor whenever the motion sensor detects movement, you can use the value for status_motion_sensor. Its value should be 1 while detecting motion and 0 while not.
- Run the program, take a step back, and move your hand over the Fresnel lens to test if the motion sensor works or not.
On Thonny, you should should see it print out “Detected Motion!” while doing this.
How to Calibrate a PIR Motion Detector
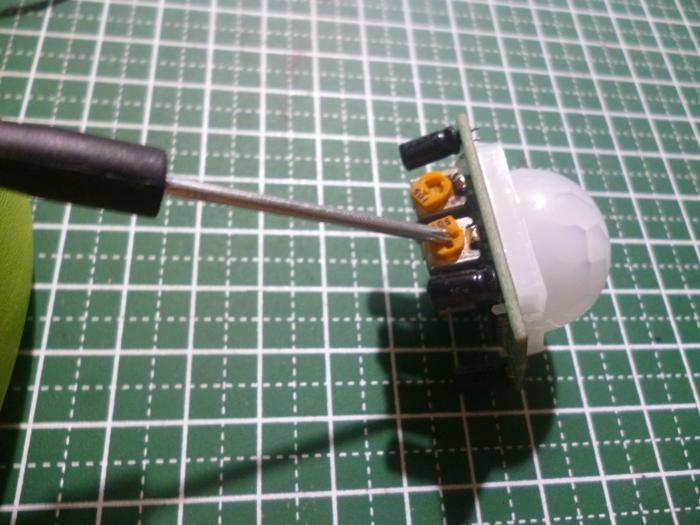
Calibrating the PIR motion detector module is quite simple. If you look at the side, you should see two potentiometers with screw caps on them. They’re usually yellowish-orange, though the color may change depending on the manufacturer.
Those screws help you calibrate the speed and sensitivity of the motion detector.
The left screw control the the sensor’s refresh rate and lets you set how fast the sensor scans its surroundings. To get a quick and easy reading, you’ll want to set this up to the fastest setting by cranking it to the left (or right, depend on your sensor model). The speed for this particular sensor ranges somewhere between 1/3 of a second to 5 minutes.
The right screw controls the sensitivity. Cranking it clockwise makes it scan for up to 7 meters. Turn it the other way around and it’s going to lose sensitivity to up to about an inch.
Sometimes, these screws can be hard to turn and it is highly possible to break the screwcaps. When that happens, you can use a pair of pliers to turn them around. The screwcaps are shaped in a way that there’s a flat side where you can grip it with a good pair.
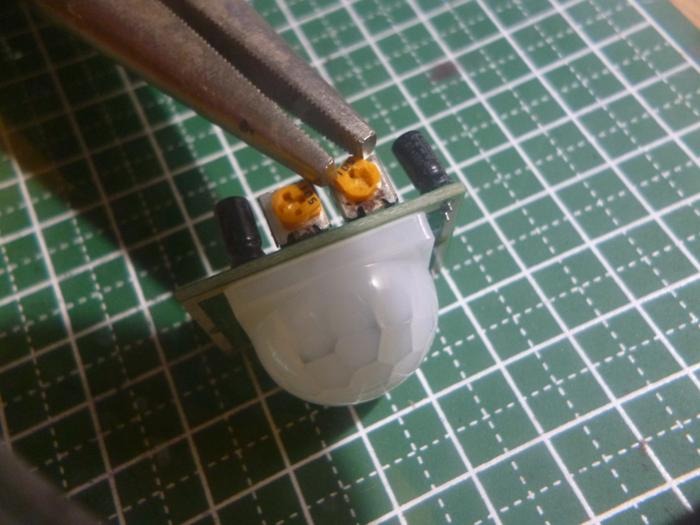
Just don’t try to turn this with your fingernails. Besides being tough to turn, you might accidentally rip out the screwcaps and break it.
Frequently Asked Questions
What is the difference between an active vs passive motion sensor?
Active motion sensors have two parts: an emitter or transmitter that emits sound, light, or anything that can bounce off something and a receiver that listens for a bounce. Passive motion sensors, on the other hand, only have a receiver and listen to changes in the amount of light or sound they detect.
Can infrared motion sensors detect small animals?
Depending on the sensitivity and timing for the motion sensor, it can detect small, warm-blooded animals like cats and dogs to a degree. They just need to be close enough to trip the sensor. However, they can’t detect cold-blooded animals like lizards and larger insects.
Can sunlight trip an infrared motion sensor for the Raspberry Pi?
The kind of infrared motion sensor used for the Raspberry Pi, the HCSR50x family of IR motion sensors, can all be tripped by direct sunlight. If possible, avoid placing these where sunlight can reach them.
Get the best of IoT Tech Trends delivered right to your inbox!


