
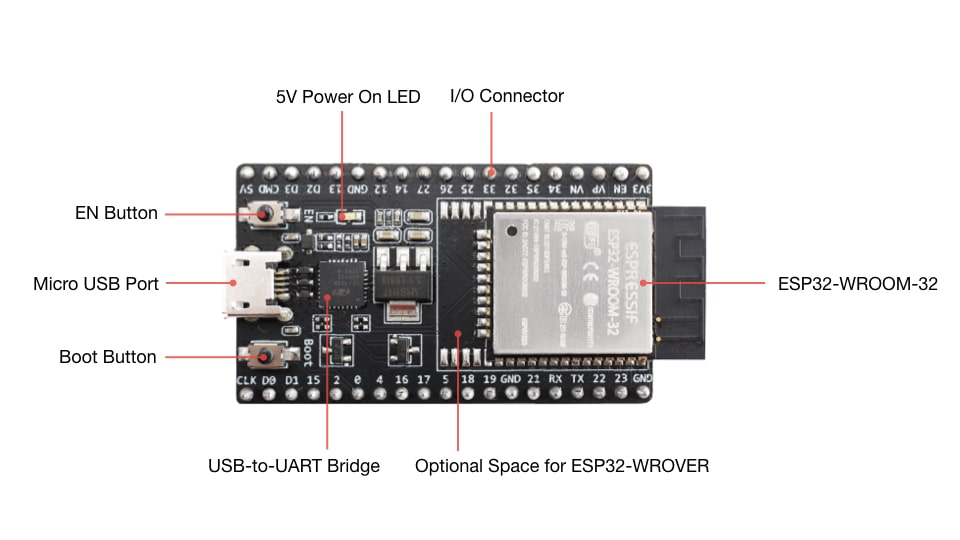
The ESP32 WROOM DevKitC v4 development board comes with Espressif Systems’ dual-core SoC. The board features Wi-Fi connectivity working at 2.4 GHz, up to 150 Mb/s speed and BLE Bluetooth technology. ESP32 WROOM DevKitC v4 works up to a frequency of 240MHz. The I/O pins of the board break out to the pin headers on both sides for more straightforward interfacing. The users can connect the peripherals with the jumper wires or fix the development board on a breadboard for building applications.
Here we show you how to get started with the ESP32 WROOM DevKitC v4 development board.
Note: to get started with ESP32 WROOM DevKitC v4, you need Arduino IDE set up on your local machine. If you don’t have Arduino IDE installed, you can check out the tutorials to install Arduino IDE on Windows, Mac, or Ubuntu.
Installing Dependencies on Arduino IDE
You can clone the official GitHub repository of Espressif Systems for working on ESP32 WROOM DevKitC v4. However, some of the community forums show that it has some bugs which throw errors during configuration. We use a different method here.
You need to uninstall all the ESP-related folders from your system for smooth functioning without any errors. Those who don’t have ESP-related folders in their system can directly start this procedure. Open your Arduino IDE and go to the “File” tab in the top-left corner of the menu bar in Arduino IDE. Select the “Preferences” options from the drop-down list, and a dialogue box will appear on your screen.
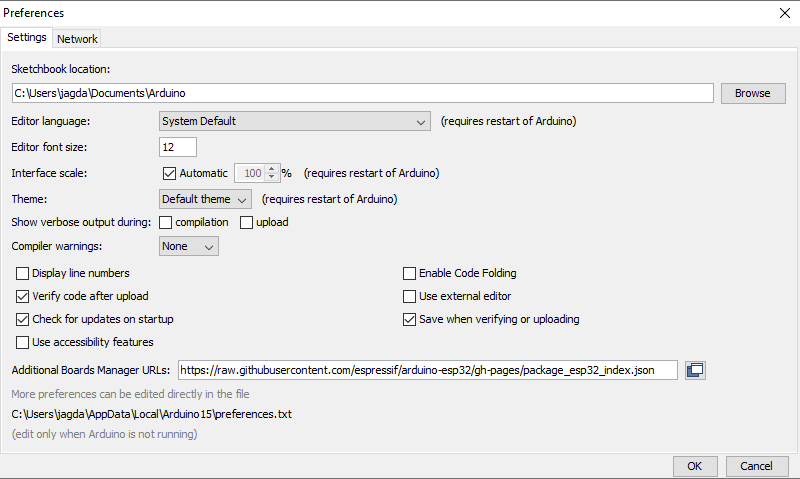
Copy and paste the below link in the “Additional Boards Manager URLs” text area in the Preferences dialogue box, as shown in the above figure.
https://raw.githubusercontent.com/espressif/arduino-esp32/gh-pages/package_esp32_index.json
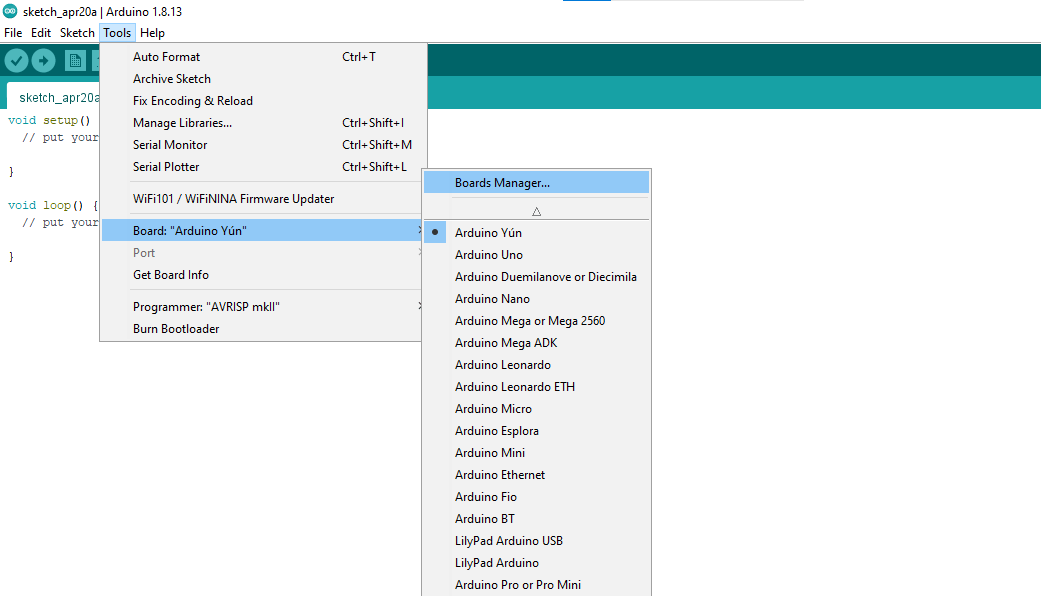
Click the OK button to save the changes and close the Preferences dialogue box. Go to the Tools tab in the menu bar. Select the “Boards” option in the drop-down list, then select the Boards Manager option.
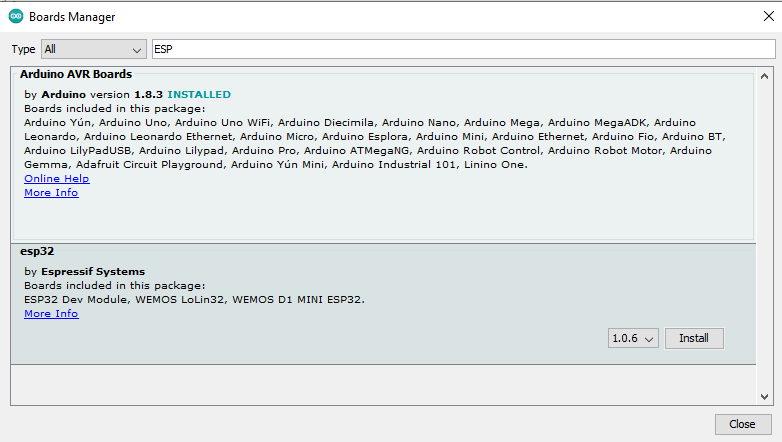
The dialogue box for Boards Manager will appear on the screen once you click on the “Boards Manager” option. Search for “ESP” in the search bar of the Boards Manager. If your configuration in the Preferences was successful, then the “esp32” option will appear when you search for it in the Boards Manager. Install the esp32 dependency for Arduino IDE. Downloading and installing the dependency module will take some time. You can see the installed dependency in the Boards Manager once the process is finished.
Loading the DOIT ESP32 DEVKIT Board
Check whether the ESP32 Arduino option is available by going to the “Tools” tab. If DOIT ESP32 DEVKIT V1 is there, click it to activate it in Arduino IDE.
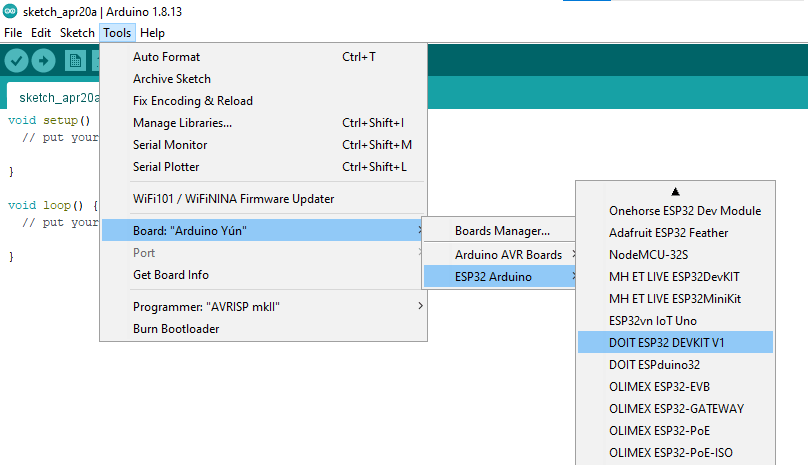
Again, you can open the “Tools” tab to confirm if the “DOIT ESP32 DEVKIT V1” is appropriately configured. You will see “Board: ‘DOIT ESP32 DEVKIT V1’ ” in the drop-down list of the Tools tab if the loading of dependency is correct. Under the “Examples” option in the drop-down list, you can see another nested drop-down list containing various examples for working with the development board.
Programming ESP32 WROOM DevKitC v4 on Arduino IDE
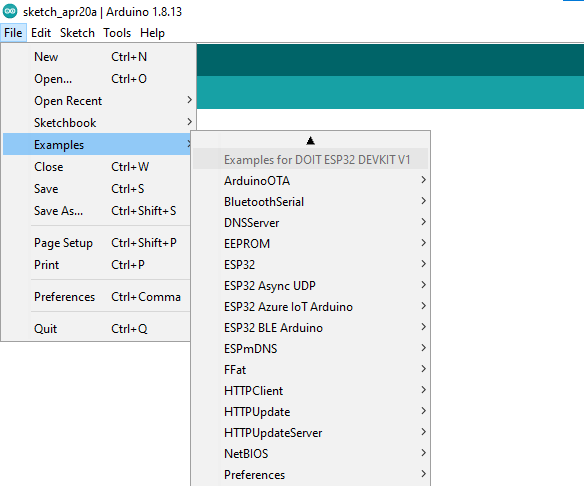
To program the development board, you can choose any of the examples in the drop-down list. These are built-in programs that are compatible with the development board and can help you to understand the scope and applications of the board.
When you click on any of the examples, it creates a separate instance of Arduino IDE. This newly-opened instance contains the pre-written program of that particular example. Hence, it overwrites the board memory when the compilation and uploading of the code occur on the development board.
Wi-Fi Scanning Example on ESP32 WROOM DevKitC v4
Go to “Examples -> WiFi” and select “WiFiScan.”
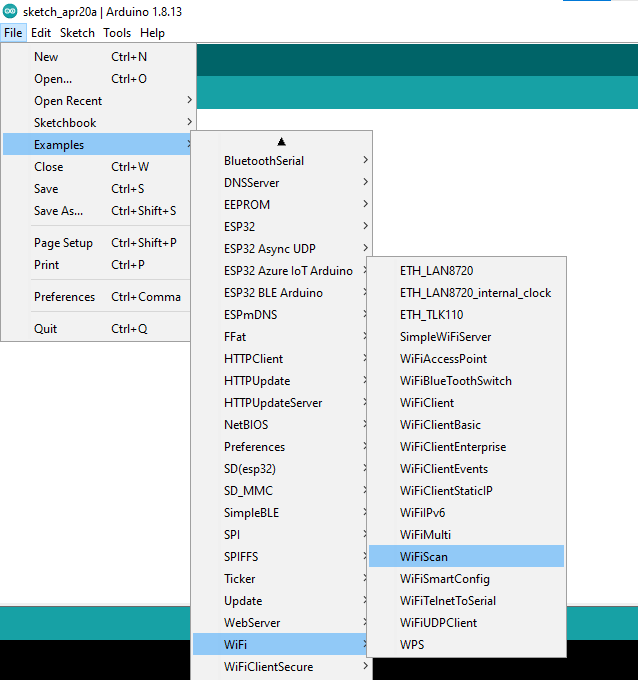
A new instance of Arduino IDE will appear with the program already written in it.
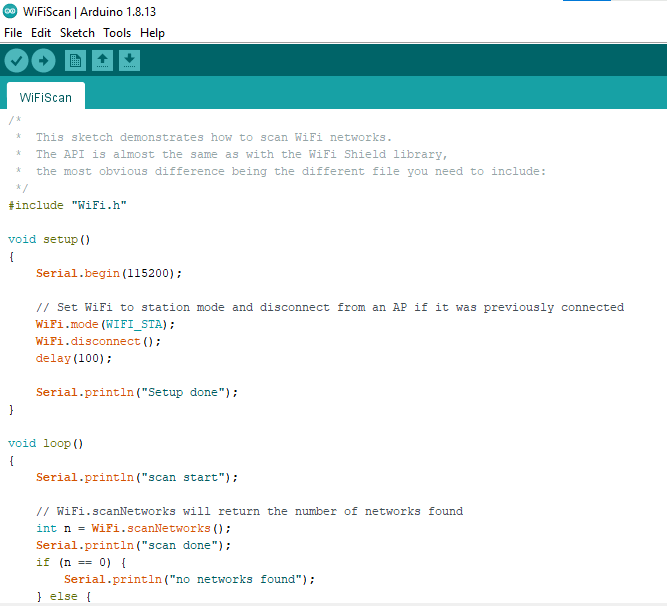
This program will scan the Wi-Fi networks around the proximity area and display the details. If there are no Wi-Fi networks around the area, it will display “no networks found.” You can go through the entire program to understand the entire flow of Wi-Fi scanning.
Now, upload the code to ESP32 WROOM DevKitC v4 through a USB cable. If the red LED is “ON” on the development board, it means everything is working fine. Arduino IDE will compile the code and then upload it on the development board. You can check the status by monitoring the black screen in the lower part of IDE.
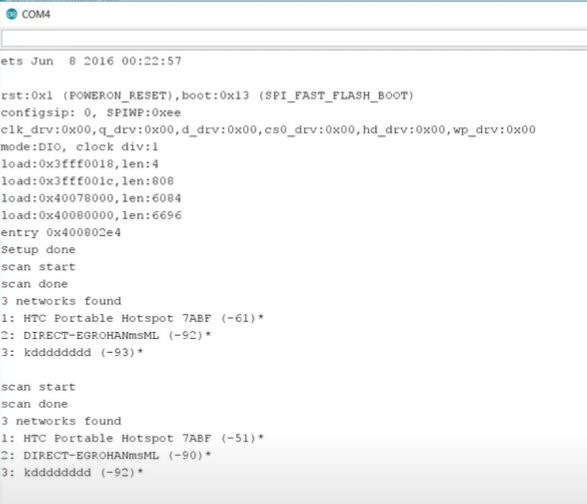
Once the program is uploaded, you can open the serial monitor of Arduino IDE to check the output of the Wi-Fi scanning code. The serial monitor option is under the “Tools” tab in the menu bar.


