
In this tutorial we show how to set up a universal IoT gateway using Raspberry Pi for all your IoT devices. You don’t have to understand Linux or write a single line of code.
Accordingly, we only use a ready-made IoT gateway image from Mozilla foundation which is available for free. But you have to spend approximately $150 on the hardware.
As discussed earlier, a Raspberry Pi is a de facto computer in itself. The same principle is utilized to convert it into a universal IoT gateway that supports a variety of IoT networking protocols.
What Do We Need?
The following components will help you build your own IoT gateway with a Raspberry Pi.
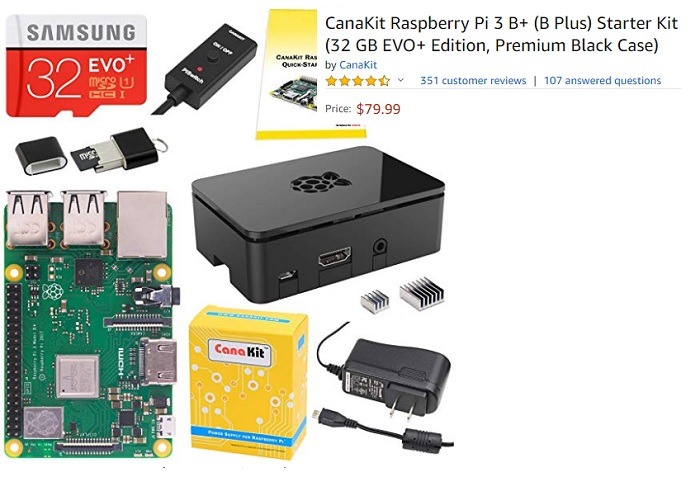
- Raspberry Pi board: use Raspberry Pi 3B+ to support built-in Wi-Fi, Bluetooth and external USB devices. It is better to go for an all-inclusive starter kit that has a microSD card, power supply, HDMI cables and GPIO references card.
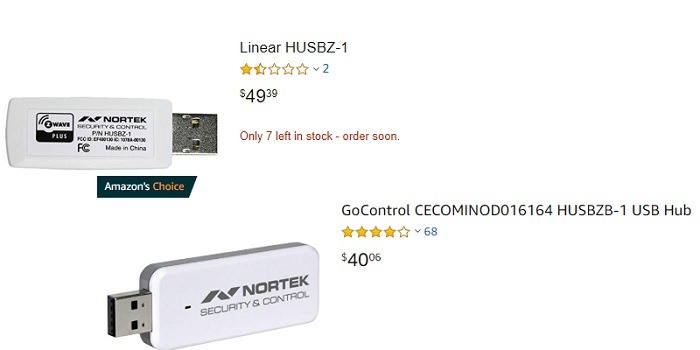
- USB dongles: get USB dongles for Z-Wave and ZigBee, as they will be on top of the Wi-Fi and Bluetooth support.
- A MicroSD card: as noted above
- HDMI cables: as noted above
- Raspberry Pi image: you will need an IoT gateway image. Mozilla offers an IoT gateway image which can be directly downloaded from its website.
- SD card image: we will use balenaEtcher as recommended by Mozilla on that website. You can download it for Windows, Linux, Mac or any other operating system.
The purpose is that you must install a flash SD program that can take IoT gateway instructions that are available online. The procedure is straightforward: flash the microSD with this coded IoT gateway program using Etcher.
After that, load the flashed microSD to your Raspberry Pi and then connect the Pi to your computer/laptop.
How to Set Up Raspberry Pi as an IoT Gateway
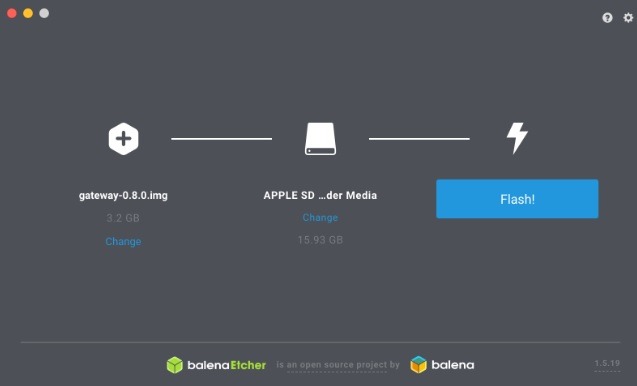
The Windows installation steps for Etcher are very basic. First, you must open Etcher, which is pre-installed from its website, and then insert the microSD card above into any SD card slot in your laptop/computer.
After that, insert the downloaded Raspberry Pi IoT image from Mozilla website. Select it as the source and the microSD card as target and click “Flash.” The following screenshot shows the procedure.
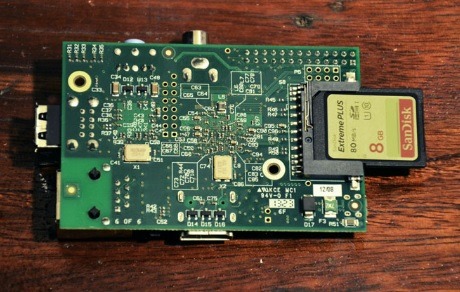
In the next step, you must load the flash image in SD card to your Raspberry Pi. For this, you must notice the assigned SD card slot in Pi and insert the flash microSD card.
Your Raspberry Pi 3b+ has a power supply port. Use one of the HDMI cables to connect it to a power supply on your computer. The device is now ready.
Apart from Wi-Fi and Bluetooth, the Raspberry Pi 3b+ board will support ZigBee and Z-Wave with their respective USB dongles.
When the IoT gateway starts itself from the flash microSD card, Mozilla will enable a Wi-Fi hotspot called “WebThings Gateway.”
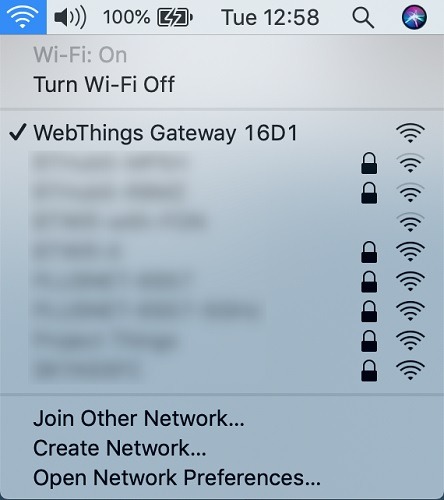
You will next be shown the way to a welcome screen and a things console where you can add any number of IoT devices to the gateway. The set up is ready, and you can now use your Raspberry Pi (it is a computer) to connect with multiple IoT objects.
In Summary
Here we saw how one can install Mozilla’s IoT gateway instruction program to a Raspberry Pi device. Having a universal IoT gateway would allow you to control all IoT devices in your network through your laptop or computer itself.


