
One of the great things about owning a Raspberry Pi is that you get to decide which operating system (OS) it should run. There’s countless operating systems that you can install on your Raspberry Pi device. Although Linux distributions such as Raspbian, Debian and Kali Linux are the most popular, there’s plenty of alternatives that you can try.
In this article I’ll show you how to get a DIY, Chromebook experience by installing Google’s Chromium OS on your Raspberry Pi.
What Is Google Chromium OS?
Chromium OS is the open-source, development version of Google’s Chrome OS, which is most commonly found on Chromebooks.
Unlike traditional operating systems, Chromium OS was primarily designed for browsing the Internet and running web applications via the Chromium web browser, which is Chromium OS’s main user interface.
Chromium OS focuses on providing a streamlined user experience, with fast booting times. This performance does come at a cost, as Chromium OS is missing many of the applications you typically expect from an operating system. However, if you spend the majority of your time online and are looking for a lightweight OS, then you may want to give Chromium a try.
As a Google product, Chromium OS also provides easy access to all of Google’s core applications, including Google Docs, Slides, and Sheets, so if you’re a fan of Google products, then Chromium OS may be the perfect operating system to install on your Raspberry Pi.
Since Chromium OS is closely linked to Chrome OS, you can also treat it as a quick, easy and inexpensive way to get some hands-on experience with Chrome OS, without having to splash out on a Chromebook.
What you’ll need
To complete this tutorial, you’ll need:
- A Raspberry Pi model 3B, 3B+, or 4B.
- An SD card that’s compatible with your model of Raspberry Pi. You’ll be wiping this SD card, so make sure it doesn’t contain anything that you want to keep.
- A keyboard and a way to attach this keyboard to your Raspberry Pi.
- A monitor and a way to attach this monitor to your Raspberry Pi. For that authentic Chromebook experience, you may want to use a touchscreen monitor.
- An HDMI cable.
- Access to a laptop or Desktop computer which you’ll use to download the Chromium software.
Once you have all these tools, you’re ready to install Chromium OS on your Raspberry Pi.
Download Chromium OS for Raspberry Pi
If we’re going to flash Chromium OS, then we need a version that’s compatible with Raspberry Pi.
- Head over to the Chromium OS for Raspberry Pi GitHub page.
- Find the version of Chromium OS that’s compatible with your model of Raspberry Pi.
- Download this release in “img.xz” format.
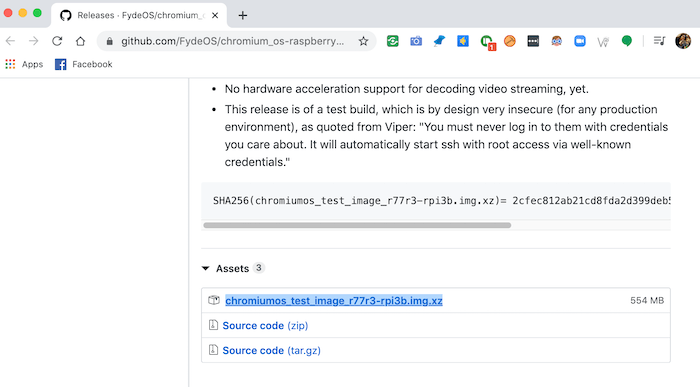
Chromium OS will now be downloaded to your computer.
Install the Etcher image mounting software
Once you have your image file, you need a way to mount it to your SD card. I’ll be using Etcher, which is an open-source application that can create live SD cards, by writing an image file onto storage media.
Etcher is cross-platform, so you can use this tool regardless of whether you’re on Windows, Linux or macOS. For this tutorial I’m using balenaEtcher for Mac, but the steps should be the same regardless of your operating system.
You can download balenaEtcher for free from the Balena website.
How to flash a system image to Raspberry Pi
Next, we need to flash Chromium OS to our SD card:
- Insert the SD card into your laptop or computer.
- Launch the Etcher app.
- In Etcher, click “Select image” and then choose the Chromium OS file you just downloaded.
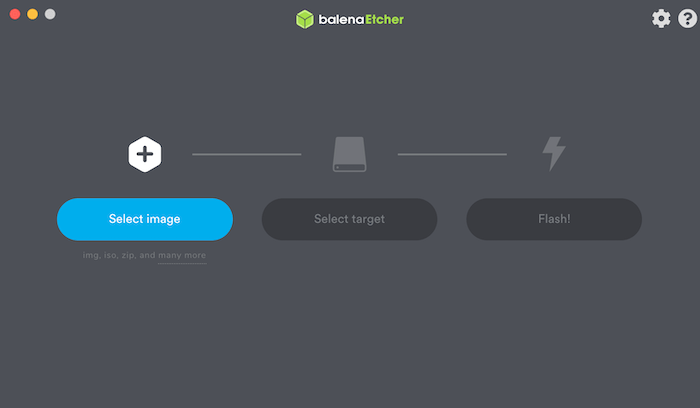
- Click “Select target” and then choose your target boot medium, which in this instance is our SD card.
Etcher will now flash the Chromium OS system image. This process may take a while, so you may want to grab a coffee!
Boot into Chromium OS
Once Etcher has finished flashing your image, the only thing left to do is boot your Raspberry Pi into Chromium OS:
- Remove the SD card from your laptop or computer and insert it into your Raspberry Pi.
- Attach your monitor to the Raspberry Pi using the HDMI cable.
- Attach your keyboard to the Raspberry Pi device.
- Plug your Raspberry Pi into a power source.

Raspberry Pi should now boot into Chromium OS.
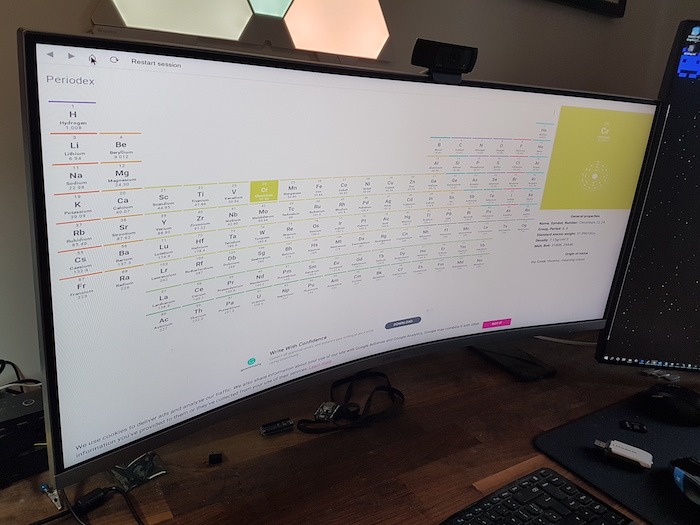
You’ll now be prompted to complete the usual first-time configuration, including setting up any peripherals you want to use, connecting to Wi-Fi, and signing into your Google account. Note that a Google account is required in order to use Chromium OS, so if you don’t already have an account, then you’ll need to create one.
If you encounter any issues during the setup phase, then check that you have an active Internet connection, as Chromium OS requires access to the Internet. If you’re struggling with Wi-Fi, then try connecting your Raspberry Pi to your router via an Ethernet cable.
Conclusion
In this tutorial we looked at how to turn your Raspberry Pi into a DIY Chromebook by flashing Chromium OS.
Have you installed Chromium OS on your Raspberry Pi device? We’d love to hear your thoughts on this combination, so be sure to let us know in the comments below!
Get the best of IoT Tech Trends delivered right to your inbox!


