
The original devices used to make up the Internet of things weren’t all that powerful. Times have changed, however, and these devices have much more computing power than they used to.
More powerful devices mean additional features, but that’s not all. With more powerful hardware, IoT devices don’t need to stay connected to the Internet all the time.
What Is Azure IoT Edge?
More powerful devices handling most of the functionality while only occasionally communicating with the cloud have a name: edge computing. As it is becoming more and more common, frameworks are popping up to support this. Microsoft Azure IoT Edge is one of these frameworks.
IoT Edge is a framework tying together three different aspects: Edge models, the IoT Edge Runtime, and the cloud-based interface you use to make them work together. In this tutorial we’ll focus on developing on Linux for Linux devices. We also have a Windows version of the tutorial.
Preparing Your System to Run Azure IoT Edge
Before you start, you’ll need a few prerequisites. One is Git, which comes preinstalled on most Linux distributions. If it isn’t installed, you should be able to install it via your package manager. If not, you can get it from the Git website.
You’ll also need Docker installed. Installing and configuring Docker can be different depending on the Linux distribution you’re using. Fortunately, you’ll find documentation covering the setup process on the Docker website.
Finally, you’ll need an Azure subscription. These can cost money depending on the plan, but you can also get a subscription for free.
Install Visual Studio Code and Azure Development Tools
To develop for Azure IoT Edge, you’ll want to use Visual Studio Code. There are various ways you can install this, but one of the simplest is to download Visual Studio Code and run the installer.
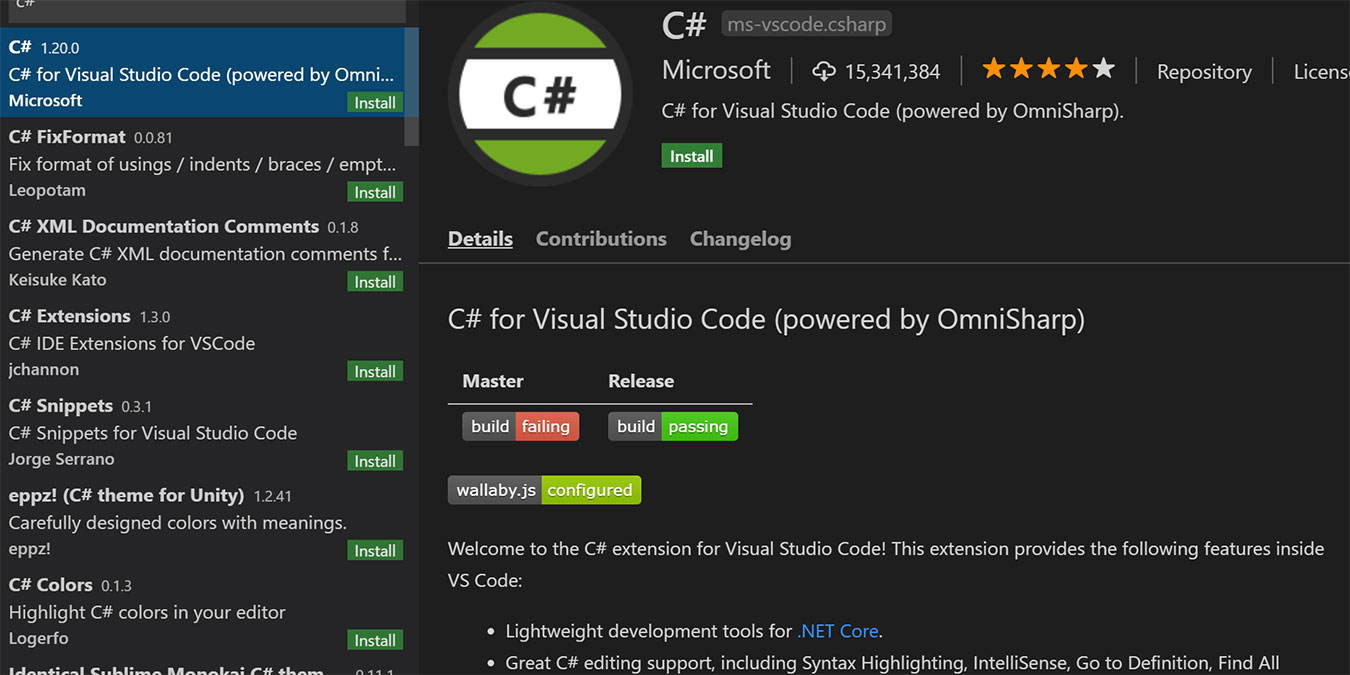
Once you have Visual Studio Code installed and running, you’ll need a few extensions: the C# for Visual Studio Code extension and Azure IoT Tools. You can install both of these by selecting “View -> Extensions,” then searching for them.
Once these are installed, you’ll need to sign into Azure. Open the command palette by going to “View -> Command Palette,” searching for “Azure” and selectIng “Azure: Sign In.” Again in the Command Palette, search for and choose “Azure IoT Hub: Select IoT Hub.” Follow the prompts.
Set Up a Container Registry
Now you’ll need to set up a container registry for Azure IoT Edge. To start, log into the Azure portal, then go to “Create a Resource,” choose Containers, and then Container Registry.
Follow the steps to give your new Registry a name, pick your Azure subscription, and choose a resource group. Microsoft recommends using a single resource group for all your Azure-related tests. Now, choose a location, set Admin User to Enable, and set SKU to Basic. Click Create to finish the setup.
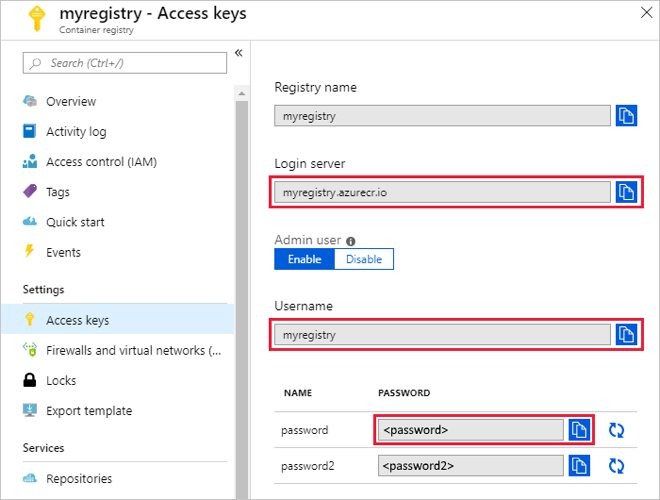
Once this is finished, choose the Access Keys option. Here, note the Login Server, Username, and Password. Make sure to save these in a secure area, as you’ll need them in the future.
Where to Go from Here
This is just the beginning, but now that you’ve laid the foundations, you’ll need to start building things. There’s still more to learn, but you’ll be able to learn as you go.
Covering everything you need to know is beyond the scope of this article. Fortunately, you’ll be able to learn everything you need to know by looking at Microsoft’s official documentation.


