
Do you enjoy healthy plants, but would like to automate the watering of them? Here we show you how to accurately measure the soil’s moisture level, and automate the watering of them to keep your plants healthy.
What You Need to Automate Your Plant Watering
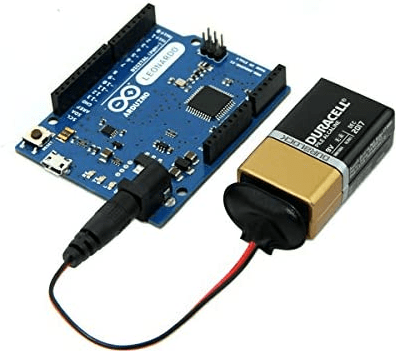
1. Arduino
You will need a microcontroller such as the Arduino Uno. A microcontroller is a good tool for repetitive tasks, where a single board computer such as a Raspberry Pi would be overkill in terms of computing power.
To connect the Arduino to the other components in the project, you also require a number of items. These you may have already if you built an Arduino starter kit for your projects. They include:
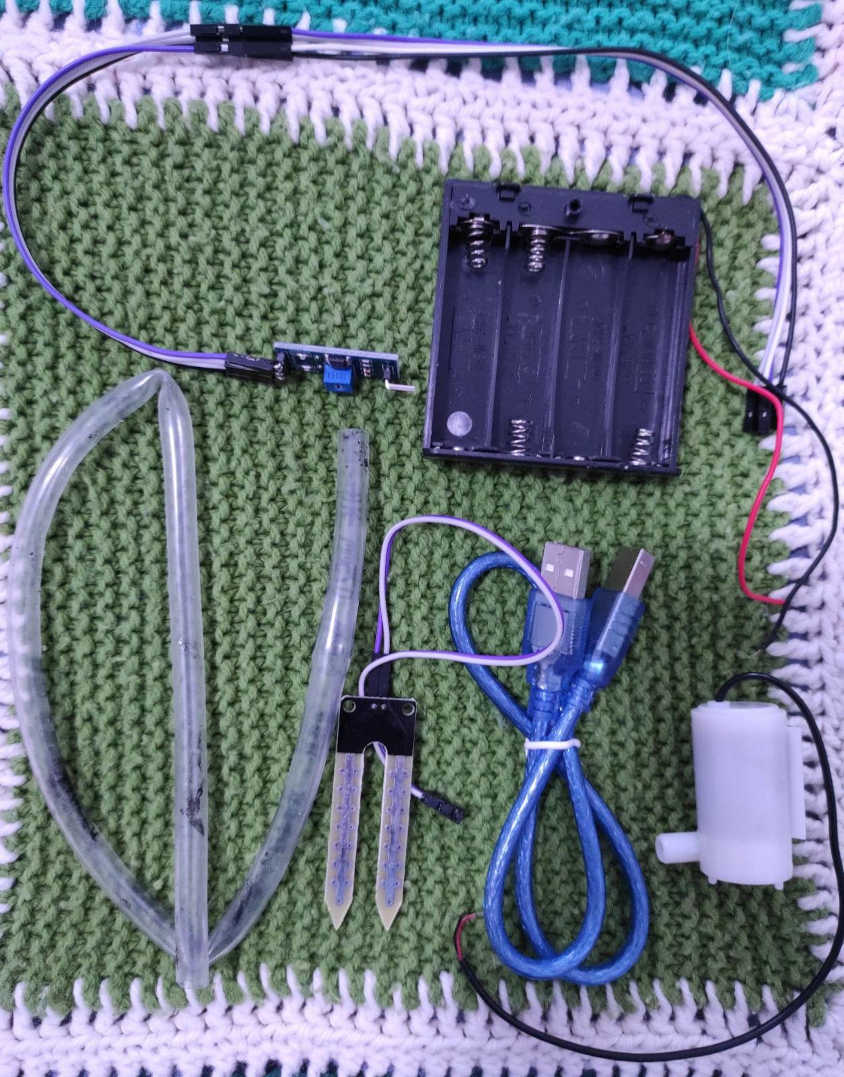
- A breadboard, small or large, depending on how many plants you want to water and how complex of a project you want to build.
- Some jumper wires to connect the Arduino to the breadboard.
- A programming cable to connect the Arduino to your PC/ laptop to upload code to.
You will also need to choose the code that you want to run your automated watering system. This Arduino Garden Controller and Data Logger is a good one to start with.
2. The Power
There are many options to power your Arduino board. These include using batteries such as 9V batteries and other sizes, including rechargeable batteries, or using an Arduino plug into the wall outlet. Setting up your Arduino with solar panels and a 12V battery can be done, but is probably a more complex setup than is needed, and would require extra kit like a solar power management module.
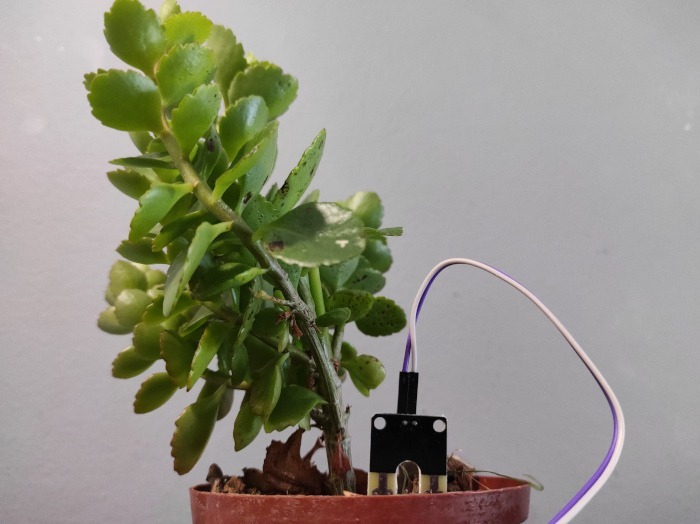
3. The Sensors
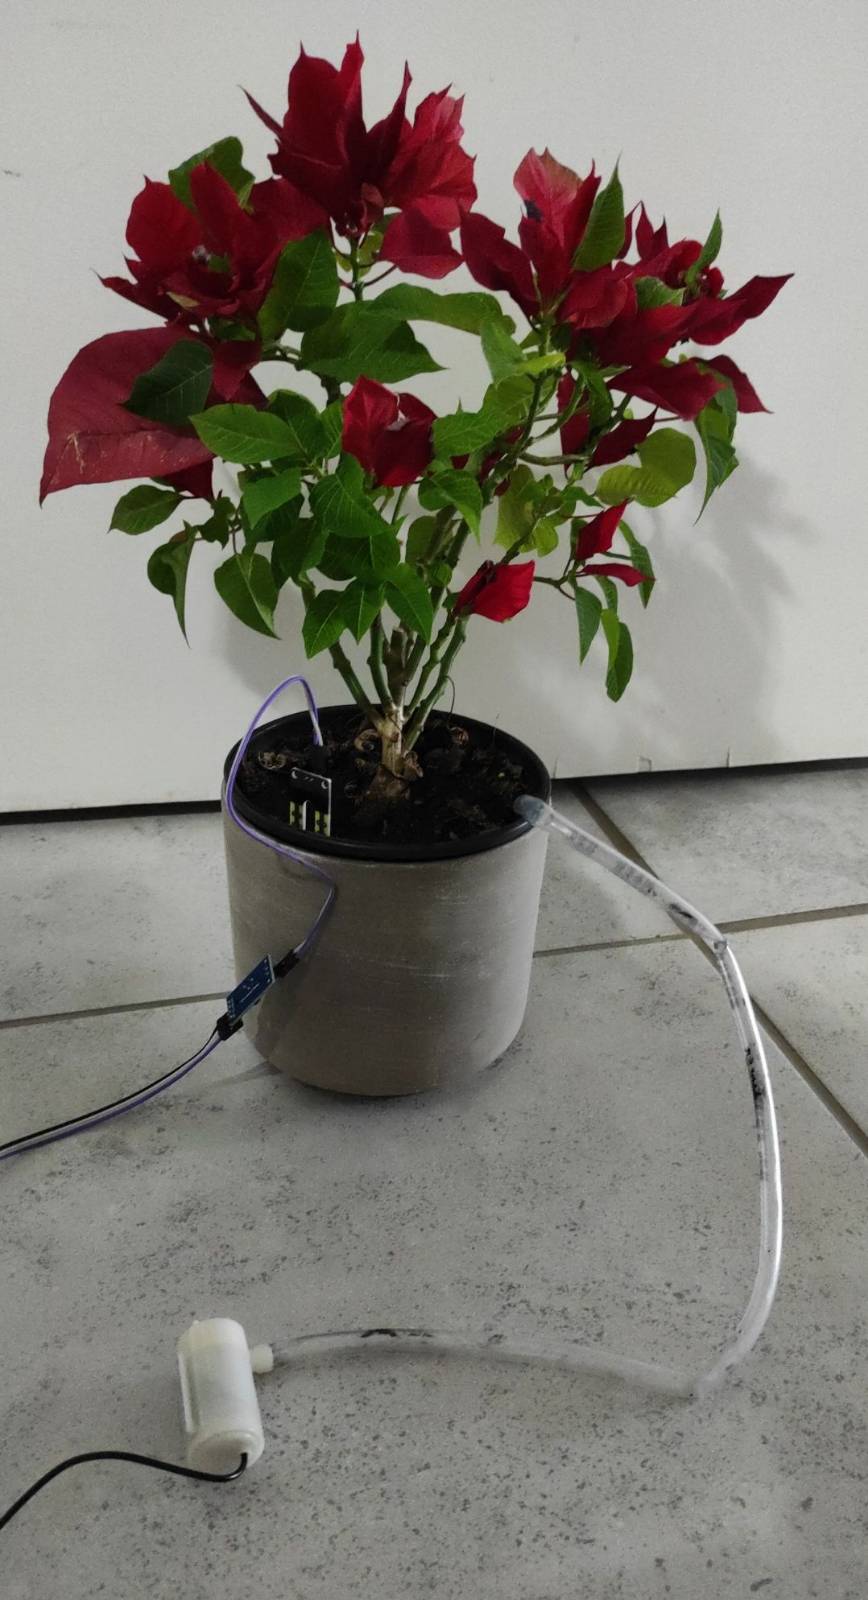
The primary sensor needed is one to tell when the soil is dry. This is a soil moisture sensor, and I would suggest getting one with the needed relay. They often come with a potentiometer that can be turned to adjust the sensitivity of the sensor.
While the soil moisture sensor is the primary sensor that you need, there are other components that you may like to add to your automated watering project, such as:
- A temperature sensor to tell how hot or cold it is, and perhaps if you should adjust the day’s dosage of water for your plant.
- A humidity sensor to tell if it is going to rain soon and if you really need to water today.
- An ultrasonic sensor to determine the level of the water in the dispensing container, such as the distance that the water is from the top of the bucket.
- An OLED display screen to display what the sensors are reading, such as the water level, humidity, temperature, and soil moisture level. Alternatively you can use the display to write a fun message depending on how your plant is doing, or what kind of day it is.
- A buzzer or flashing LED light to alert you when the water level is low, to sound an alarm when your plants need attention, or perhaps to play a song for your plants (I heard that that makes them grow better).
4. The Water
To pump the water when the moisture sensor senses that the soil is too dry, you will need a small pump such as the type used in small aquariums or water features. There is no need to go overboard, as you don’t want a jet of high pressure water hitting your plant.
You can use a submersible pump, or use a pump that you keep out of the water and just connect a flexible hosepipe to the water with. Make sure that the hosepipe fits the pump snugly, and then cut the pipe to size using a pair of scissors.
You can use a number of water containers, from bottles to buckets. Ideally, the water container will be close to the pot plant, so that only a short piece of water pipe is needed. You can always have a longer wire connecting the pump to the relay and then to the Arduino.
5. Extra Ideas
The automatic watering system can be as simple or complex as you like. There are automatic Arduino watering kits that have everything already included in them for watering your pot plant. You can also find automatic watering Arduino kits for watering a number of plants, using multiple moisture sensors for each pot plant, and multiple relays.
You may want to use other microcontrollers for built-in capabilities such as wireless, for example the ESP32 or Raspberry Pi Pico W.
How to Automate Plant Watering
A simple system will pump water when the sensor measures that the soil is dry. A more complex system will water only if the light sensor detects that it is daytime, the thermal sensor detects that it is a certain temperature, the humidity sensor detects that it is not about to rain, and the water level sensor detects that the water container is not empty.
Here are the steps of a simple, one plant setup, using one moisture sensor:
- Upload the code (below) to your Arduino Uno.
int pump = 13;
int sensor = 8;
int moisture;
void setup() {
	pinMode(13,OUTPUT);
	pinMode(8,INPUT);
	Serial.begin(9600);
	while (! Serial);  // Allow the serial port to connect.
	Serial.println(“Speed 0 to 255”);
}
void loop()
	{
	if (Serial.available())
	{
		int speed = Serial.parseInt();
		if (speed >= 0 && speed <=255)
		{
		analogWrite(pump, speed);
		}
	}
moisture = digitalRead(8);
if(moisture == LOW)
{
digitalWrite(13,LOW);
}
else
{
digitalWrite(13,HIGH);
}
delay(600);
}
- Connect the moisture sensor to pin 8 of your Arduino and place the moisture sensor in the soil. The data will then be read or input to the Arduino from the moisture sensor via pin 8, with a delay for how often to take the reading.
- Connect the water pump to pin 13 of the Arduino. We tell the pump what speed to use if the soil dryness is HIGH or it is LOW, and run a loop to pump the water with this output to pin 13.
That’s it.
Frequently Asked Questions
Which Arduino board must I use?
Although we used an Arduino Uno in this example, you can use another type of Arduino board, if you only have that one available to you. Just remember to choose the correct board from the dropdown in the Arduino IDE, when you upload the code to that board, and remember to connect the I/O pins correctly.
Can this system work for any plant?
In theory yes, but plants need different amounts of water based on how big they are, how established they are (if they are still seedlings they may need more), and what type of plant they are (if you have a cactus, it may require less watering). A good rule of thumb is to use your finger to test how dry the soil is. Adjust the pumping parameters accordingly.
Can I add fertilizer?
The water shouldn’t come into contact with the Arduino or the battery/ plug, so adding a bit of fertilizer will only potentially affect the pump and pipes. As long as these can take the solids and you clean them out, a bit of organic fertilizer every now and then may be a good idea. Remember to dilute the fertilizer accordingly so that it doesn’t cause your plant to die from chemical burns.
All photographs and screenshots were taken by the author.
Get the best of IoT Tech Trends delivered right to your inbox!


