
The Raspberry Pi can be a great platform for Internet of Things projects. It’s cheap, readily available, and comes in different form factors. The only issue is adding the software to get it to do what you want it to do.
Wyliodrin is a tool that lets you use your Raspberry Pi as an IoT device without needing a degree in computer science. Before you get started using it, though, you’ll need to set it up on your Raspberry Pi.
A Brief Introduction to Wyliodrin
Part of what makes Wyliodrin great for beginning IoT enthusiasts and major corporations alike is its focus on visual programming. This lets you control your devices without needing to understand a programming language like C. Of course, advanced users can jump in and manually code, but you don’t have to.

Wyliodrin also lets you develop for your Raspberry Pi remotely. This means that once the initial installation is finished, you don’t need to write code to an SD card or use a cable to connect to your Pi.
Before You Start
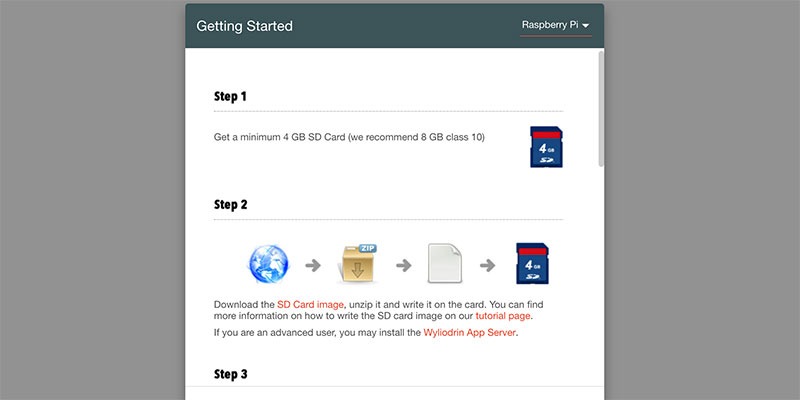
Before you start, you’ll need a Raspberry Pi, of course, as well as a power source. You’ll also need a blank SD card at least 4GB in size, though at least 8GB is preferable.
You’ll also need a computer to run the Wyliodrin IDE, WyliodrinSTUDIO. Fortunately, this IDE runs on Windows, macOS, and Linux. There is even a Chrome extension that will let you run the IDE on a Chromebook. The one caveat is that you’ll need to write a disk image to the SD card, which isn’t an easy task on a Chromebook.
To start, head to the Wyliodrin website and download the IDE for your operating system. Once you have downloaded and installed the IDE, run it to get started.
Setting Up the Raspberry Pi
When WyliodrinSTUDIO launches, you’ll see a popup offering a few options. Choose “Connect Board,” then on the next screen select the Raspberry icon. On the following screen, click the SD Card image link under the second step to download the image.
Once the image is downloaded, you need to write it to the SD card, but you can’t just copy and paste. On Windows you’ll need to use a utility like RUFUS. On macOS and Linux you can use a command like the following:
dd bs=4M if=wyliodrin.img of=/dev/sdX
Here you would replace “wyliodrin.img” with the actual file name and “/dev/sdX” with the disk identifier of your SD card. You can do this by plugging in the card and running dmesg and looking for the relevant message. You can also use the blkid tool.

Once the SD card has finished writing, you can safely eject it, then plug it into the SD card slot on your Raspberry Pi, plug in your Ethernet cable, and power it on. Once it has finished booting, it should show up in the network list in WyliodrinSTUDIO.
Now you can use the built-in tutorial projects in the IDE to familiarize yourself with the software.

Conclusion
One of the benefits of Wyliodrin is that it works across different platforms. This article focuses on getting it running on Raspberry Pi, but it also works on other boards. That’s handy since you can use the skills you learn using the app to develop projects with other hardware.
One of the platforms that Wyliodrin supports is Arduino, which is a bit more hands on. If you’re not sure which to use, take a look at our comparison of the Raspberry Pi and Arduino for IoT projects.
Get the best of IoT Tech Trends delivered right to your inbox!


