
Did you know that you can program other boards on the Arduino IDE? If you’re in need of a 3.3V logic microcontroller platform but can’t use PlatformIO, this one’s the guide for you!
With an ESP32, you can power 3.3V TFT displays, low-power sensors, and cheap camera modules that would otherwise break on an Arduino’s 5V circuits.
Why You Might Want to Program the ESP32 With the Arduino IDE
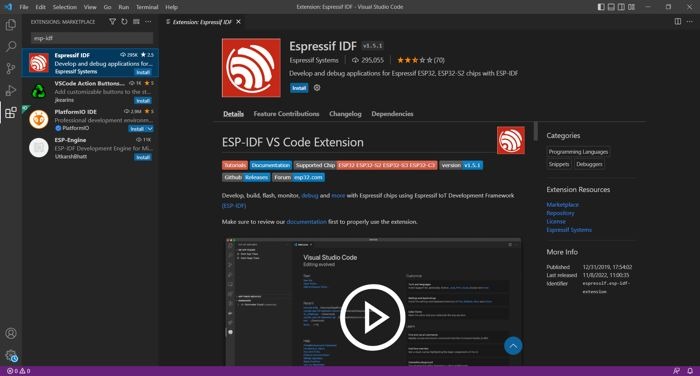
Normally, when you want to work with any ESP-based development board, you’ll have to use the Espressif IoT Development Framework (ESP-IDF). It’s a development framework that you can access with the Espressif IDE.
It’s all good and nice, but there’s a tiny problem. ESP-IDF isn’t particularly newbie friendly. You’ll need to read documentations, and these can get complex real quick. If you’re just moving from Arduino to ESP32, this might become a bit frustrating.
Fortunately, you can make the transition a bit easier by using something you’re already used to. That is, by having the Arduino IDE do the code uploading for you.
What You Can’t Do on an ESP32 With the Arduino IDE
While you can still work on an ESP32 like it’s a normal Arduino board, there are a number of things that you can’t do with just the Arduino IDE.
- No microPython
- Limited Real Time Operating System (RTOS) support
- Less capacity to use ESP32’s full potential
Let’s start with the last one. Unlike normal Arduino boards, the ESP32 has two “cores”, which means it can run two things at the same time.
However, the Arduino IDE won’t let you do that easily. While you can run FreeRTOS with the Arduino IDE, this is not the best nor easiest one for projects that are more complex than running inputs and outputs in a single core.
And that’s exactly why you can’t just use the Arduino IDE for everything. It’s just not meant for everything the ESP32 can do – let alone program in microPython.
But it is great as a beginner tool, so here’s how to program the ESP32 with the Arduino IDE.
What You’ll Need
- Arduino IDE
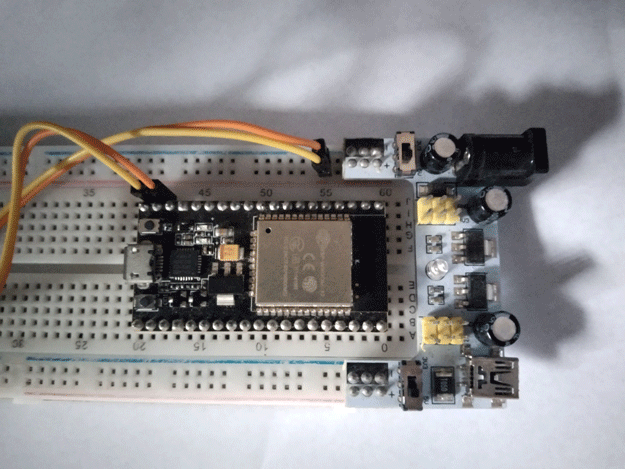
- Any ESP32-based board with USB support
- USB connector
- A Windows PC to work with
How to Do Program ESP32 on the Arduino IDE
Installing the Board Cores
Firstly, the Arduino IDE needs to install the ESP32 Arduino core. This is like the Arduino equivalent to the ESP-IDF, helping it figure out what an ESP32 connected to a computer via USB looks like and instructions on how to upload code to it.
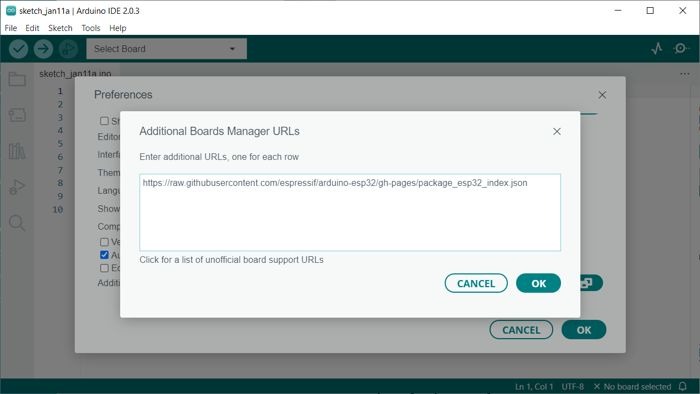
- Go to “File -> Preferences -> Additional boards manager URLs”.
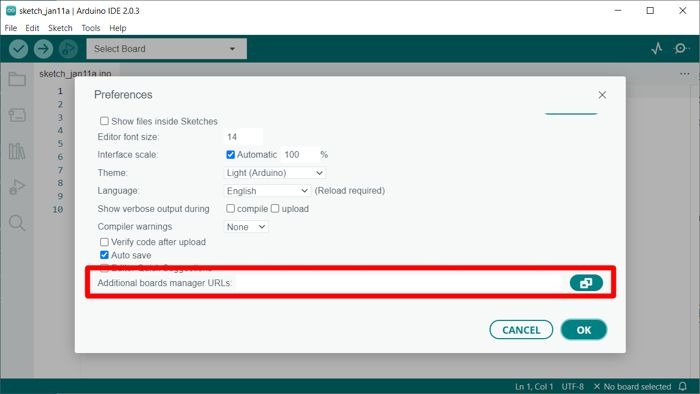
- Paste https://raw.githubusercontent.com/espressif/arduino-esp32/gh-pages/package_esp32_index.json which contains the latest stable release of the ESP32 Arduino core.
- Click OK until you get back to the main screen.
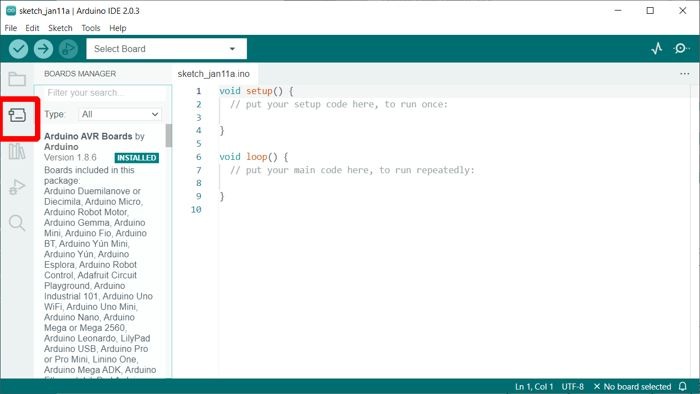
- Now go to “Tools -> Board -> Board Manager” (or press CTRL + SHIFT + B).
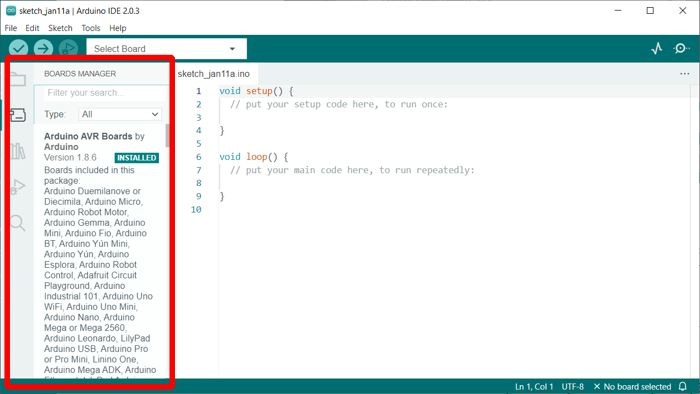
Note: Starting from Arduino IDE 2.0, there’s a button on the left tray that would quickly show you the boards manager.
- Scroll to “esp32 by Espressif Systems.”
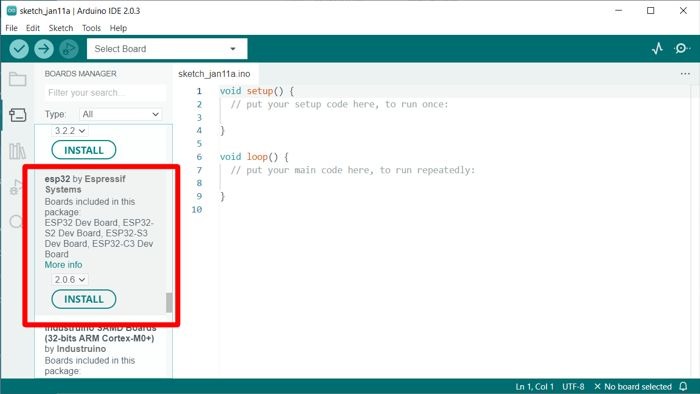
Tip: If you didn’t do steps 1-2, you won’t find the “esp32 by Espressif Systems” option in the Board Manager.
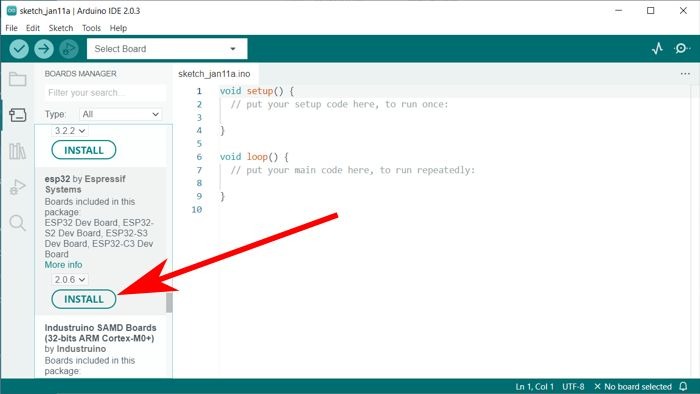
- Click install and wait until the Output box says Platform esp32:esp32@”latest-version-number” installed.
Figuring Out Your ESP32 Board
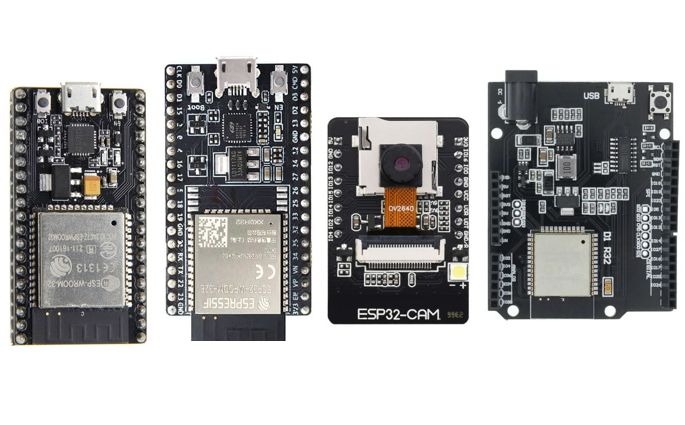
Unlike Arduino boards with clear-cut designs, lots of ESP32 boards can come in many shapes. These boards might not have the same pinouts too, so if you pick the wrong board setting on the Arduino IDE, it might not get to upload your code at all.

There are two ways to figure out the board you’re using:
- Look at the product description. You have to be sure of the model number that’s on the product description. If you’re new to this, you might mistake seeing NodeMCU ESP8266 as NodeMCU-32S. The latter is the newer version of the two, and you might run into troubles if you pick the wrong board for it on the Arduino IDE.
- Check the shape. Some online shops might send you the wrong board, and you’d never find out until you took a good look. One example is the ESP32-DEVKIT-C, which looks slightly like the NodeMCU-32S except for the Wi-Fi module that juts right out of the back. Others, like the ESP32-CAM has way less pins than any other board.
Now if you really can’t tell which one is which, some ESP32 boards will still work if you pick the setting for something that looks similar to them. But that has to be the last thing you should do. Just make sure they have the same numbers of pins.
Note: You can skip to “Additional Information About ESP32 Board Families” to have a decent idea of what works with which board.
Testing Out the ESP32
- Set your ESP32 as the board. Go to “Tools -> Board -> esp32” then pick your ESP32 board on the list. Mine is the NodeMCU-32S version.
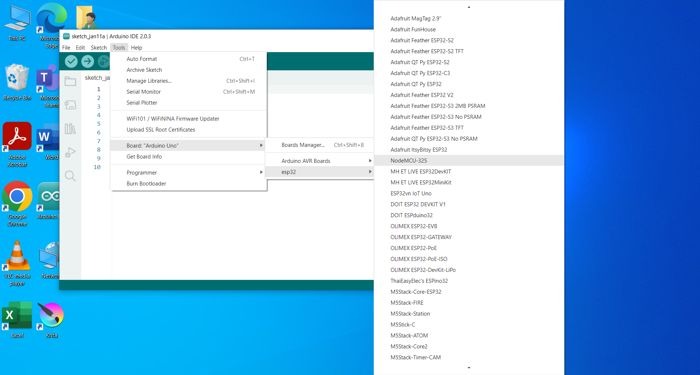
Remember: If you don’t know which one is the board you’re using, google the name and pick one that looks similar to what you have. That should work most of the time.
- Now paste the following code. This will blink the ESP32’s built-in LED.
Note: This assumes that the built-in LED on your EP32 board is pin 2. If it doesn’t work, replace the value of LEDpin with the pin number for the board you’re using. For ESP32-CAM, that’s usually pin 33.
- Upload the code by going to “Sketch -> Upload” (or pressing CTRL + U).
- Press and hold the BOOT button on the ESP32 to let it upload the code to it.
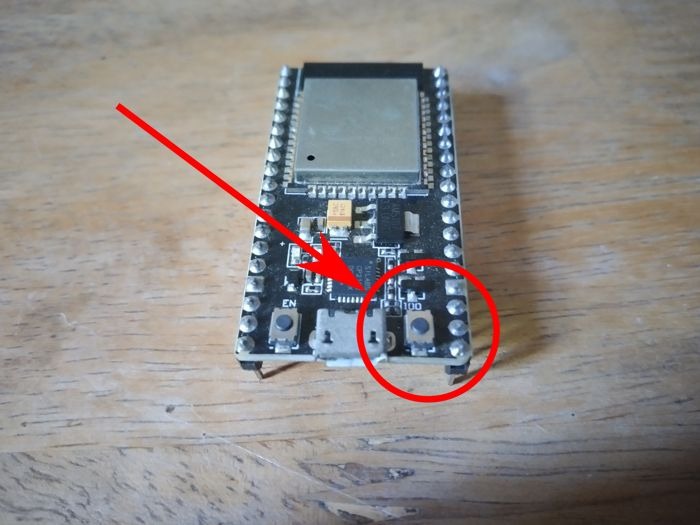
Note: The location of the BOOT button differs per board. For the NodeMCU-32S, it’s usually on top of the board. The ESP32-CAM has it on its side. You might also find that it looks like OOT instead. It’s okay if it looks like that. The other button should look like either EN or RST.
- You can let go of the EN button once the Arduino IDE starts uploading.
- The ESP32 should now start blinking its built-in LED every second!
Additional Information About ESP32 Board Families
Some boards are based off each other to the point that you could even call these as “families” of development boards. There are normally four of these you’d easily find for sale:
- DEVKIT DOIT
- LOLIN
- Feather-based development boards
- ESP32-CAM
DEVKIT DOIT
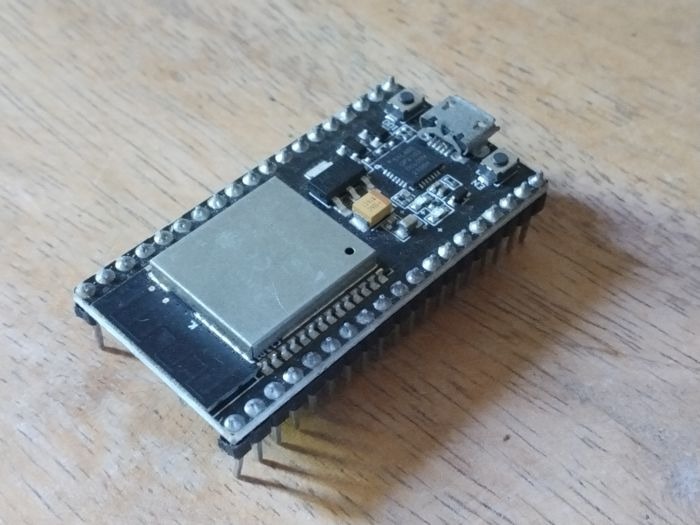
The DEVKIT DOIT has two versions: 30-pin and 36- pin. This was developed by Espressif, the company that developed the ESP32, and uses it to show what their chips can do. The most common variant you’d find online is the NodeMCU32S. However, this would usually have a slightly different pinout.
LOLIN
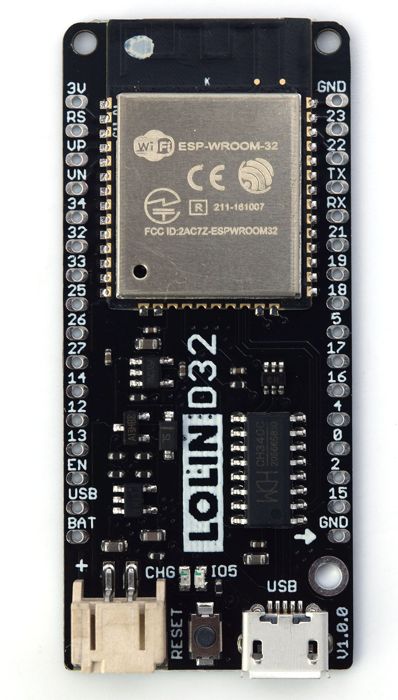
The WEMOS LOLIN is a cool bunch. Grab one if you can afford it, because these things come with something extra on board. There are four types of these: D32, Lite, OLED, and with Battery Holder. Of these, only the D32 is officially supported, with the rest named as LOLIN32 and usually sold as counterfeits. They can still be just as good as the originals though.
Feather-based Development Boards
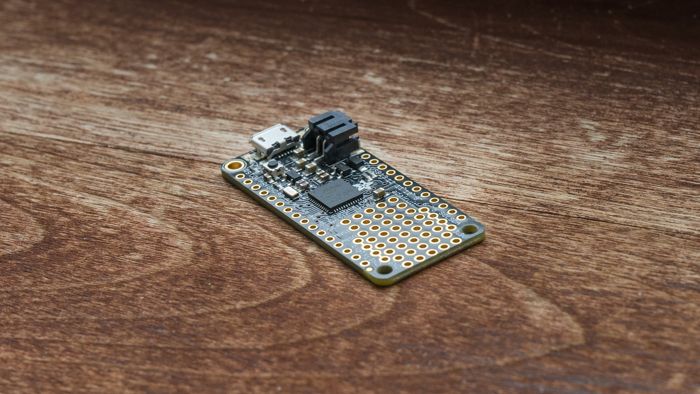
Adafruit’s Feather-based development boards would be one of the more consistent board families. These all follow the same format and pinouts, although some pins might have different functions depending on the microcontroller chip used. There is also a variant that uses the ESP8266, which is the ESP32’s predecessor.
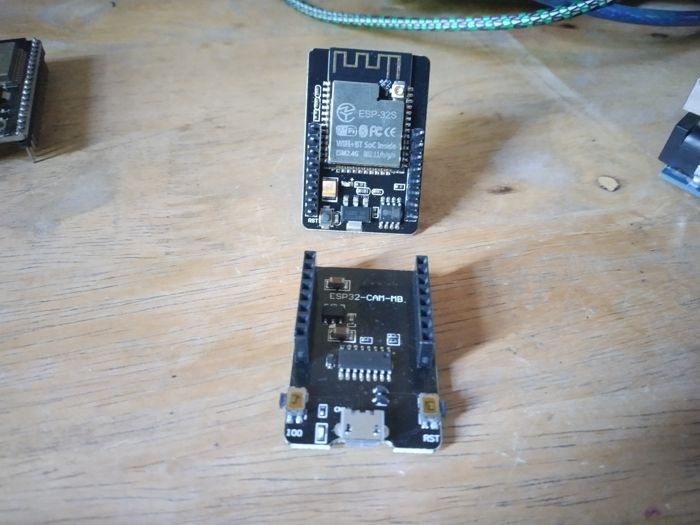
ESP32-CAM
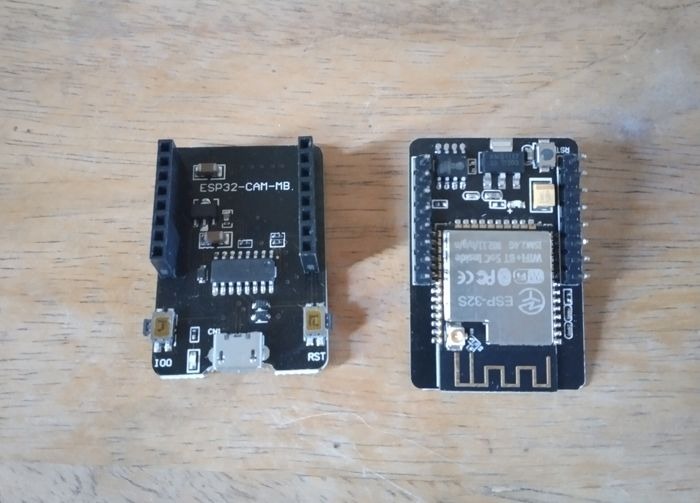
Lastly, the ESP32-CAM is one of the easier-to-find variations. So far, there aren’t much manufacturers who play around with a similar design. What makes this way different from everything else, however, is that the ESP32 microcontroller chip is not connected to the USB. It has downward-facing pins that sit well on a programmer board like a shield on an Uno. Also, this does not need you to press BOOT every time you upload to it.
Frequently Asked Questions
Can I program the ESP32 without pressing the BOOT button?
Unfortunately, most ESP32 development boards can’t do this. But for those that do, they usually have the Enable button connected to a GPIO pin. Look up your specific’s board’s schematics if it does this.
How do you reset ESP32?
You can reset the ESP32 by pressing the EN button. You can also send a 3.3V signal to GPIO 0 to do the same thing.
How big is the ESP32 core download size for Arduino IDE?
While the Arduino IDE is downloading the ESP32 core, expect it to take around 2 GB.
Get the best of IoT Tech Trends delivered right to your inbox!


