
Arduino IDE is a popular software framework for embedded developers. Its compatibility with various devices using the Boards Manager makes it a useful and dynamic software for users. The recent launch of the Arduino IDE 2.0 has made it even better, featuring a range of new functionality, like live debugging.
Arduino IDE also comes with a board manager that allows you to install different cores and dependencies to support the various development boards out there. Here we show how you can use the Boards Manager to install cores on the Arduino IDE 2.0.
Downloading and Installing Core on Arduino IDE 2.0 through Boards Manager
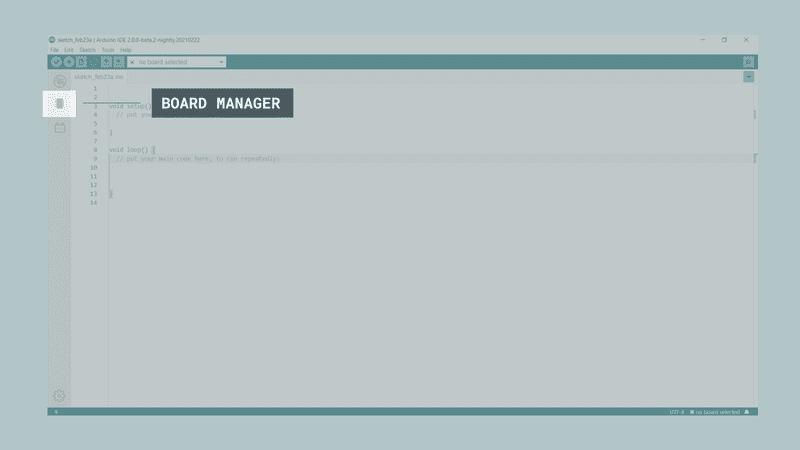
It is assumed that you have already installed Arduino IDE 2.0 on your local machine. You need to open the Arduino IDE 2.0 on your system so that the code editor section shows up on the screen. You will see a microcontroller symbol on the left navigation bar. Hover your mouse above that symbol and confirm that it is the board manager, then click on the symbol to open the Board Manager.
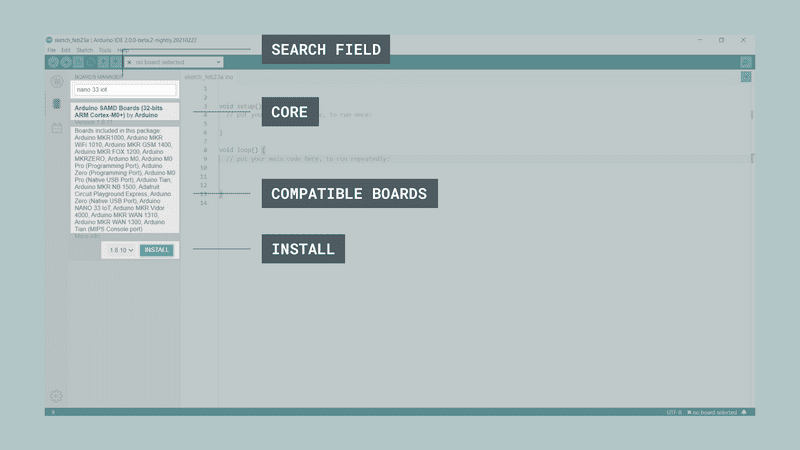
A list of available cores will appear in the Board Manager. You can scroll down the list to find the core of your choice or enter the name of the core in the search field. The available cores also have a description section below them. This shows the list of all the development boards compatible with that core. Once you find the core of your choice, click the Install button that corresponds to that core.
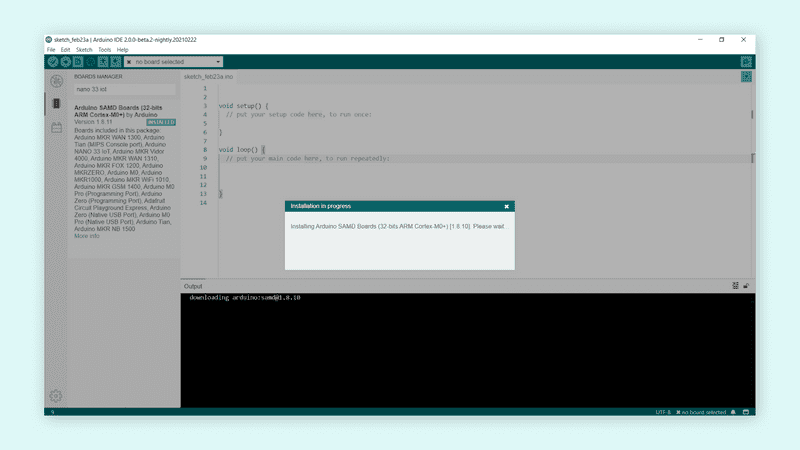
After clicking the install button, a dialogue box appears on the screen, which shows the status of the installation of the core. The installation process may take several minutes to complete. During the installation process, you can also see a black console at the bottom of the code editor which shows the location and status in the form of text. This console is similar to the command prompt in Windows or the terminal in Ubuntu.
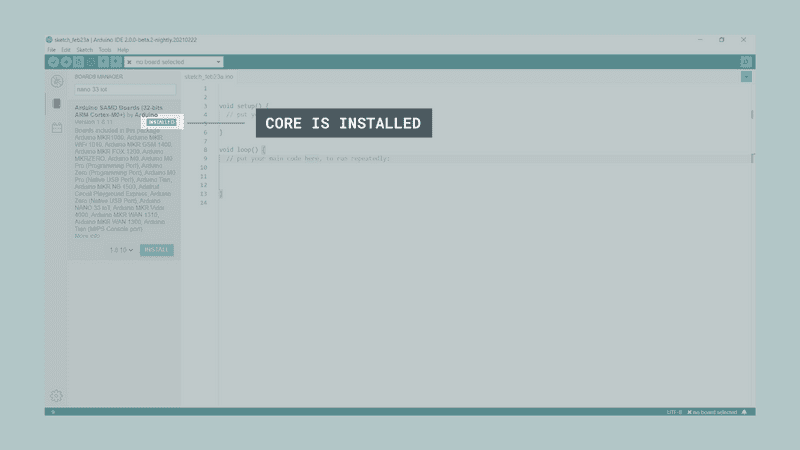
When the process is complete, you can visit the Board Manager to confirm if the core is installed. The core will have an “Installed” status in place of the Install button. Now you can start working on your development board or MCU by programming on the code editor of the Arduino IDE 2.0. For more information regarding installing the cores through Boards Manager, you can visit the official documentation by Arduino.
Get the best of IoT Tech Trends delivered right to your inbox!


