
A brand new Raspberry Pi means a brand-new installation of your favorite operating system. Whether that’s the recommended Raspbian or an IoT platform like Windows 10 IoT core, you’ll need to prepare your SD card for use with your Raspberry Pi before you boot up and get things running.
You’ll need an SD card big enough for your OS first – usually 8GB or larger. Here’s how you can format an SD card for your Raspberry Pi.
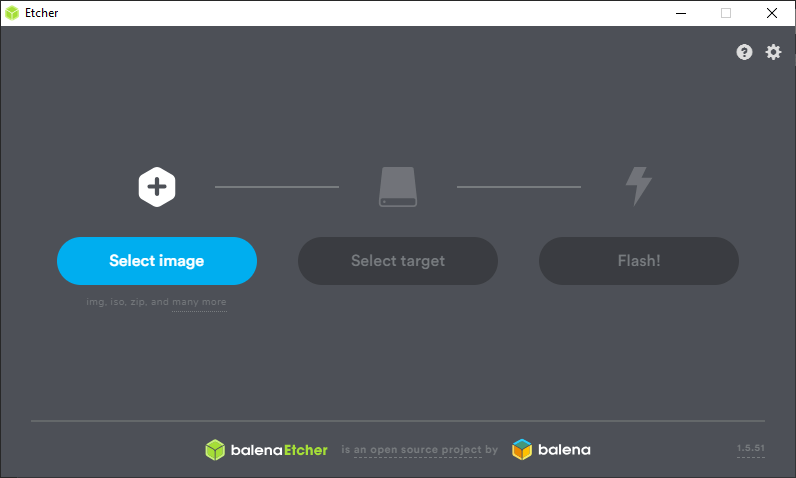
Using Etcher to Format and Flash Your SD Card
The easiest option is to use balenaEtcher to flash and format your SD card. It’ll flash operating system ISO files, creating the correct partition table on your SD card as it does so. balenaEtcher is available for macOS, Linux, and Windows.
1. First, download and install balenaEtcher. You’ll also need to have your chosen ISO file ready. You can download Raspbian from the Raspberry Pi Foundation.
2. Open balenaEtcher once it’s installed. Select your OS ISO first by clicking “Select Image,” then choose your ISO file.
3. Click “Select Target” and choose your SD card.
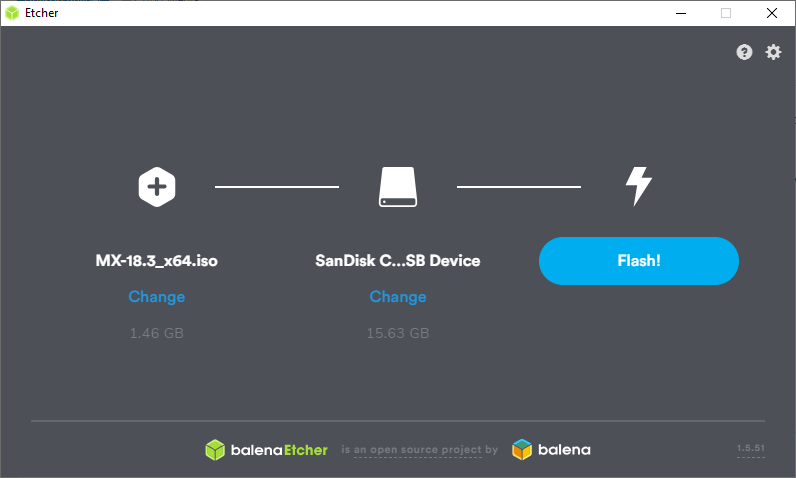
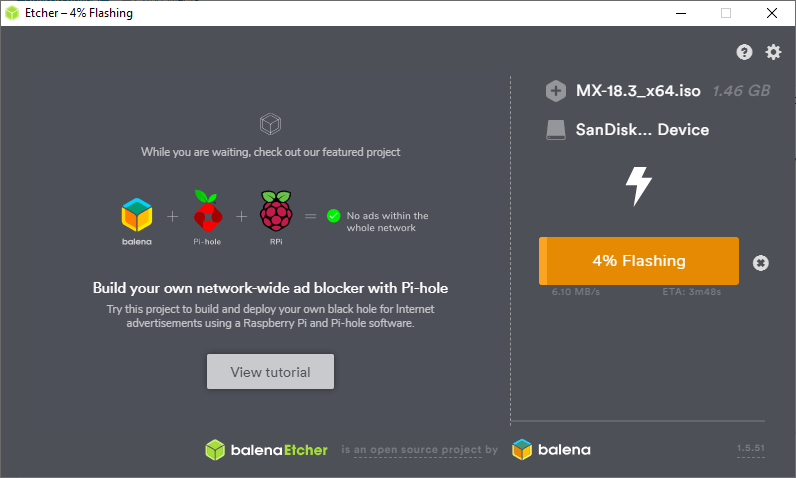
4. Click “Flash” and wait for balenaEtcher to complete the partition creation, file copying, and flashing process.
This will also work to completely erase the existing partition table of an SD card. New or old, if you want to install an operating system on your Raspberry Pi easily, balenaEtcher is the best method.
Using dd to Format and Flash Your SD Card
If you’re running Linux or macOS, you can also flash your OS from the terminal using dd.
To start, confirm that the SD card is detected. Open a terminal, and on macOS, type diskutil list and locate your SD card (for example, disk4). On Linux, type lsblk and locate your SD card (eg. /dev/sdb), as well as all of the partitions on that drive currently (eg. /dev/sdb1, /dev/sdb2, etc.).
Unmount the devices. On macOS, type:
diskutil unmountDisk /dev/diskX
Replace “X” with the number of your disk as located using diskutil. On Linux, type:
sudo umount /dev/sdbX
replacing sdb with your SD card and X for the partition number.
Perform the Linux action for every partition on that drive (e.g. ‘/dev/sdb1,” “/dev/sdb2.” etc.).
If you have an ISO file, you’ll need to create an IMG file first. You can use dd to do this. On macOS, type:
hdiutil convert iso-file.iso -format UDRW -o img-file.img
On Linux, type:
sudo dd if=iso-file.iso of=img-file.img
Wait for the process to complete before continuing.
Copy the contents of your IMG file using dd. For macOS, type:
sudo dd bs=1m if=iso.img of=/dev/rdiskX conv=sync
Replace “rdiskX” with the disk number you located using diskutil (and remember to use rdisk rather than disk here). For Linux, type:
sudo dd bs=1m if=iso.img of=/dev/sdX conv=fsync
Replace “sdX” with your SD card letter (e.g. sdb).
Once completed, unmount the drives using the instructions above, and your SD card should be ready for use.
Formatting Your SD Card Manually on Windows and macOS
Another approach is to format your SD card manually and using a bare-bones installer like NOOBS to install your operating system directly. You can do that using the SD Memory Card Formatter tool on Windows and macOS.
1. Download and install the SD Memory Card Formatter for your particular OS, then open it.
2. Select your SD card and click “Format,” Click “yes” to the confirmation message.
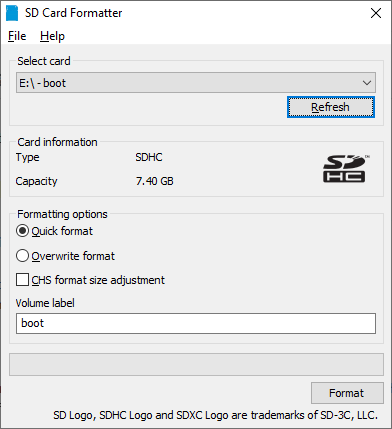
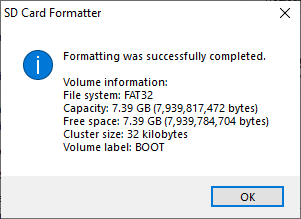
3. Once it’s completed, you’ll receive a completion message. Click “OK” to exit.
You can then copy the contents of your NOOBS zip archive to the FAT32 formatted card. Insert the SD card into your Raspberry Pi and power it up, then follow the on-screen instructions to install an operating system.
Formatting Your SD Card Manually on Linux
The best approach for manual formatting on Linux (to use the NOOBs installer) is to use GParted to create a partition.
1. Download and install GParted, and open it once installed. From the drop-down menu in the right-hand corner, choose your SD card.
2. If you have more than one partition, select each of them, then click “Delete,” then “Apply.” Click “New” and select FAT32 as your file system, click “Add,” then “Apply,” and confirm the changes.

3. Otherwise, right click, go to “Format to” and select FAT32, then click “Apply.”
The card will now be formatted as FAT32, ready for you to transfer the NOOBS files to your card manually.
Prepare Your Pi
Once your SD card has been formatted and flashed, you can move onto setting up your Raspberry Pi. After that, you can use it as the nerve center for all kinds of projects, from a retro gaming console to a home automation server.
What do you plan on using your Raspberry Pi for? Let us know your project ideas below.
Get the best of IoT Tech Trends delivered right to your inbox!


