
Once you start going deeper into the inner workings of an Arduino, you need more functionality than simply coding from a USB connection. Maybe you want to install new firmware, or perhaps you are assembling an Arduino from scratch. Or it might be that your Arduino is bricked (rare), and you need to give it a fresh lease on life.
That is where a bootloader comes in.
The Arduino is nothing but a microprocessor bundled with an collection of input and output arrays that can hook up to various sensors. Controlling this microprocessor is a bootloader that tells it to heed the commands you send from your computer – making the whole thing possible.
Thus, the bootloader is the most essential piece of programming for your Arduino, and as you might expect, rather involved to tamper with. So without further ado, let us look into how to burn and install the Arduino Bootloader.
What You Need
Apart from the Arduino board itself. you need a device known as a Programmer. A programmer is needed to burn your commands into the firmware in the absence of the bootloader. You can use any programmer, but make sure that it is an In-Circuit Serial Programmer (ISP), as other programmers are intended for flashing chips before integrating them into the circuit.
Some ISP programmers are AVR-ISP, USBtinyISP and ParallelProgrammer. With some tinkering, you can even use another Arduino as an ISP.
On the software side, of course, you need to have the Arduino IDE installed on your computer. The IDE contains all the packages and tools needed to work with an Arduino, which includes the various versions of the bootloader program as well. Below are the steps to install an Arduino IDE on Windows, Mac and Ubuntu.
How to Burn Arduino Bootloader
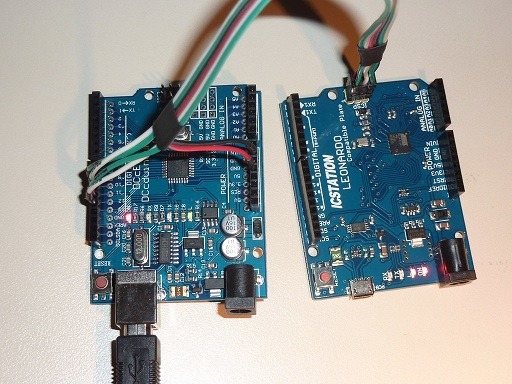
The most important step in burning the bootloader to your Arduino is to get the connections right. What you are looking for is a 2×3 ICSP header on your board. Chances are, your Arduino has a couple of these headers, depending on the number of ICs live on the board. You need to connect your programmer to this ICSP header using programming cables for the best results.
Once your programmer is connected to your computer and the target Arduino board, you can get started on actually burning the bootloader.
How to Install Arduino Bootloader
This is actually the easier part. Provided that you got the connections right, you should have little trouble burning the bootloader onto the Arduino board.
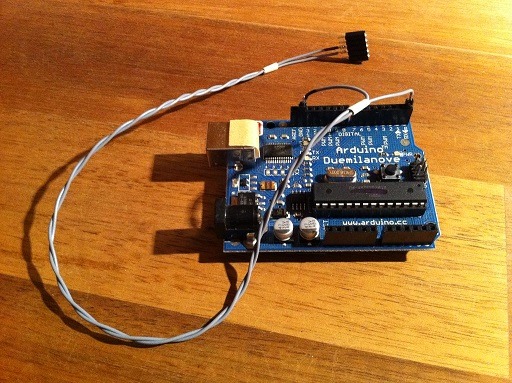
Using Arduino as ISP
First, fire up the software associated with your programmer. In case you are using an Arduino as an ISP, the Arduino IDE would play this role.
From the “Programmer” drop-down options under the Tools menu, select the “Arduino as ISP” option. Enabling this option tells the IDE to treat your existing Arduino as the programmer and makes use of its hardware interface to upload the code.
External Programmer
In case you used an external programmer, you can still use the Arduino IDE with some tweaks. From the File menu, navigate to Examples, and then select your programmer from the list that drops down. This prepares your programmer for burning the Arduino board properly.
Burning the Bootloader
Now the Arduino IDE comes preloaded with the required bootloader, so the process becomes as simple as navigating to Tools and clicking on the “Burn Bootloader” option.
Before you do that, however, you might want to go to Tools and check under the “Board” menu to verify you are burning the correct version for the model of Arduino you have. Once you have selected the correct board, you can proceed to burning the bootloader.
That’s it. If everything went right, you will see a “Done burning bootloader” message on the console after a few minutes. Simply disconnect the programmer, and your new board is ready to be coded with the Arduino IDE!
Get the best of IoT Tech Trends delivered right to your inbox!


